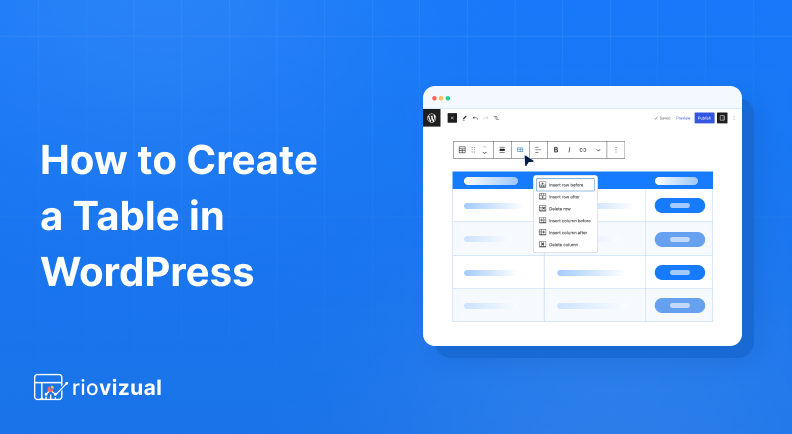
WordPress has a default table block that lets you create a basic level table to display information in easy-to-digest pieces.
However, for more advanced functionality and customization options, you can use a free plugin like RioVizual. It’s one of the Best WordPress Table Plugin for creating any type of table in WordPress.
Let’s explore how to create table in WordPress using the default table block and the feature-rich RioVizual plugin.
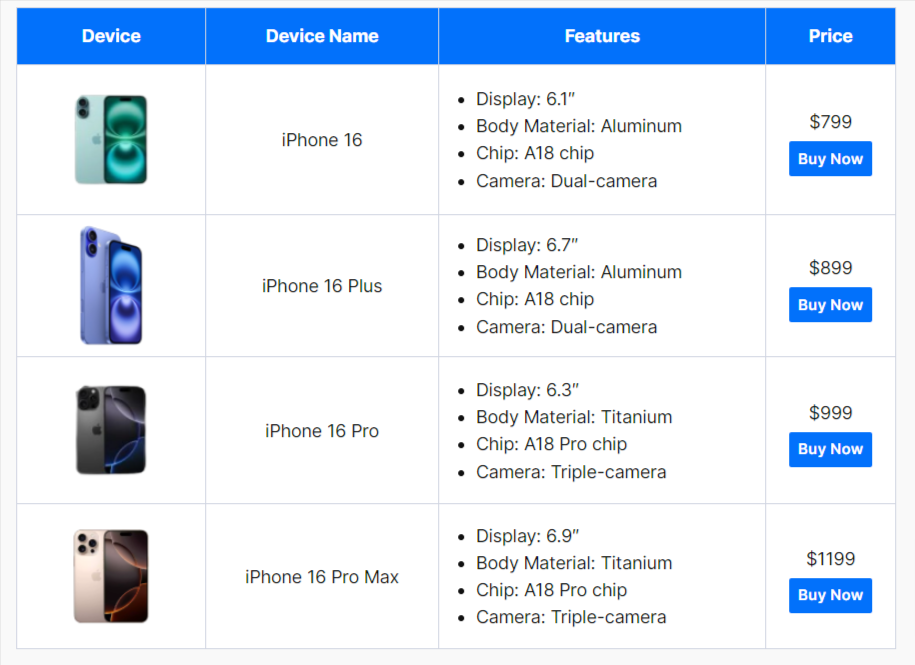
Our Created Table Preview
By using the RioVizual’s Table Builder block, we created the following comparison table:

Required Setup
- Latest version of WordPress is installed.
- RioVizual is installed and activated.
Method 1: Create Table in WordPress Using Default Table Block
With the default Table block in WordPress, you can easily create a basic table in WordPress. Here is how to do it:
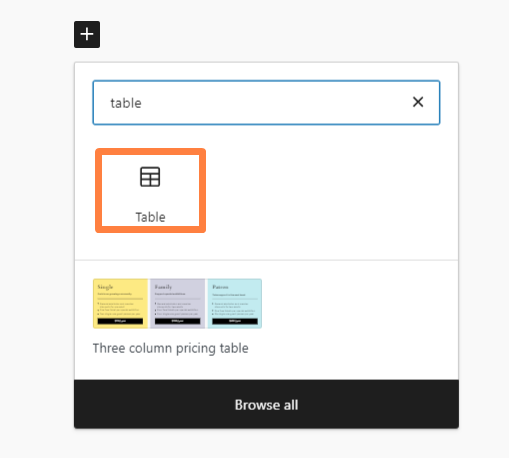
Step 1: Insert the Table Block
- Go to the page or post where you want to add a table.
- Use the block inserter, search for “Table,” and insert it.
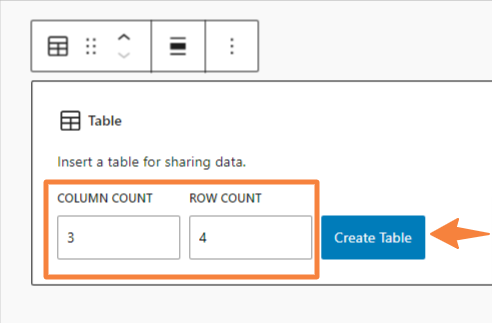
- Specify how many columns and rows you want in the table, then click on “Create Table.”
Step 2: Add Content and Customize Your Table
- Click on each cell to input your text content.
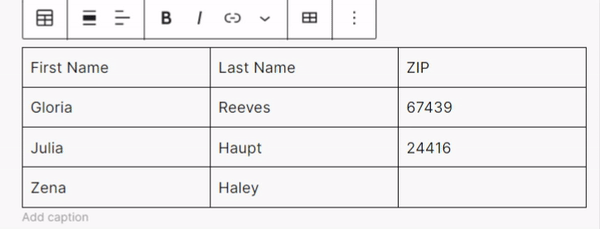
- Use the block settings’ Settings and Style tabs to make customizes like:
- Enable options like header/footer sections
- Choose between striped or default styles
- Adjust alignment and set fixed-width cells
Step 3: Publish or Update Your Table
After adding content and making necessary customizations, click on the Publish or Update button to save your changes.
Method 2: Create Table in WordPress Using RioVizual Plugin
While the default table block allows you to create a basic table, Table Builder block lets you do lots more. With its 6 elements (text, image, button, list, icon, and shortcode) and extensive customization options, you can create any type of table with ease.
To show you its capability, we created a comparison table for the iPhone 16 variants:
Step 1: Insert “Table Builder” Block
- Go to the page or post where you want to add the table.
- Click on the + button to open the block inserter.
- Search for “Table Builder” and insert it and select “Build From Scratch”
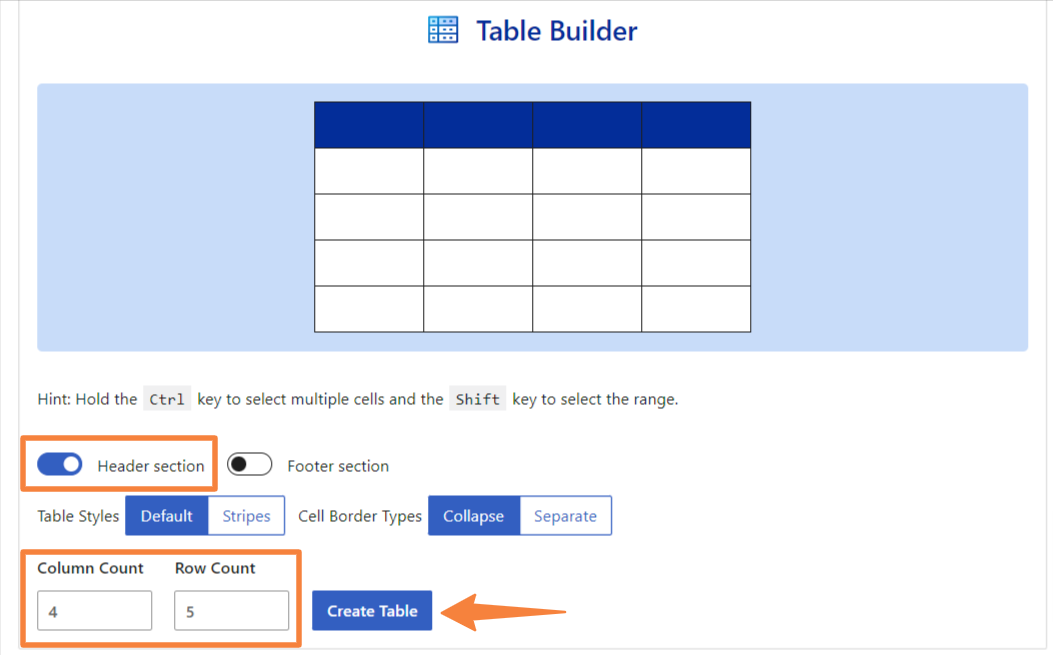
Step 2: Specify Rows and Columns
Next, define the number of rows and columns for your table. You can also enable header and footer sections.
For our demo, we made the following adjustments:
- Enable the “Header” section
- Set column and row count:
- Column Count: 4
- Row Count: 5
After inputting the values, simply click on “Create Table” to proceed.
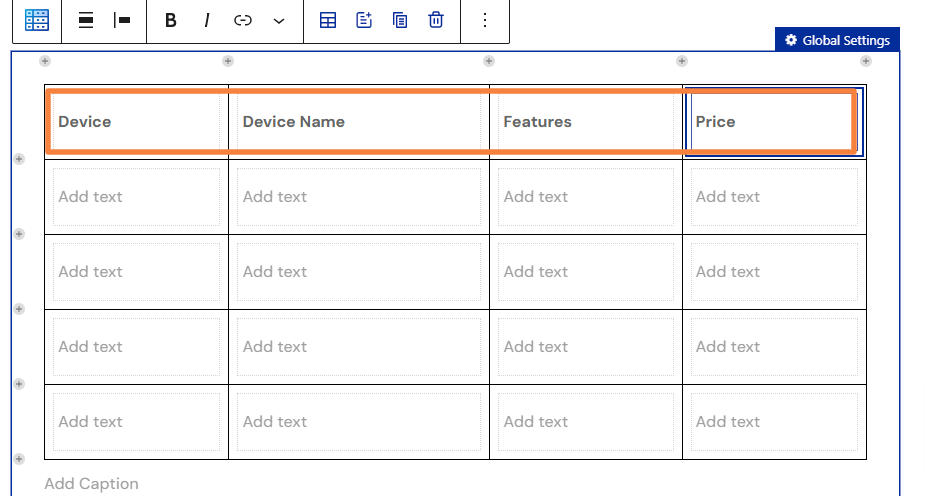
Step 3: Add Necessary Content in the Table
Now it’s time to populate the table. In our demo, we included text, images, feature lists, and buttons.
3.1: Add Header
- Click on the top cell of each column to enter the header text.
3.2: Add Image:
To add image to the table, follow these steps:
- Click on the column where you want to place the image.
- Click “Add Element” in the toolbar and select “Image.”
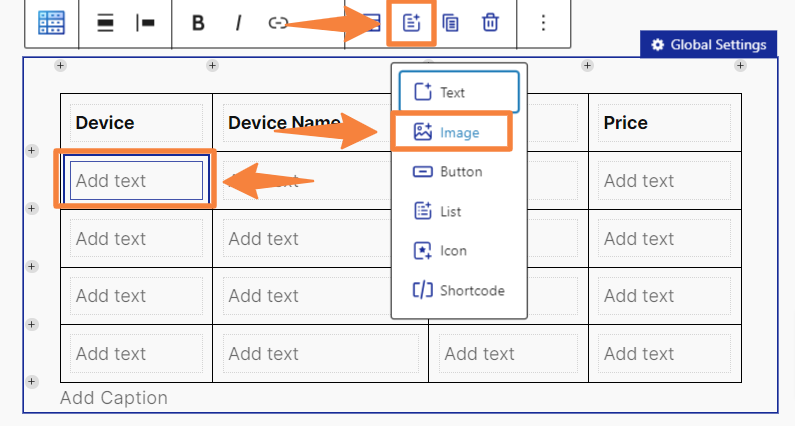
- In the block’s settings, go to General tab > Content > Set Image (Choose an image from media library or upload one)
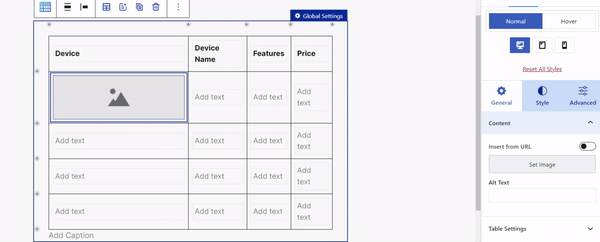
Note: Repeat these steps for the corresponding cells in the column where you want to add images.
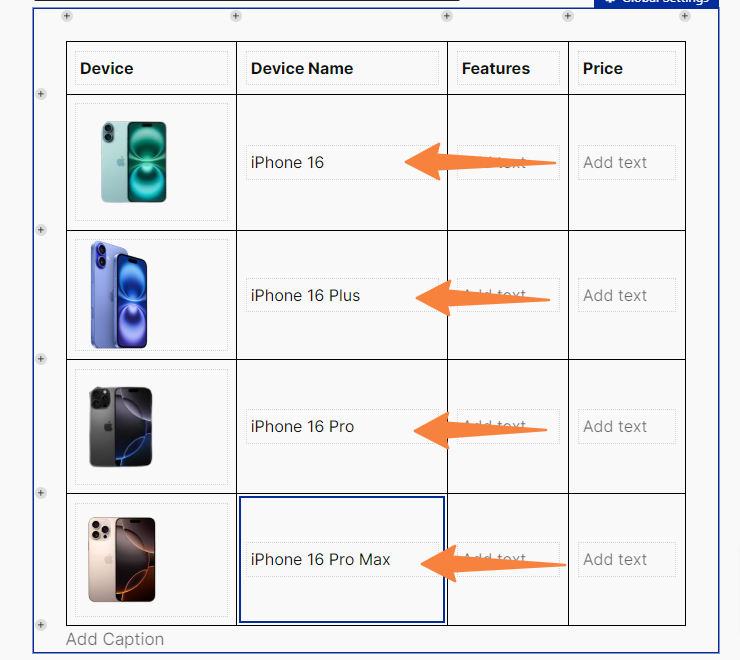
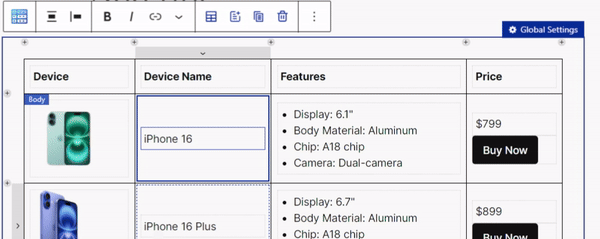
3.3: Add Device Name:
After adding the images, enter the device names in the next column by clicking each cell one by one.
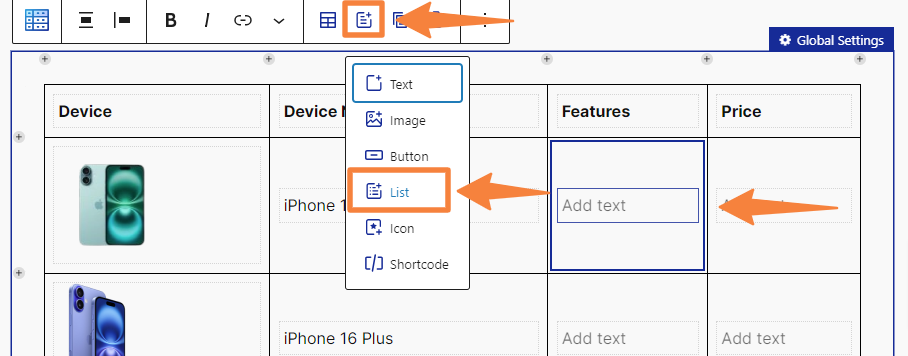
3.4: Add Device Features:
Next add each device’s features one by one. Here is how to do it:
- Click the first cell in the next column and select “List” from the block toolbar.
- Go to General tab > Content > List Item, and click “Duplicate” or “Add New” (we added 4 features per device).
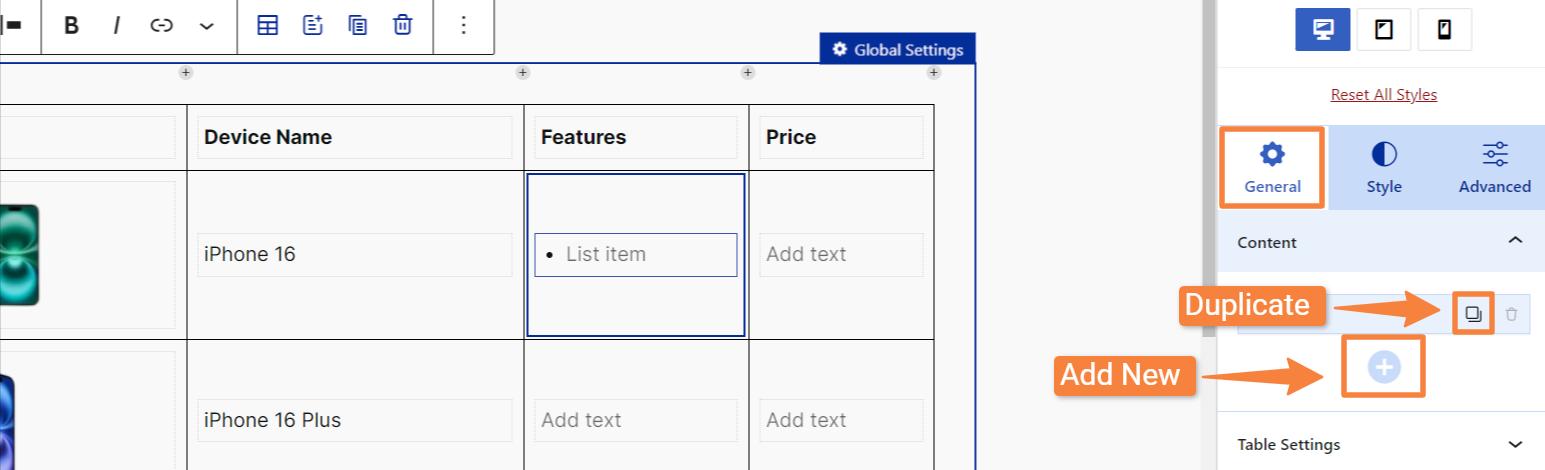
- Click on each list item and enter feature name
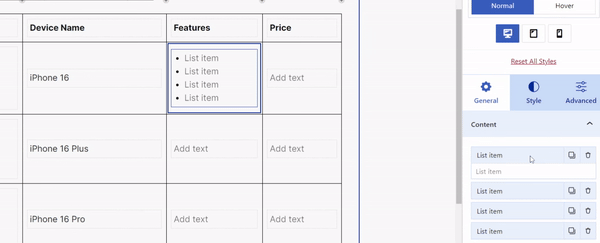
Note: Repeat these steps for the corresponding cells in the column where you want to add feature lists.
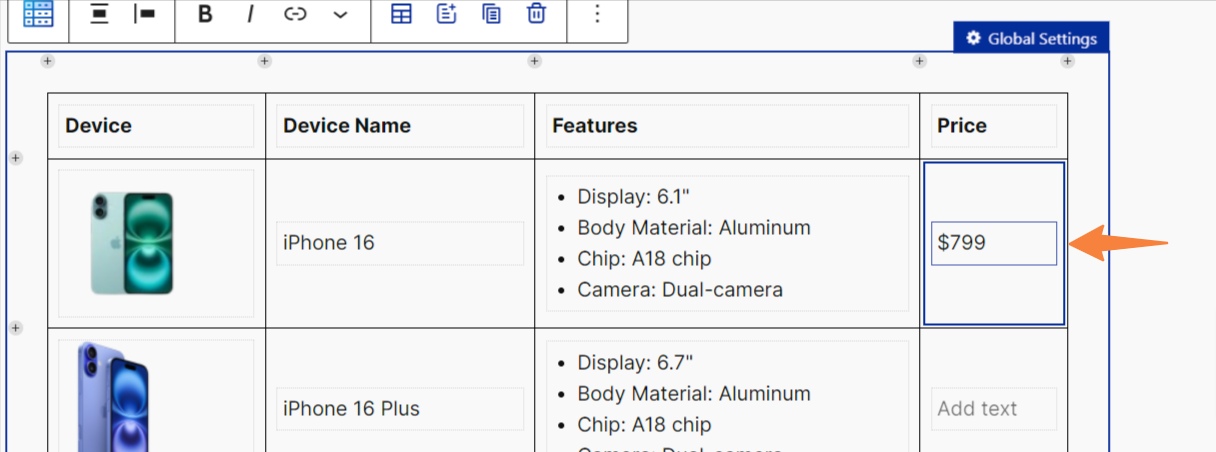
3.5: Add Price and Button:
In the last column, follow these steps to add the price and button:
- Click on the cell and enter the price.
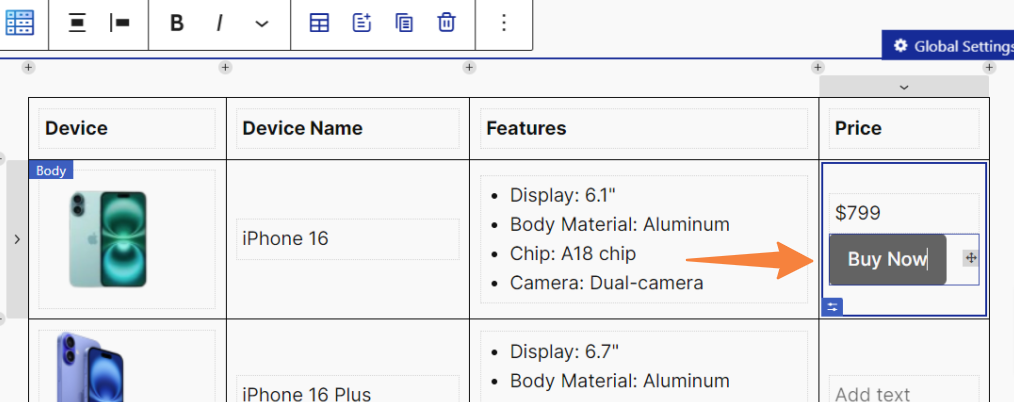
- Next, in the toolbar, click “Add Element” and select “Button.”
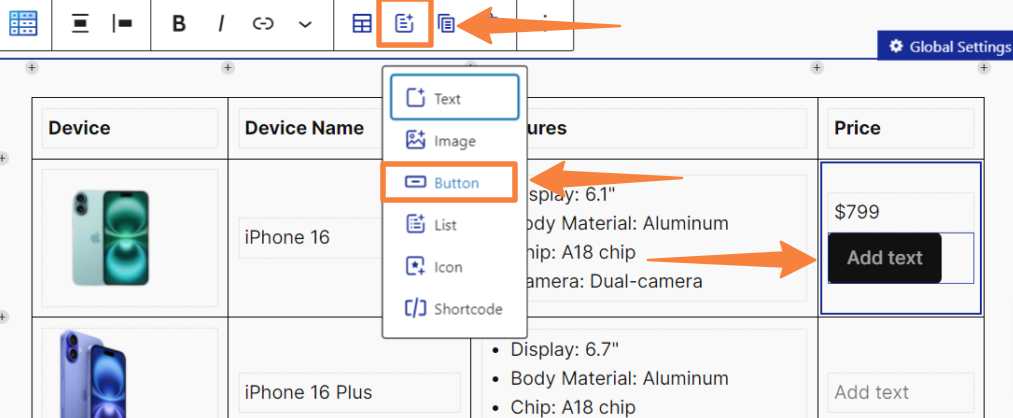
- Click the button in the table and enter your desired text.
- Add the button’s link by going to General tab > Content > Link URL and entering the desired URL.
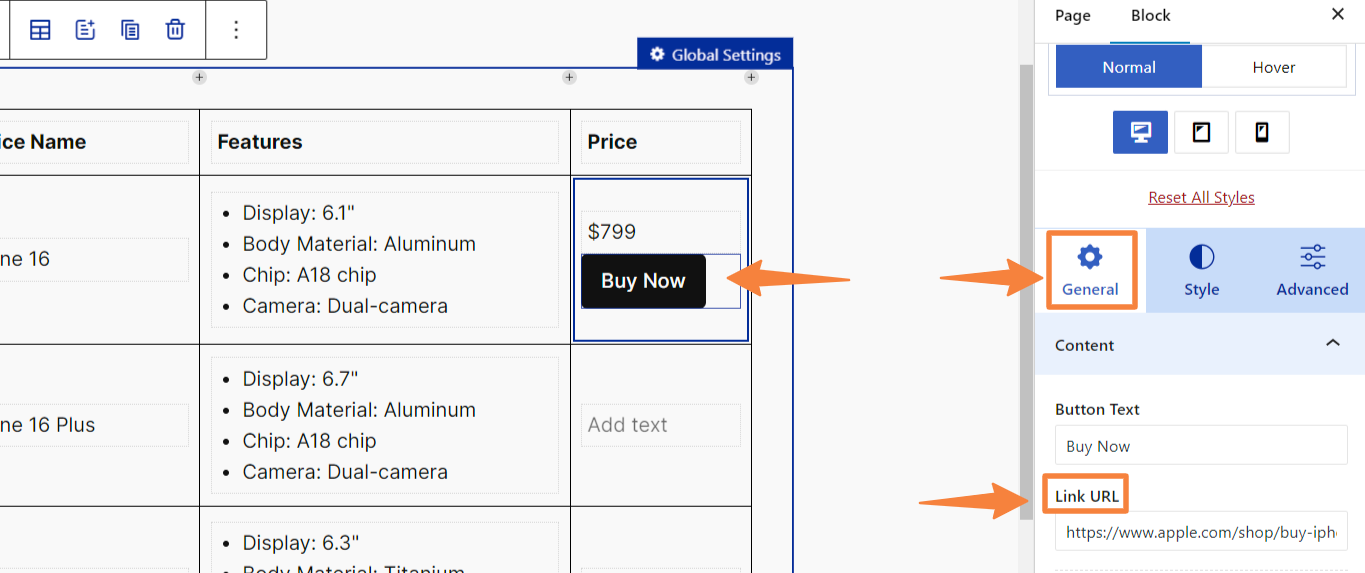
Note: Repeat these steps for the corresponding column’s cells where you want to add buttons.
Step 4: Style and Customize Your Table
Once you added all the necessary content in your table, it’s time to style the table.
Here is how to do it:
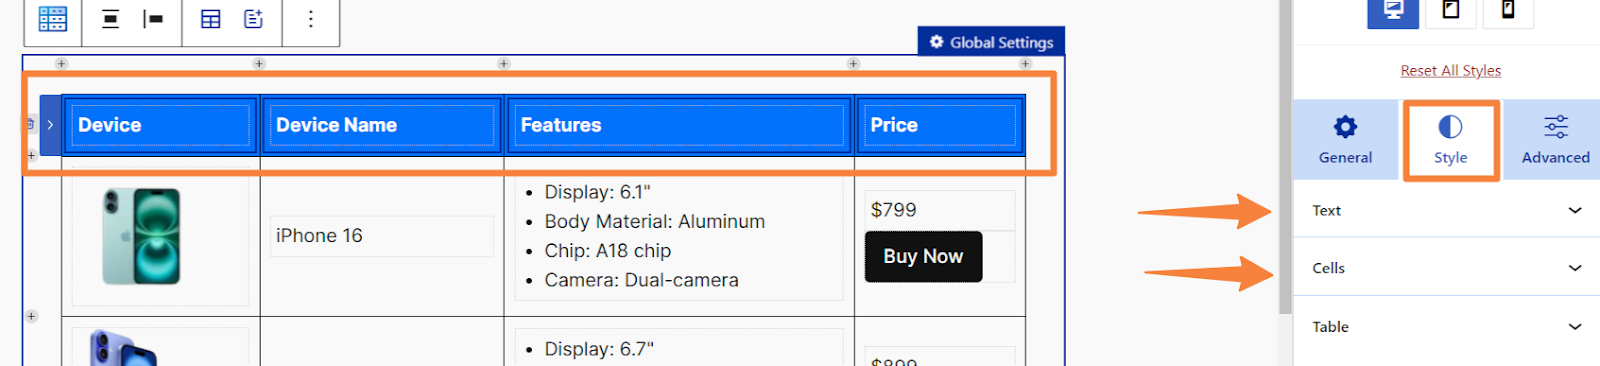
4.1: Style the Header Section
To style the header section, follow these steps:
- Select the complete header section
- Then go to Style tab > Cells > Custom > Background > Background Color
- Background Color: 0471FB
- Again click on the “Text” in the Style” tab, then within the custom tab, click on Color
- Color: FFFFFF
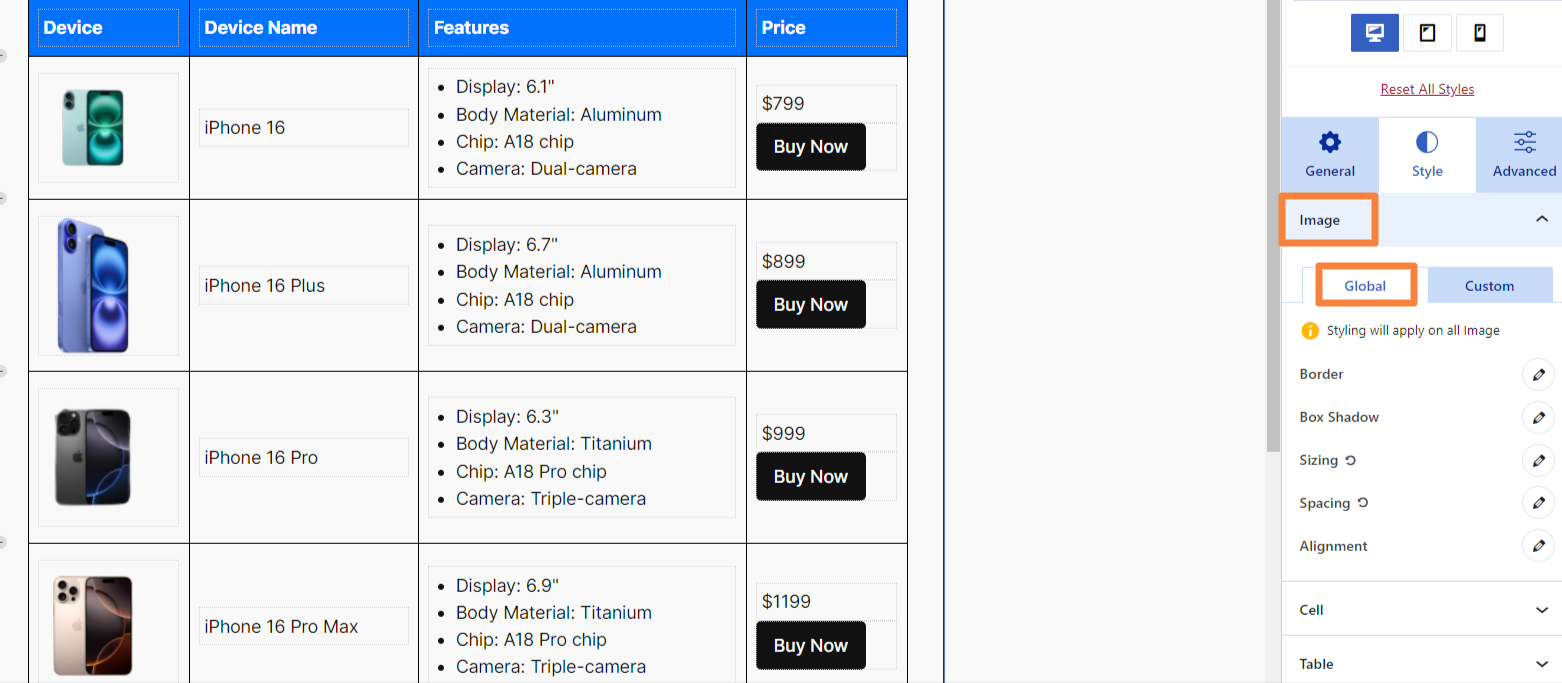
4.2: Style Image
- Click on any image in the table.
- Go to Style tab > Image > select Global, then change the sizing and spacing globally
- Sizing: Width (100px)
- Spacing: Margin (top and bottom 6 px)
4.3: Style Feature Items
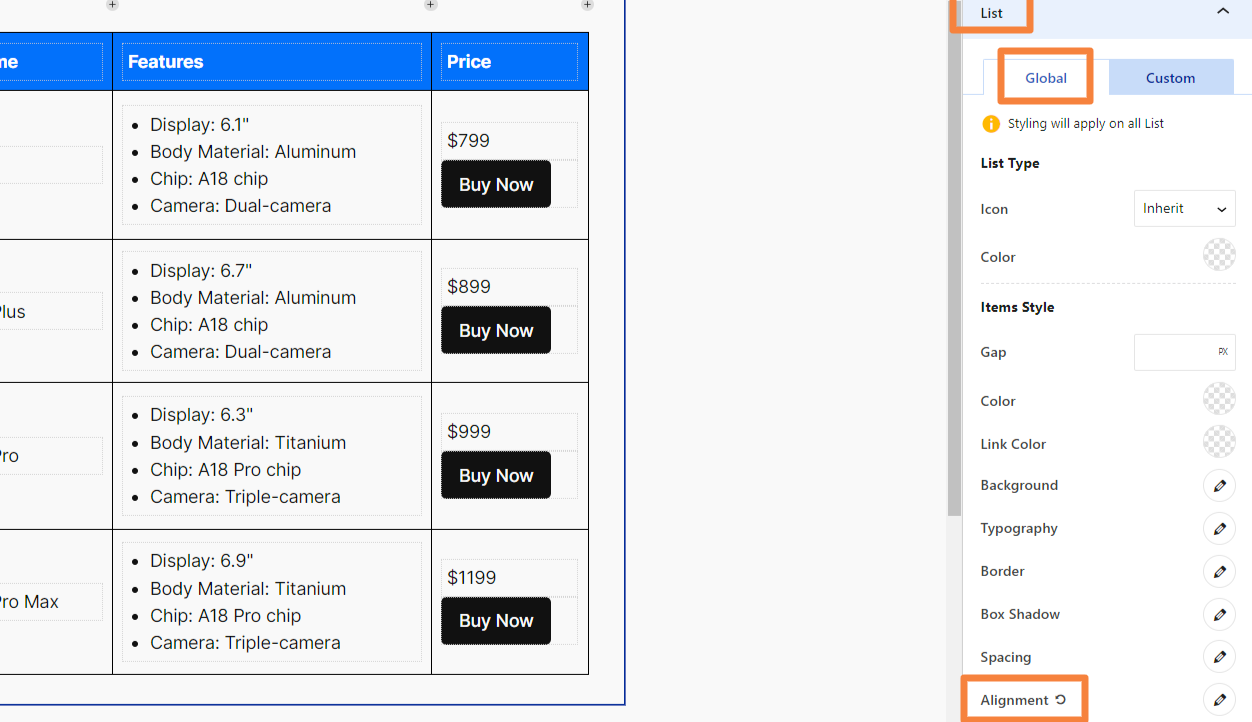
- Click on any feature list in the table.
- Then go to Style tab > List > select Global > Items Styles and then change the alignment
- Alignment: Left Align
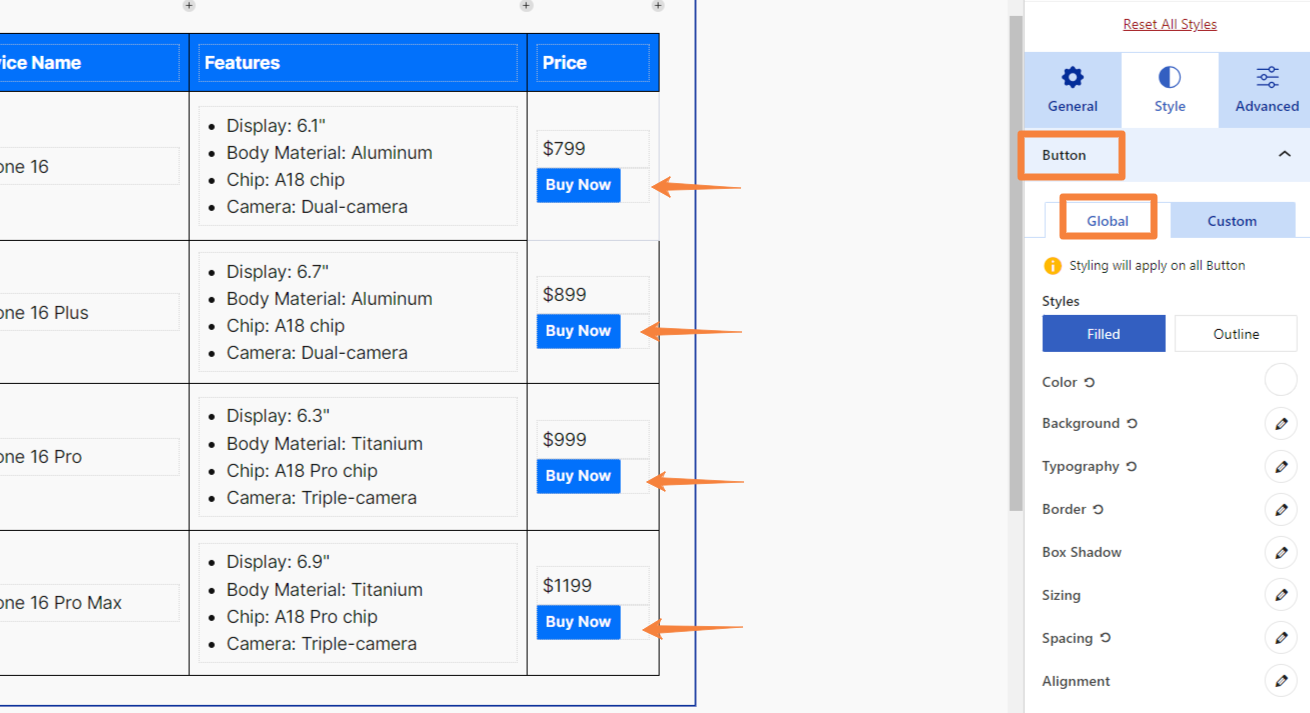
4.4: Style All Button
- Click on any button in the table.
- Navigate to Style tab >Button > select Global and make the following changes:
- Color: FFFFFF
- Background: Background Color (0471FB)
- Typography: Weight (600), Font Size (14)
- Border: Border Radius (top, bottom, right and left 2 px)
- Spacing: Padding (top and bottom 5px) (left and right 8px)
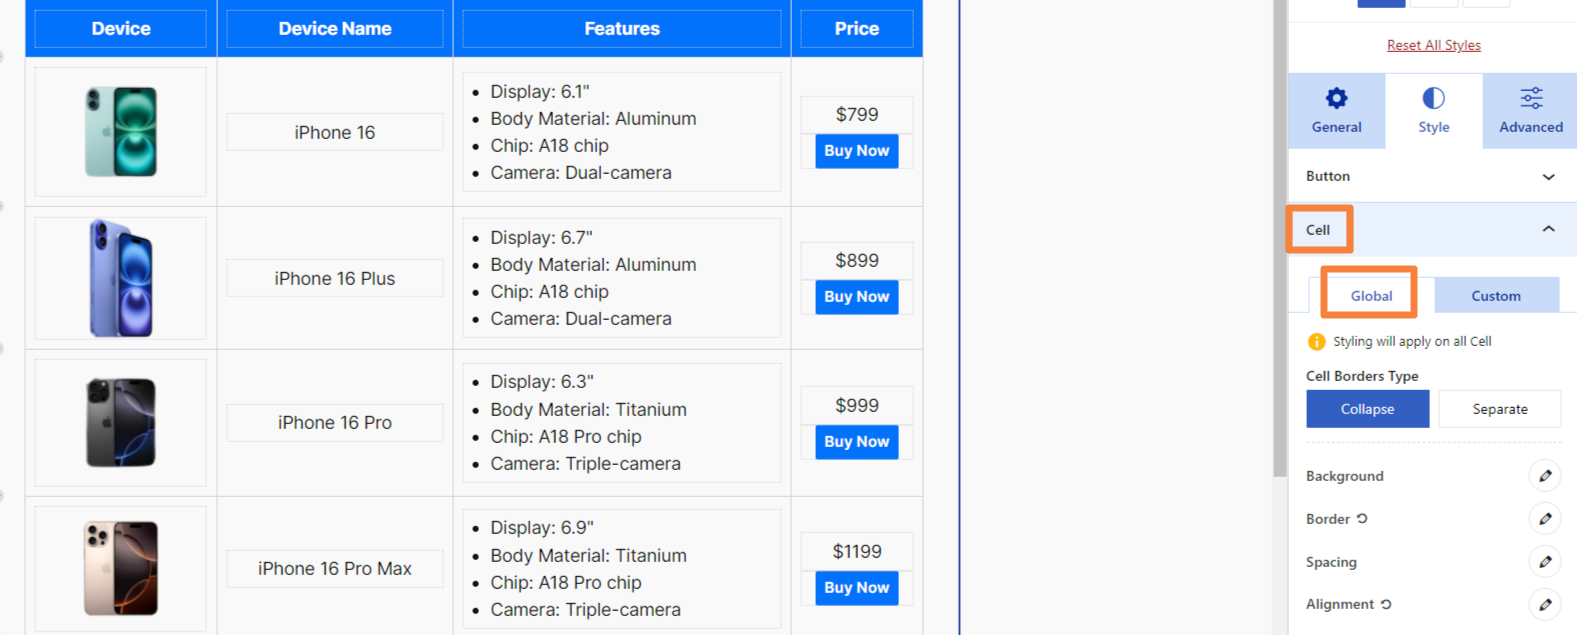
4.5: Style All Cells
- Go to Style tab > Cell > select Global and make these changes:
- Border: Border Color (CFD4E2)
- Alignment: Horizontal (Center Align)
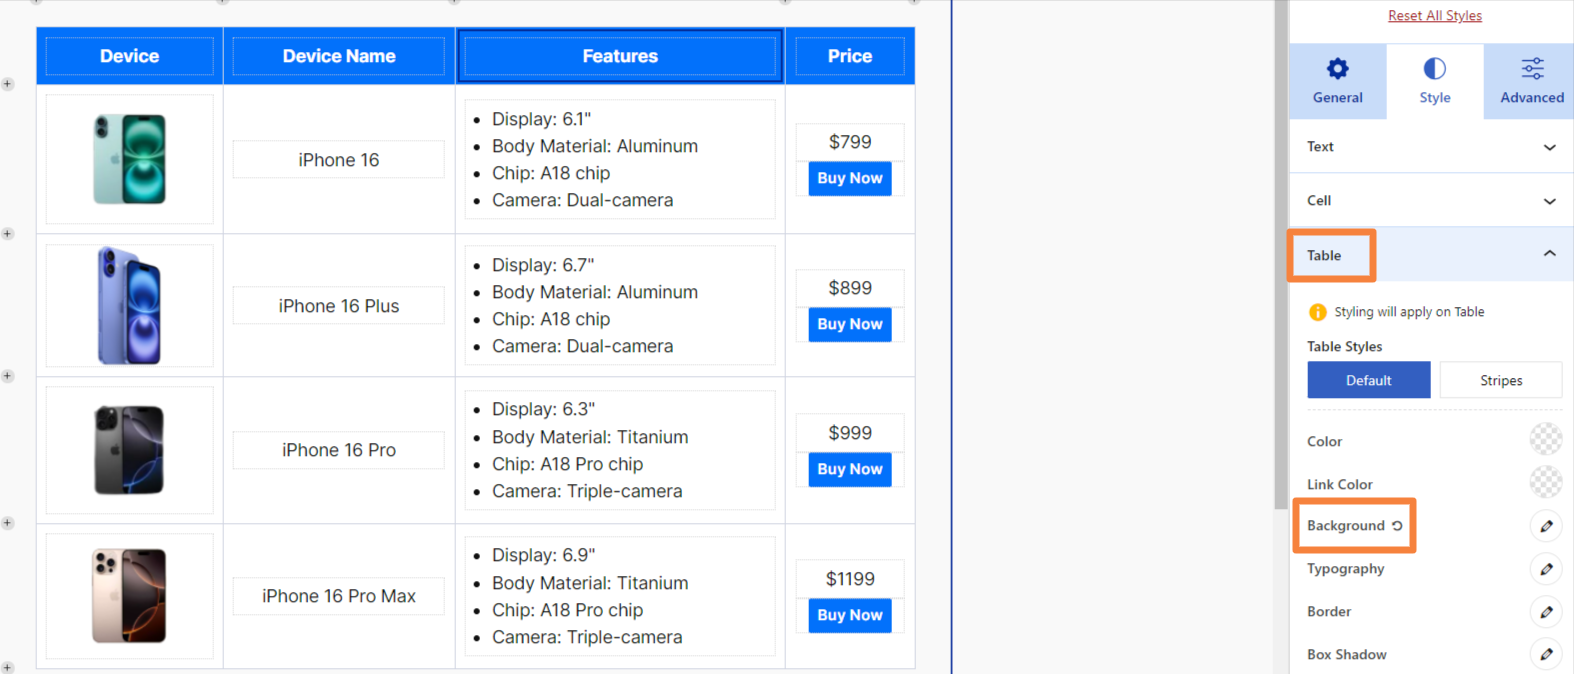
4.6: Style Table
- Go to Style tab > Table > Background and then change the background color.
- Background Color: FFFFFF
Step 5: Publish or Update Your Table
We have achieved our desired table design and here is how the final version looks like:
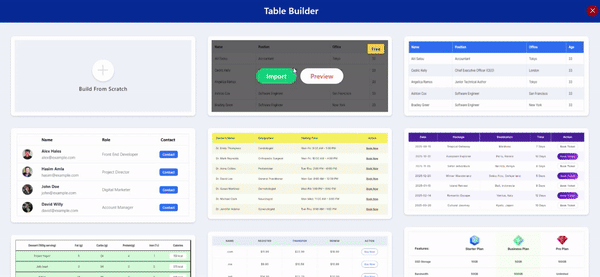
Method 3: Create Table in WordPress Using Premade Demo
Instead of creating a table from scratch, you can quickly create one using RioVizual’s free premade templates. Here is how:
Step 1: Choose and Insert a Template
- Go to the page/post where you want to add a table.
- Insert the “Table Builder” block and browse through the available templates.
- Simply choose your template and click “Import” to add it.
Step 2: Customize and Style the Pricing Table
After inserting a template, click on each element in the table to change its content. You can also use the block settings’ “General” and “Style” tabs to make further customizations.
Step 3: Publish or Update the Post/Page
Once you are happy with the changes, click the Publish or Update button and you are done.
Note: If you want to learn more about RioVizual’s Table Builder block, you can check our documentation for detailed instructions.
Closing Thoughts
By now, you should have a complete understanding of how to create a table in WordPress. We showed three different ways by using a default table block and using a dedicated plugin.
However, if you desire more flexibility in adding advanced features and customization, we recommend using a plugin like RioVizual. The best part is that its Table Builder block offers 27 pre-made templates that are free to use.

Leave a comment