In this article, we will share two easy methods to help you create tables inside Oxygen Builder. You can build data tables, pricing tables, comparison tables, pros and cons tables, and more.
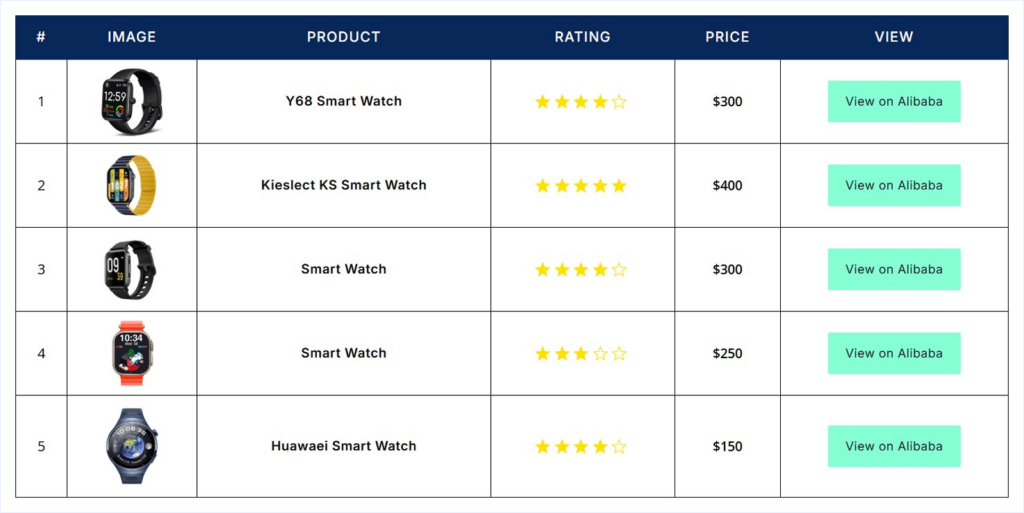
By the end of this article, you will be able to create this type of table in Oxygen Builder within just a few clicks, along with any other type of table your website may need.
Required Setup:
Before you start creating tables in Oxygen Builder, make sure the following requirements are in place.
- The latest version of WordPress is installed.
- Oxygen Builder is installed and activated.
- RioVizual is installed and activated.
Once these requirements are met, let’s start creating the table!
Method 1: Create a Table in Oxygen Builder Using the RioVizual Plugin
RioVizual offers two flexible options to create tables in Oxygen Builder. You can choose the one that fits your workflow and design needs. These are:
- Option 1: Use RioVizual’s pre-designed templates for fast table creation.
- Option 2: Build a table from scratch for full design control.
Option 1: Create Table Using RioVizual’s Pre-Designed Templates
RioVizual includes a collection of professionally designed table templates. These templates help you create tables quickly without starting from a blank layout.
Here is how you can create one:
Step 1: Create the Table from the RioVizual Dashboard
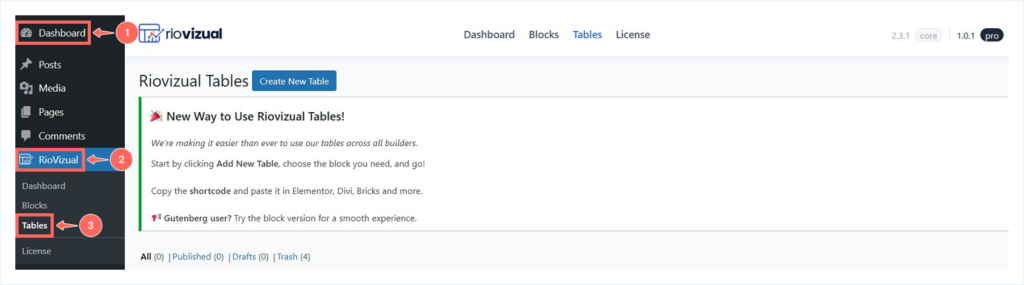
- Go to WordPress Dashboard → RioVizual → Tables
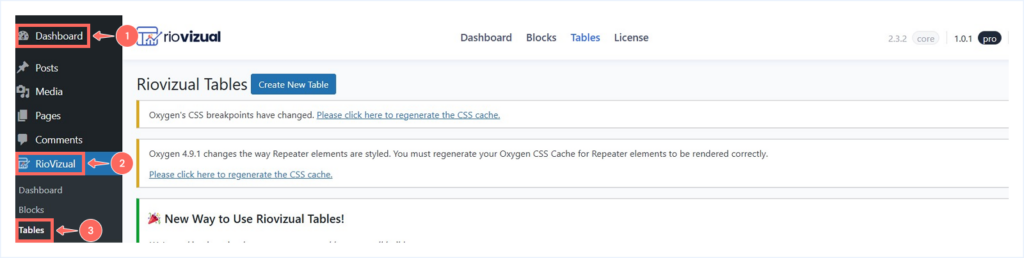
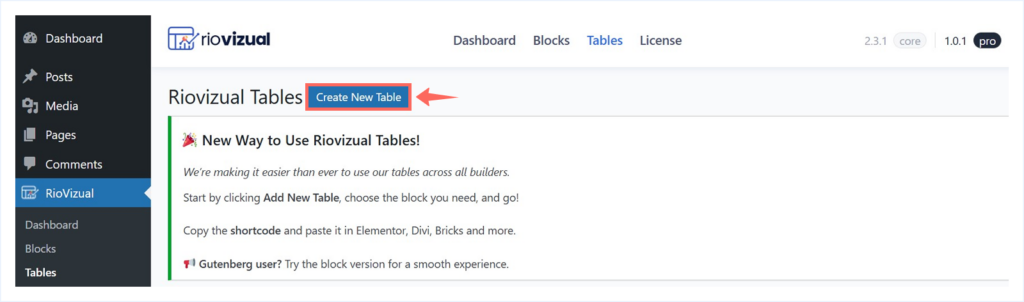
- Click on Create New Table.
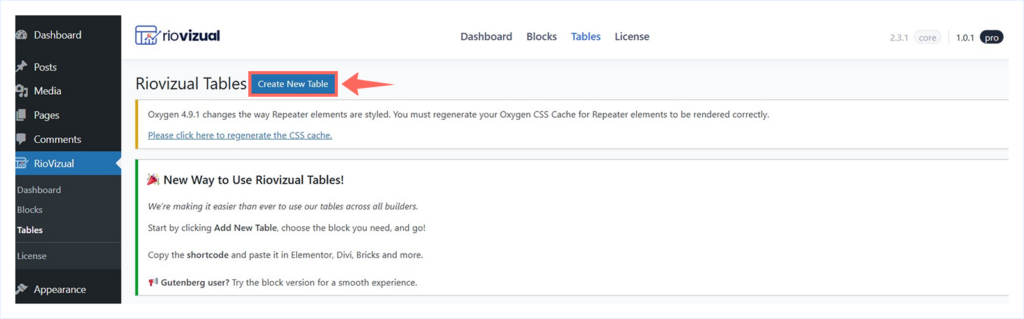
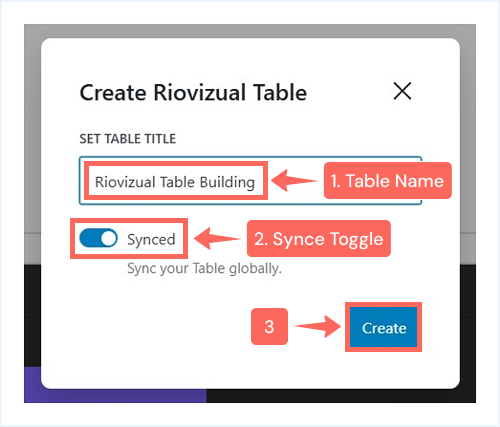
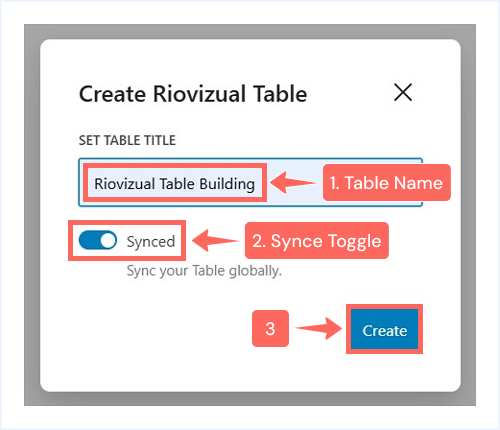
- Enter a table name.
- Enable the Synced toggle if you want global updates. This lets you edit the table once and apply changes everywhere.
- Click Create.
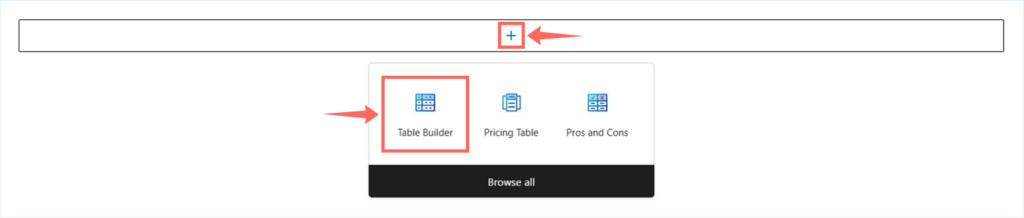
- Click the + icon and select Table Builder.
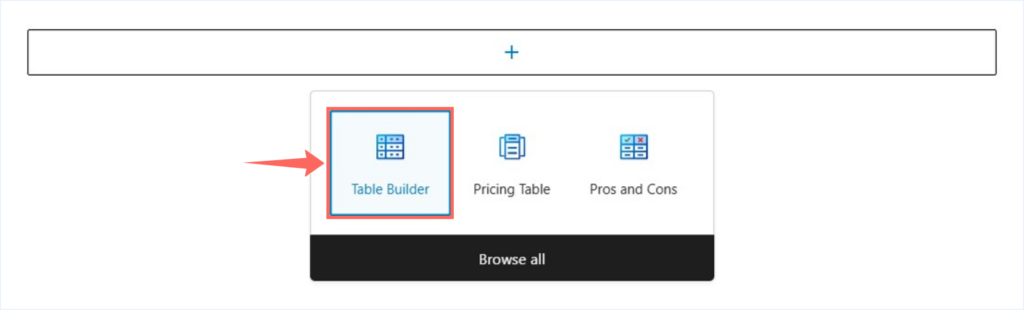
Note: We are using the Table Builder block in this example. You can also choose other RioVizual blocks, such as Pricing Table or Pros and Cons, depending on the type of table you want to create.
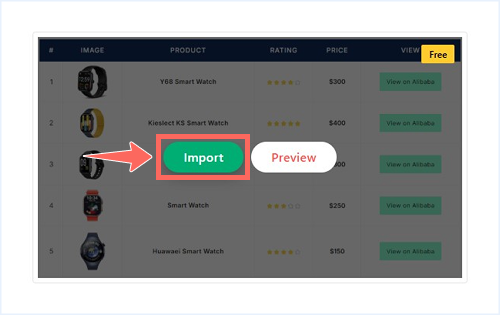
- Select a pre-designed template from the available options.
- Hover over the template you choose and click Import.
Your table is now created. You can edit the structure, update the content, and adjust the styling as needed. Once you are done, click Publish.
Step 2: Insert the Table into Oxygen Builder:
After creating the table, you can insert it into any page or post built with Oxygen Builder. Here is how you can do this:
- Open the page or post with Oxygen Builder.
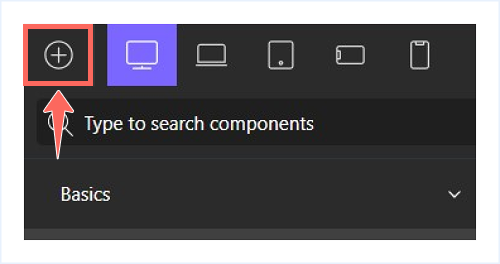
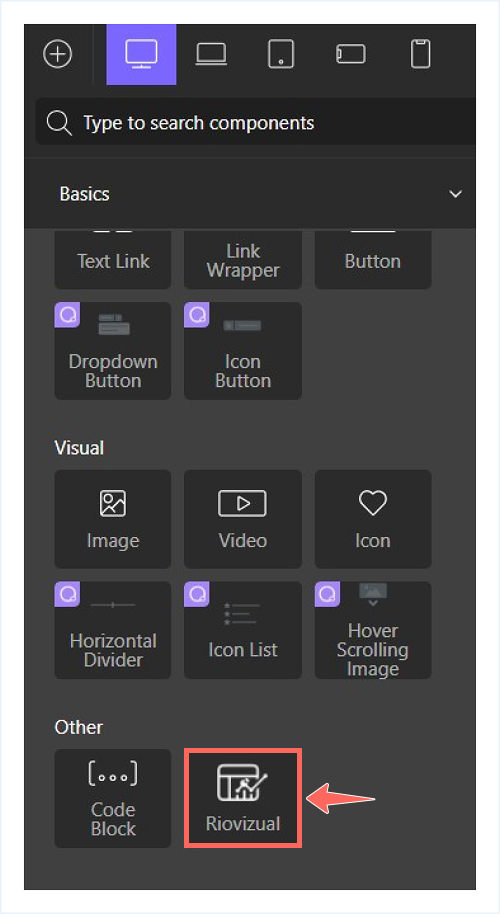
- Click the + icon from the top-left corner to add a new element.
- Search for RioVizual and insert the element.
- Select your created table from the Select a Table dropdown.
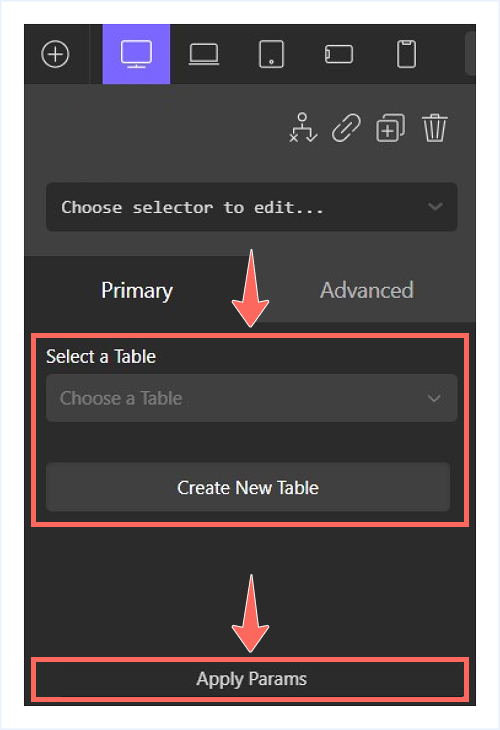
- Click Apply Params.
Your table will now appear inside Oxygen Builder.
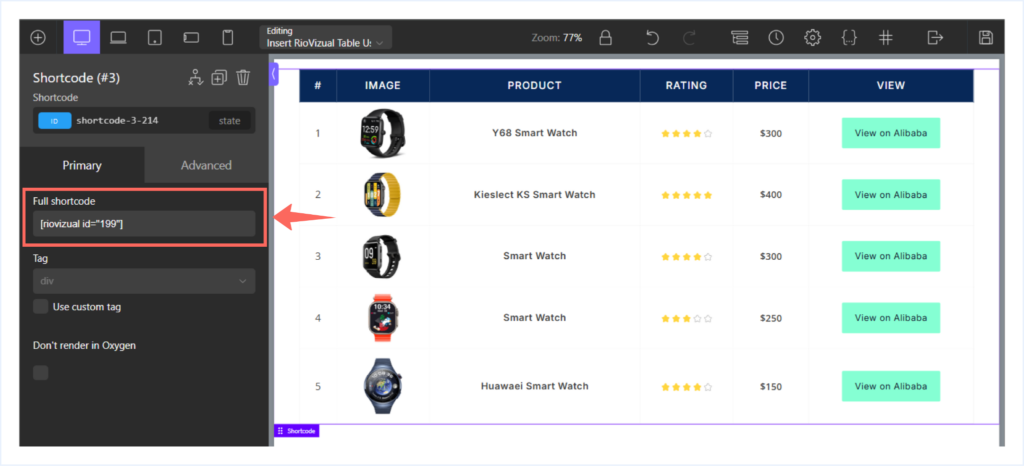
Alternative: Insert the Table Using a Shortcode:
If you prefer using shortcodes, you can insert any RioVizual table into Oxygen Builder using the following method:
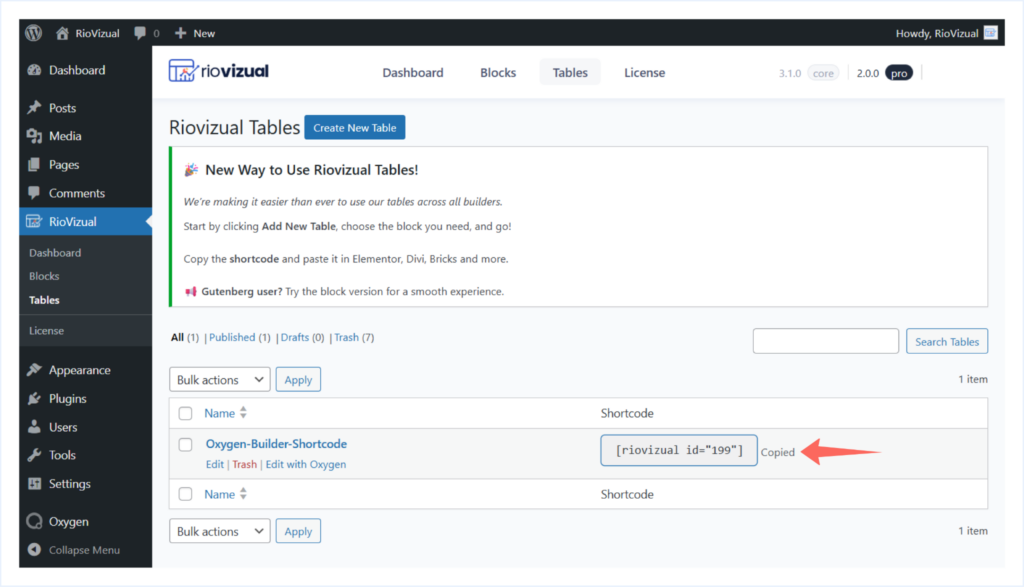
- Go to WordPress Dashboard → Riovizual → Tables

- Copy the Shortcode for the table you want to display.
- Open the page or post with Oxygen Builder.
- Click the + icon in the left sidebar to add a new element.
- Search for the Shortcode element and click to insert.
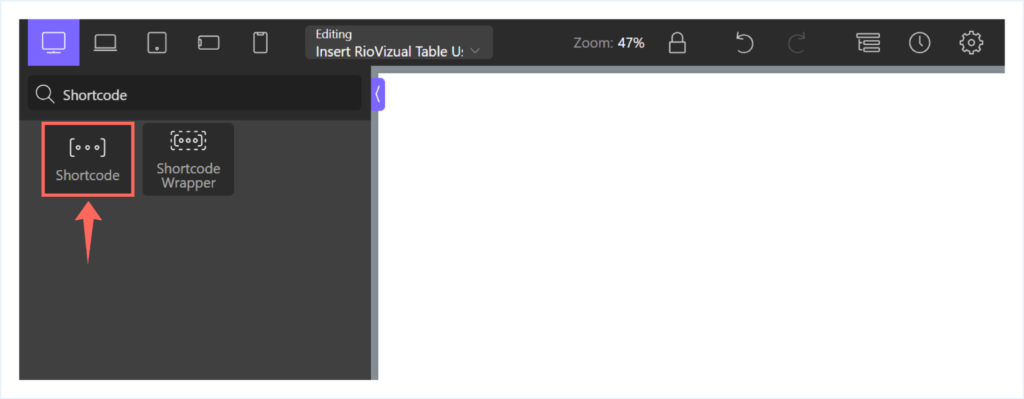
- Paste the Shortcode you copied earlier and save your changes.
Both methods allow you to reuse the same table across multiple pages while keeping the content synced.
Option 2: Create a Table in Oxygen Builder from Scratch
If you prefer building a table from scratch using RioVizual, start with a black layout and make a table as you want. Here is a step-by-step guide:
Step 1: Create the Table from RioVizual’s Dashboard
- Go to WordPress Dashboard → RioVizual → Tables
- Click on Create New Table.
- Enter a table name.
- Enable the Synced toggle if you want global updates across your site.
- Click Create.
- Click the “+” Plus icon and choose “Table Builder”.
- Select Build from scratch to start with a blank layout.
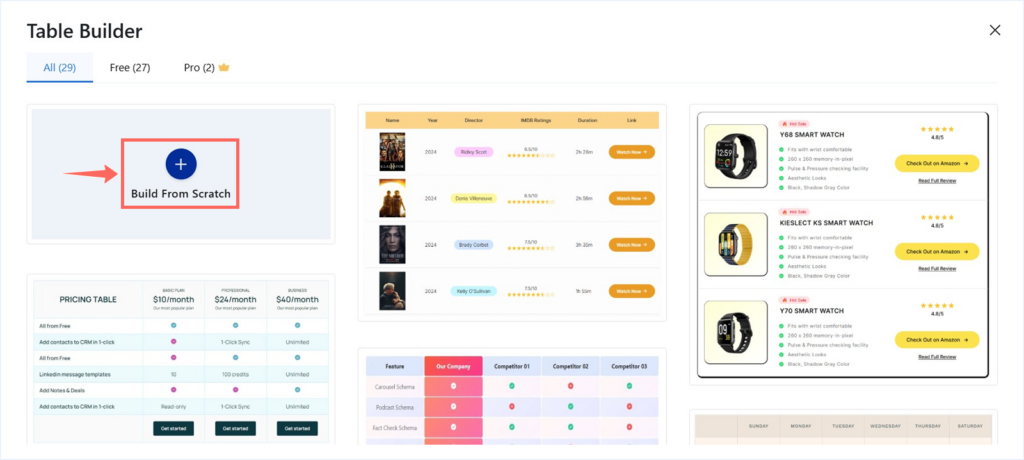
Note: We are using the Table Builder to recreate the same layout used in the pre-designed template. You can choose other table blocks if your use case is different.
Step 2: Define the Initial Table Structure
After selecting “Built from Scratch,” a table setup dashboard will appear. Start by setting up the basic structure of your table before adding content. These settings can be changed at any time as your design evolves.
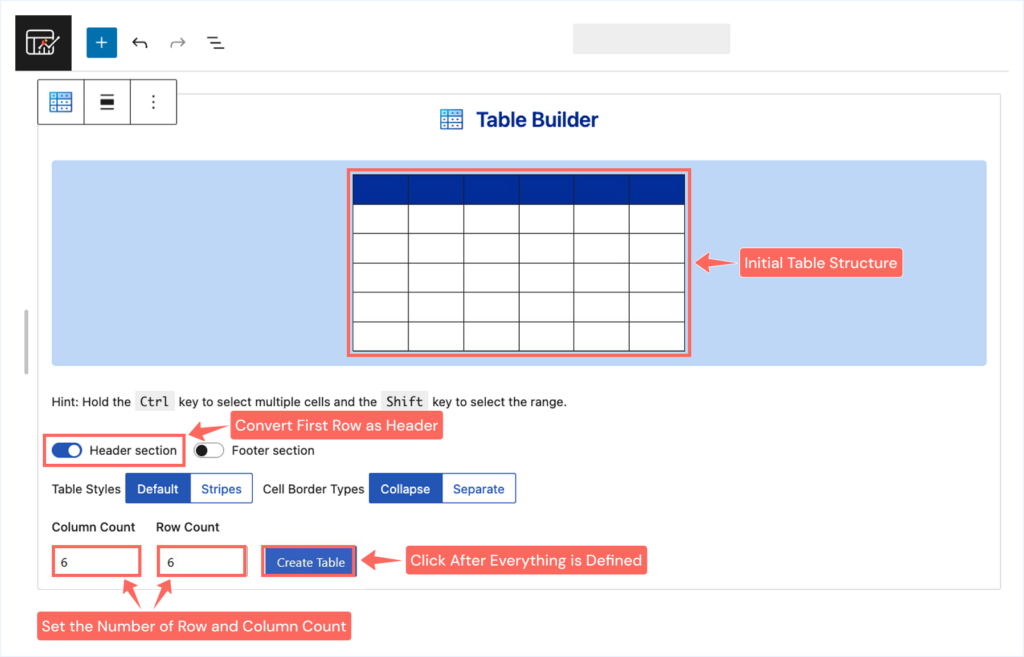
- Header Section: Enable this toggle to convert the first row into a header.
- Footer Section: Left it to the default as our template had no footer.
- Table Style: Select Default.
- Cell Border Types: Use Collapse (default).
- Column Count: Set to 6.
- Row Count: Set to 6.
Click Create Table after setting the values.
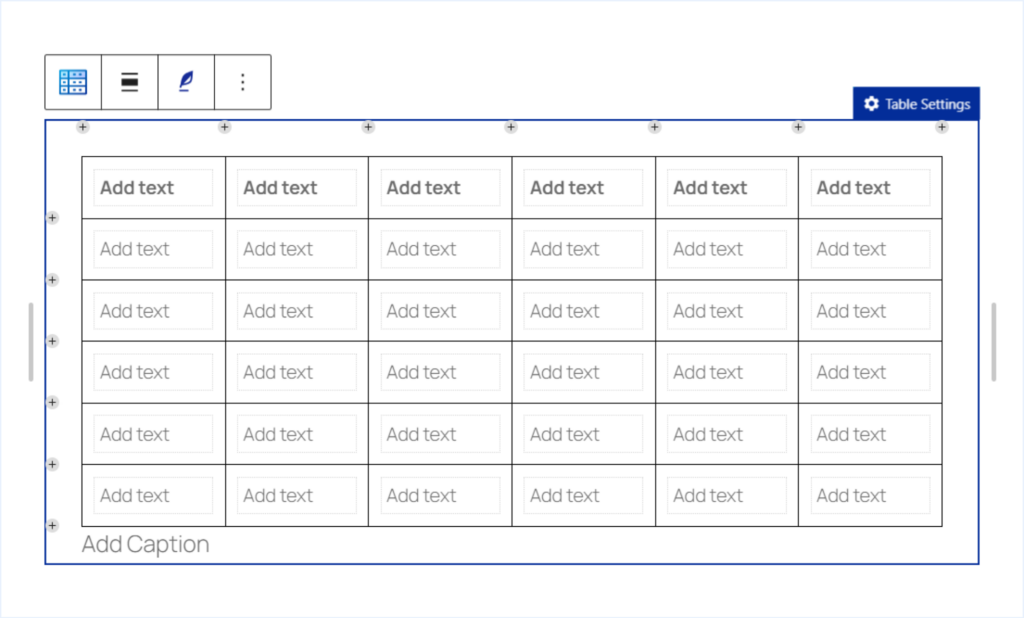
Once the table is created, a blank table canvas will appear based on your selected table structure with a text placeholder labeled “Add Text” in each cell.
Step 3: Add Contents to your Table
Now it’s time to add content to the table, such as Text, Image, Star Rating, Buttons, to match the table style we have imported earlier.
Add Text:
- Add Text to First Row / Header: Start by adding text to the first row/header row. This helps define the purpose of each column.
- Add Body Text: Add body text for values such as serial numbers, product names, and prices.
To add text, click any cell containing the Add Text placeholder and start typing.
Add Images:
- Select the cell where you want to place the image.
- Click the + icon in the bottom-right corner of the cell.
- Choose Image from the element list.
- Choose your preferred method to upload the image:
- Upload: Upload an image from your computer.
- Media Library: Choose an image from the WordPress media library.
- Insert from URL: Insert an image directly from the Image URL.
- Adjust the image width to 80px from the General tab under Settings Panel.
- Align the images horizontally to the center.
Add Star Ratings:
- Select the cell where you want to insert the Star Rating.
- Click the “+” Plus icon from the bottom-right corner.
- Choose “Star Rating” from the Element List.
- Adjust the Star Rating values from the Settings Panel → General Tab.
Add Buttons:
- Select the cell where you want to insert the button.
- Click the “+” Plus icon from the bottom-right corner.
- Choose “Button” from the Element List.
- Update the Button text from the text placeholder or the General tab.
- Add the destination URL for the button.
Once all elements are added, the table structure and content are complete. The next step is to style each of them along with the entire table.
Step 4: Style the Table and Its Elements
Once the table content is in place, the next step is styling. In this section, you will adjust the appearance of the table and its individual elements to match the design of the imported template.
You can follow the same steps with your own styling preferences to create a table that fits your website’s design.
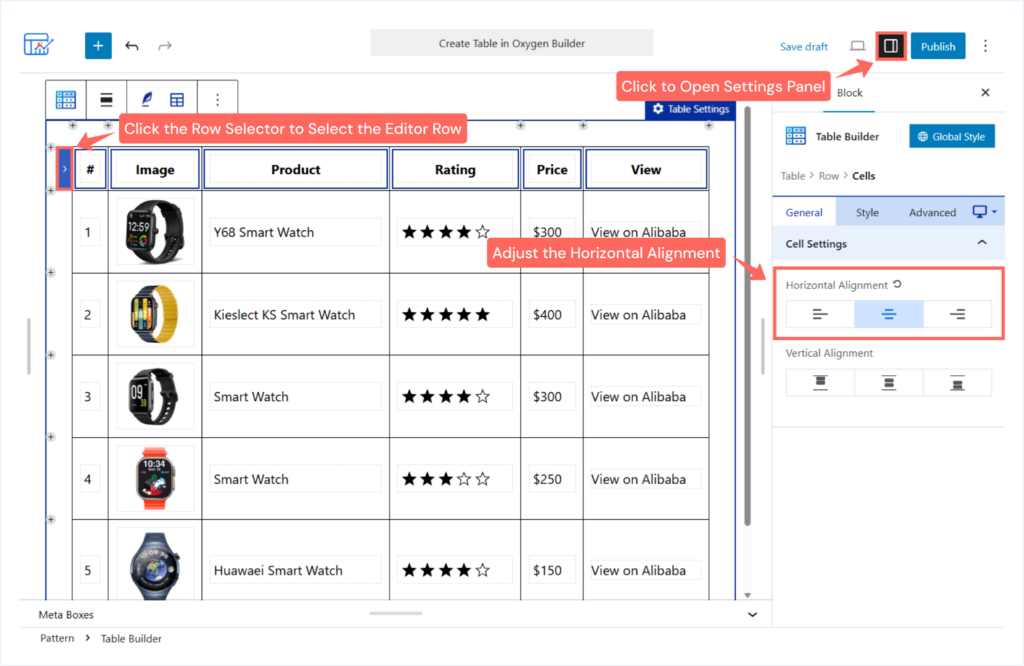
Style the Header / First Row:
- Select the first row using the Row Selector.
- Open the Settings Panel.
- Set horizontal alignment to Center from the General tab.
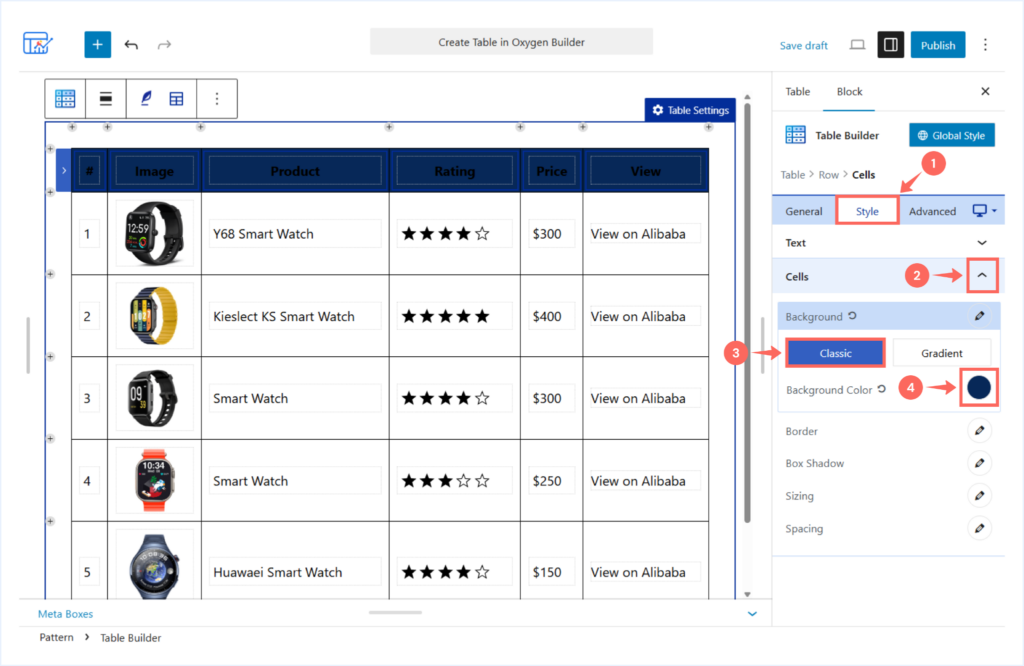
- Go to Style → Cells → Background.
- Choose Classic and apply a solid background color.
- Use #072858 for the header background.
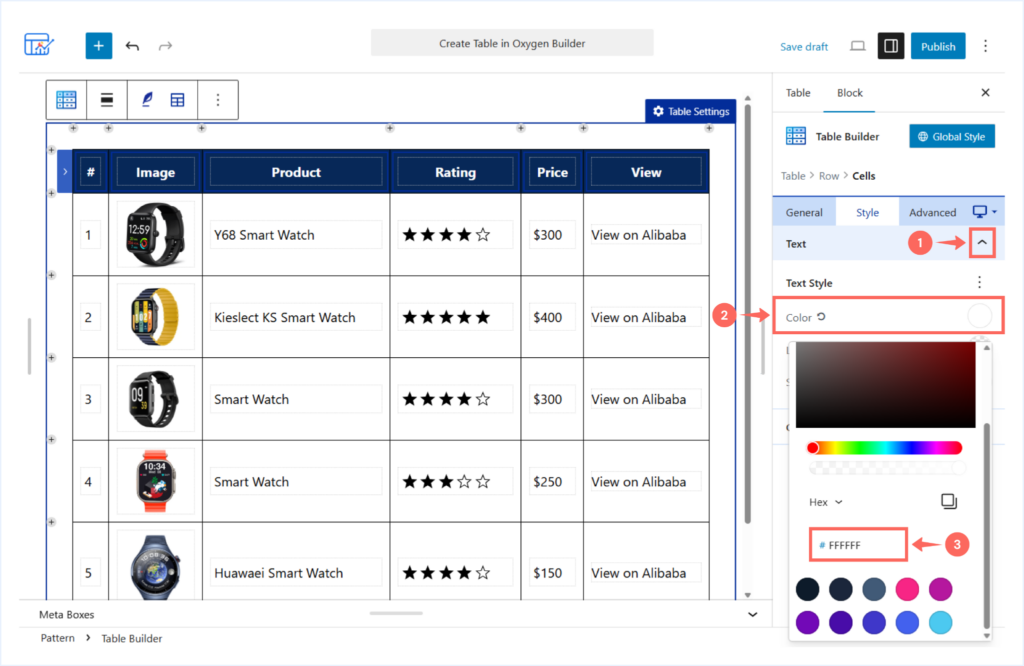
Now the first / header row background has changed to a dark background. It’s time to pick a light text color used in this row to make it visible.
Style the Header Text:
- Expand the Text styling options from the same Style tab.
- Set text color to white (#FFFFFF).
- Apply the following typography settings:
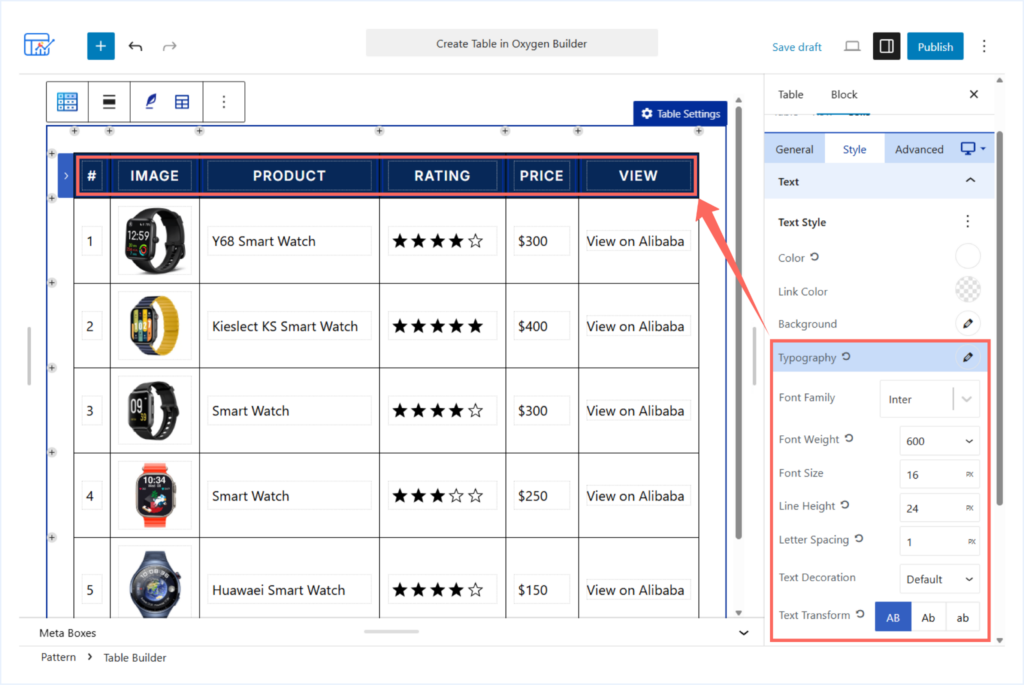
- Font Family: Inter
- Font Weight: 600
- Font Size: 16 px
- Line Height: 24 px
- Letter Spacing: 1 px
- Text Transformation: Capital case
ℹ️ Some styling options in the settings panel may be hidden by default. Click the (⋮) three-dot menu to reveal additional controls.
Style the Body Text:
- Hover over the table and click Body to select the entire body section.
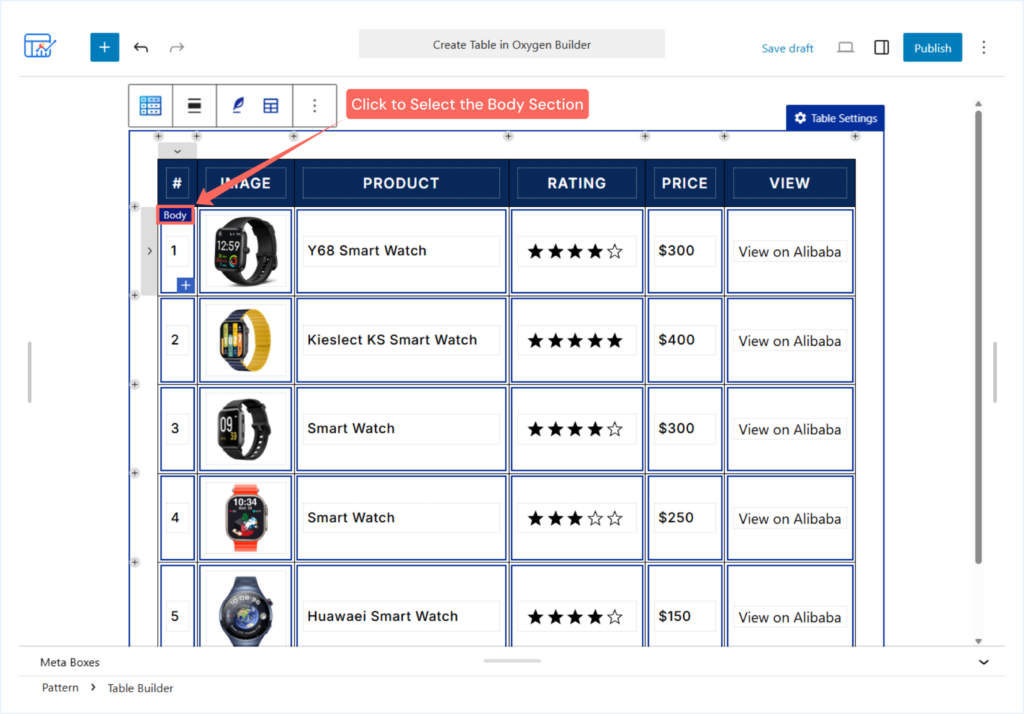
- Open Settings Panel → General tab → Cell Settings → Horizontal Alignment → Center.

- Navigate to Style tab → Text → Typography and apply the following changes:
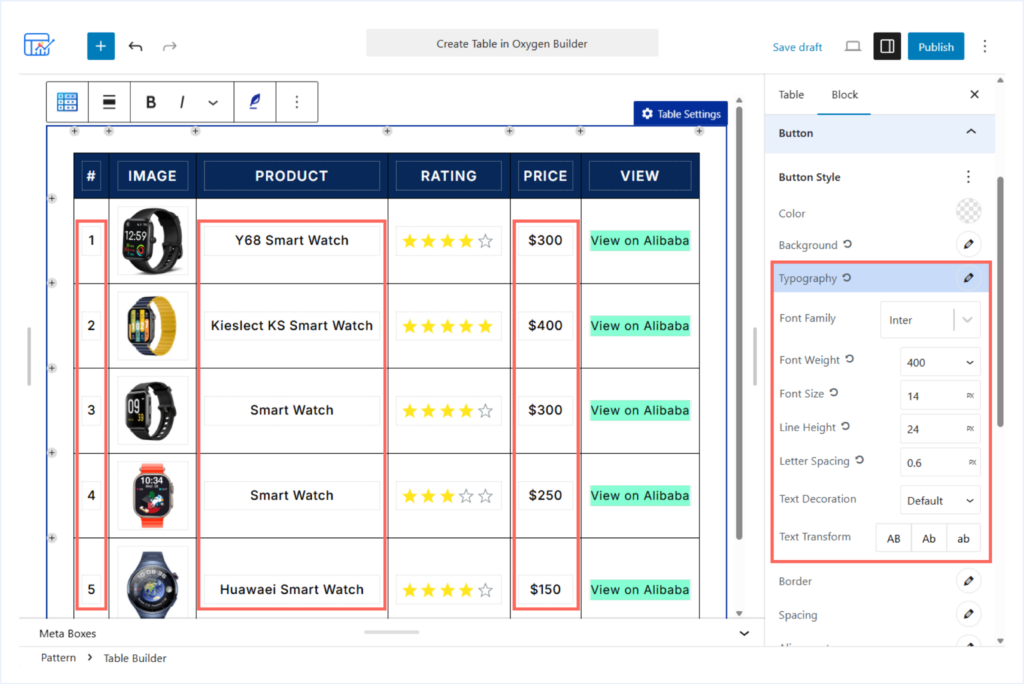
- Font Family: Inter
- Font Weight: 500
- Font Size: 15 px
- Line Height: 24 px
- Letter Spacing: 0.5 px
ℹ️ Some styling options in the settings panel may be hidden by default. Click the (⋮) three-dot menu to reveal additional controls.
Style the Star Rating Elements:
- Open Global Style from the settings panel.
- Expand the Star Rating Styling options.
- Choose the fill and unfill color of the star icons.
- Fill Color: #FFE51C
- Unfill Color: #838E92
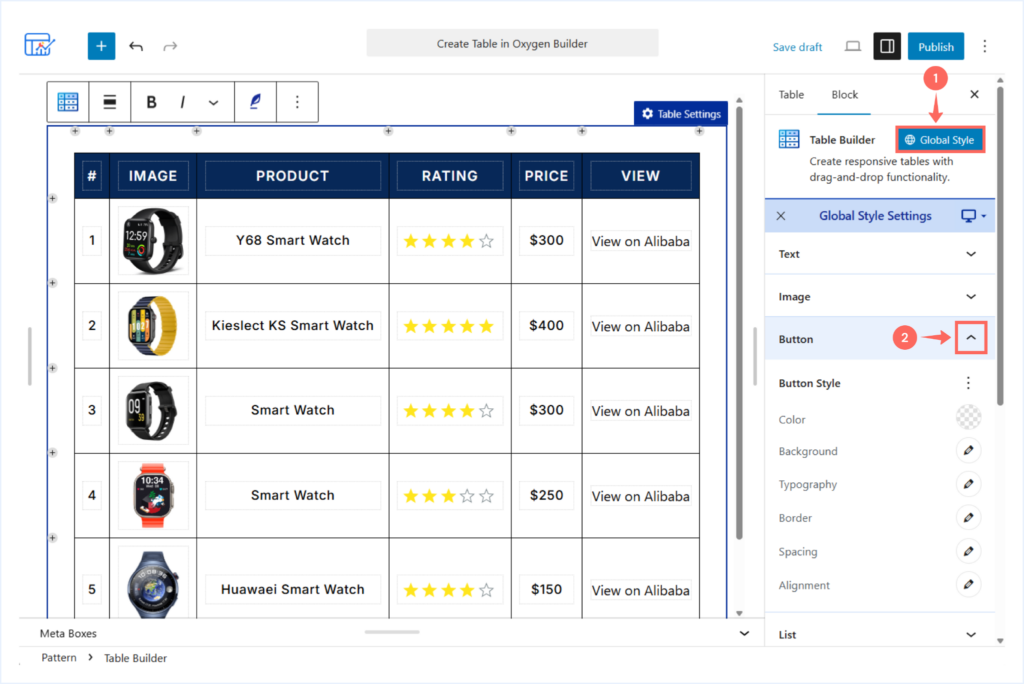
Style the Button Elements:
- Open Global Style from the settings panel.
- Expand the Button Styling section and apply the following changes:
- Color: Choose the button text color (e.g: #101727).
- Background: Style the button’s background. Choose:
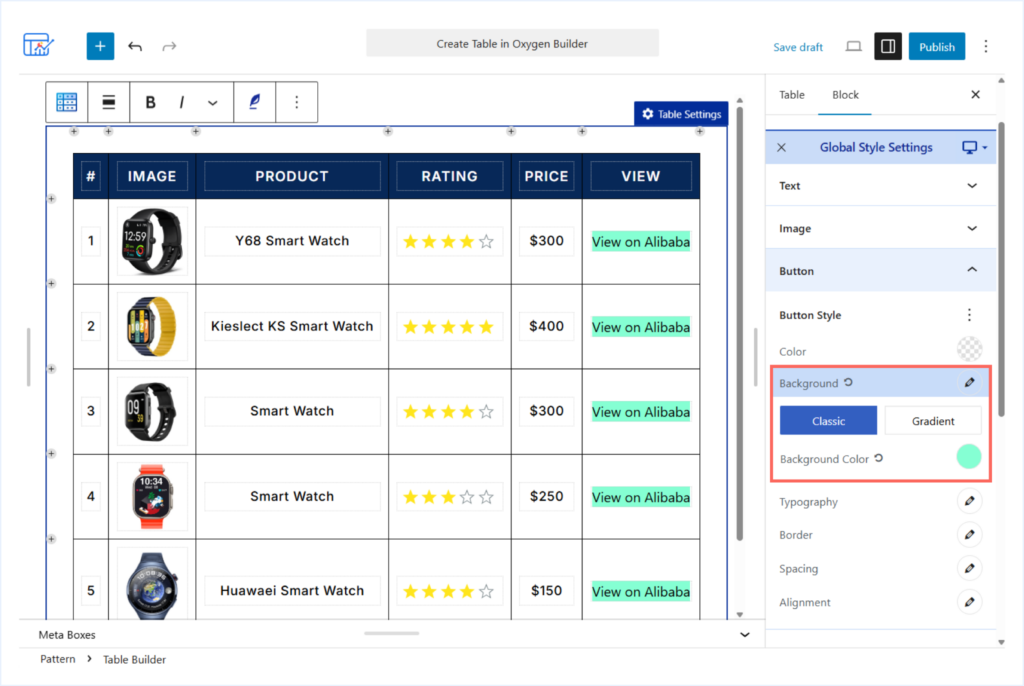
- Classic: For a solid, single color background.
- Color: Choose the button Background (e.g: #85FFD3).
- Open the “Typography” Settings and apply the following changes:
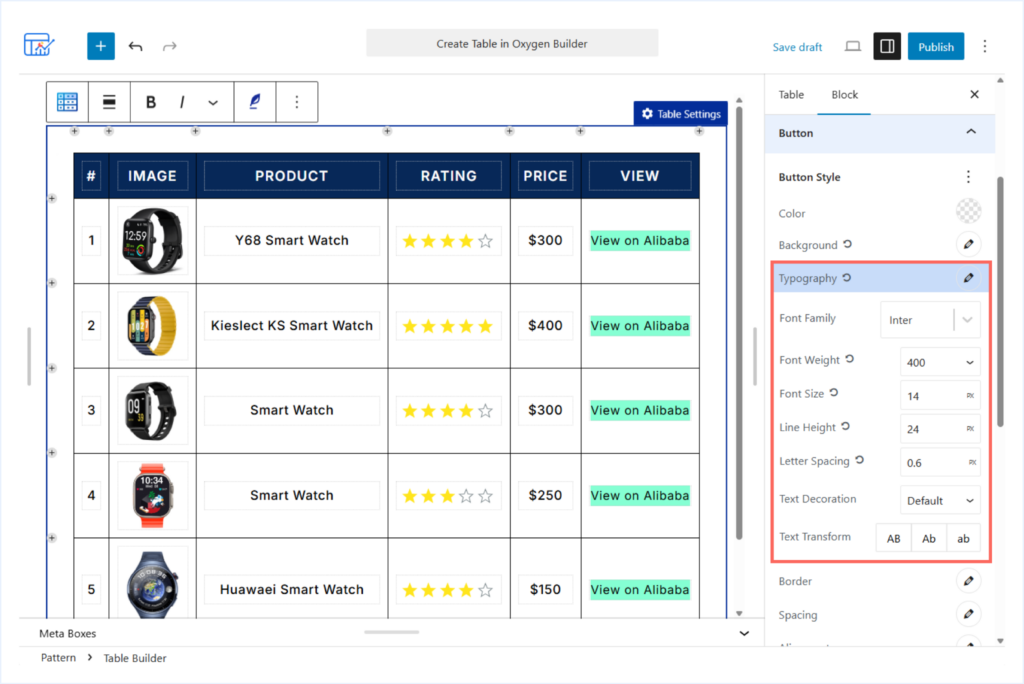
- Font Family: Inter
- Font Weight: 400 px
- Font Size: 14 px
- Line Height: 24 px
- Letter Spacing: 0.5 px
- Open the Spacing options to adjust the padding (inner spacing) and apply:
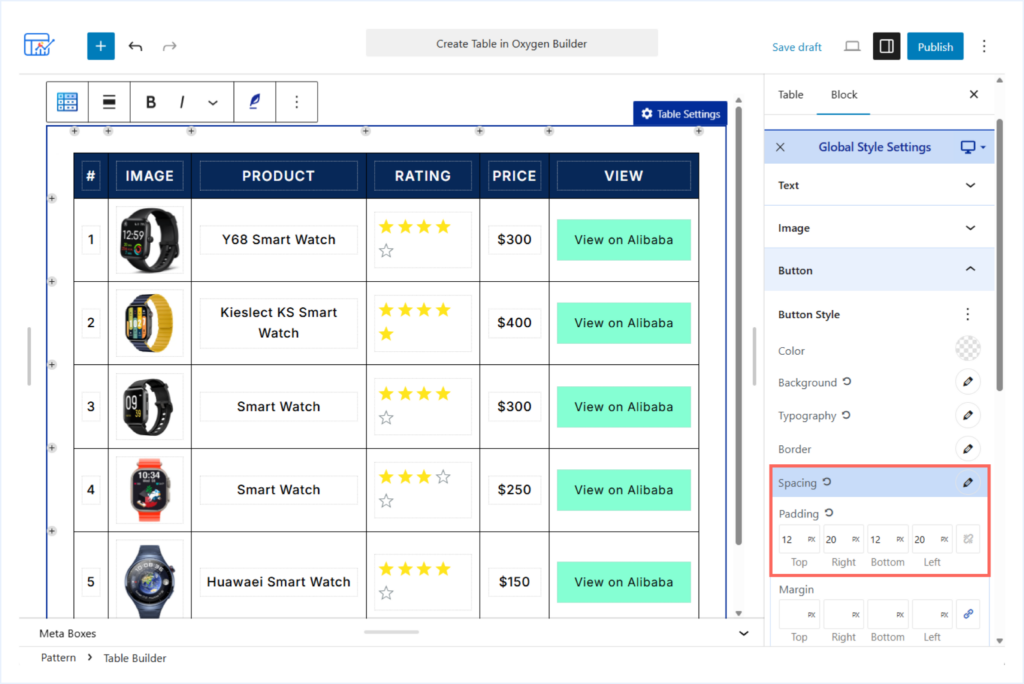
- Top: 12 px
- Bottom: 12 px
- Left: 20 px
- Right: 20 px
While adding values, make sure you unlink the value fields to add separate values to each field.
Your table is now ready!
You have completed all the customizations to match the pre-designed table we imported earlier.
You can now insert this table into any page or post using Oxygen Builder, following the same steps described in the Insert the Table in Oxygen Builder section.
Method 2: Create a Table in Oxygen Builder Without a Plugin
Creating tables in Oxygen Builder without a plugin requires manual work. You need a basic understanding of HTML and CSS, and write the code manually to create the same table layout.
This method is suitable if you prefer full control through code or do not want to rely on an additional plugin.
Below, we are sharing the complete HTML and CSS used to recreate the same table design shown earlier.
You can copy this code and adjust the content to match your own requirements.
<style>
  .custom-table-wrapper {
    overflow-x: auto;
    border-radius: 16px;
    box-shadow: 0 10px 30px rgba(0, 0, 0, 0.05);
  }

  .custom-table {
    width: 100%;
    border-collapse: collapse;
    font-family: 'Segoe UI', sans-serif;
    font-size: 15px;
    color: #333;
  }

  .custom-table thead {
    background-color: #0c2e63;
    color: #fff;
  }

  .custom-table th,
  .custom-table td {
    padding: 16px 12px;
    text-align: center;
    border: 1px solid #f0f0f0;
  }

  .custom-table td:first-child,
  .custom-table th:first-child {
    font-weight: 600;
  }

  .custom-table img {
    max-width: 60px;
    height: auto;
    border-radius: 6px;
  }

  .custom-table a.view-button {
    display: inline-block;
    background-color: #3fffc6;
    color: #0c2e63;
    font-weight: 600;
    padding: 8px 16px;
    border-radius: 4px;
    text-decoration: none;
    transition: background 0.3s ease;
  }

  .custom-table a.view-button:hover {
    background-color: #32e9b0;
  }

  .rating {
    color: #f5a623;
    font-size: 16px;
    letter-spacing: 2px;
  }
</style>

<div class="custom-table-wrapper">
  <table class="custom-table">
    <thead>
      <tr>
        <th>#</th>
        <th>Image</th>
        <th>Product</th>
        <th>Rating</th>
        <th>Price</th>
        <th>View</th>
      </tr>
    </thead>
    <tbody>
      <tr>
        <td>1</td>
        <td><img src="https://riovizual.com/wp-content/uploads/2024/08/y68.png" alt="Y68 Smart Watch"></td>
        <td>Y68 Smart Watch</td>
        <td><span class="rating">★★★★☆</span></td>
        <td>$300</td>
        <td><a href="#" class="view-button">View on Alibaba</a></td>
      </tr>
      <tr>
        <td>2</td>
        <td><img src="https://riovizual.com/wp-content/uploads/2024/08/ks-smart.png" alt="Kieslect KS Smart Watch"></td>
        <td>Kieslect KS Smart Watch</td>
        <td><span class="rating">★★★★★</span></td>
        <td>$400</td>
        <td><a href="#" class="view-button">View on Alibaba</a></td>
      </tr>
      <tr>
        <td>3</td>
        <td><img src="https://riovizual.com/wp-content/uploads/2024/08/smart-watch.png" alt="Smart Watch"></td>
        <td>Smart Watch</td>
        <td><span class="rating">★★★★☆</span></td>
        <td>$300</td>
        <td><a href="#" class="view-button">View on Alibaba</a></td>
      </tr>
      <tr>
        <td>4</td>
        <td><img src="https://riovizual.com/wp-content/uploads/2024/08/xiomi.png" alt="Smart Watch"></td>
        <td>Smart Watch</td>
        <td><span class="rating">★★★☆☆</span></td>
        <td>$250</td>
        <td><a href="#" class="view-button">View on Alibaba</a></td>
      </tr>
      <tr>
        <td>5</td>
        <td><img src="https://riovizual.com/wp-content/uploads/2024/08/huawaei.png" alt="Huawei Smart Watch"></td>
        <td>Huawei Smart Watch</td>
        <td><span class="rating">★★★★☆</span></td>
        <td>$150</td>
        <td><a href="#" class="view-button">View on Alibaba</a></td>
      </tr>
    </tbody>
  </table>
</div>
Note: Before using this code, replace the sample content, such as text, images, star ratings, prices, and button links with your own data.
How to Use This Code in Oxygen Builder?
- Open the page or post with Oxygen Builder.
- Click the + icon in the left sidebar.
- Search for the Code Block element.
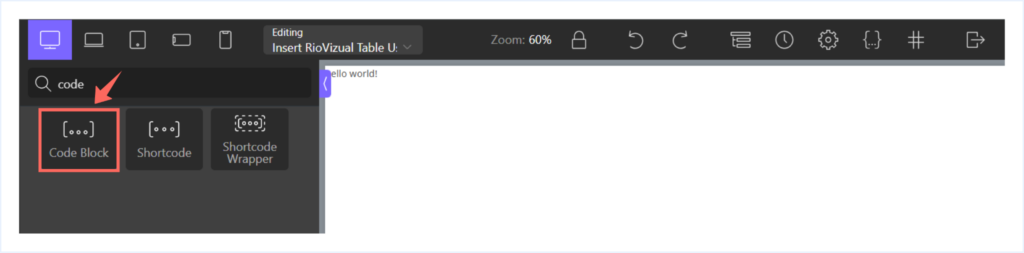
- Select PHP & HTML from the Primary tab.
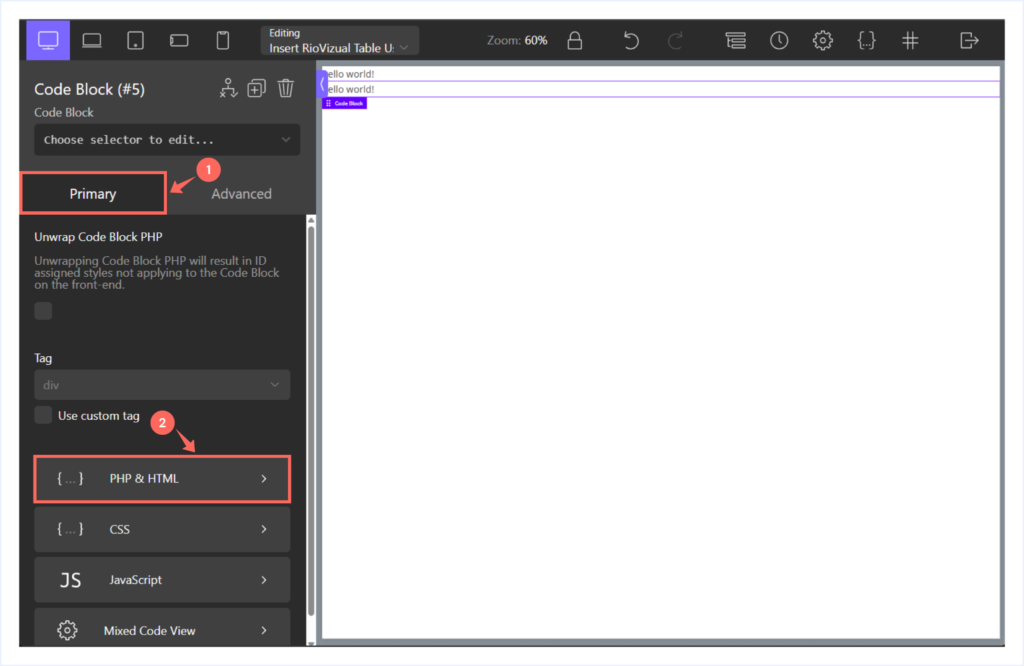
- Paste the HTML and CSS code into the code editor.

- Click Apply Code and save your changes.
The table will now appear on your page or post exactly as defined in the code.
Which Method Should You Apply?
In this guide, we covered the practical ways to create tables in Oxygen Builder. Each method works, but the right choice depends on how much time, control, and technical effort you are willing to invest.
Since you are using WordPress as your CMS, table creation should be only a few clicks away. WordPress is built on a strong plugin ecosystem, which exists to simplify tasks that would otherwise require custom code.
If your priority is speed, flexibility, and long-term scalability, using a dedicated table plugin like RioVizual is the most efficient approach.
Our Recommendations:
- Use an all-in-one table plugin like RioVizual to create any type of table.
- Use RioVizual’s pre-designed templates to speed up the table creation process.
- Build tables from scratch when you need full control over structure and styling.
Closing Thaught
In today’s fast-moving digital era, creating tables should take only a few clicks. This saves time and makes your workflow more scalable as your site grows.
Pairing an all-in-one table plugin with Oxygen Builder is a practical way to extend its capabilities and build any type of table your website needs without unnecessary complexity.
If you want to explore more options, this guide on Best WordPress Table Plugins will help you compare features and choose the right solution.
If you run into any issues while following this tutorial, or if you learned something useful from it, feel free to leave a comment. We always enjoy hearing your feedback.

Leave a comment