
Have you ever experienced the message “there has been a critical error on this website” while trying to access your site? It’s like arriving at a party only to find the door locked – confusing and a bit frustrating, right?
Confusing because there is no specific issue mentioned in the message, so, you don’t know what’s blunder you have made and what to tweak to fix this issue.
Well, fear not! Trust us, this critical error is not as daunting as it sounds. It’s a sign that something needs a little fixing behind the scenes, and that’s exactly what we’re here to discuss today.
In this blog, we are going to show you 7 proven tips to solve this critical error in WordPress sites in no time. So, without any further delay, let’s get started!
Why Does “There Has Been a Critical Error on This Website” Happen?
When you see “there has been a critical error on this website” that means the website you’re trying to visit is facing a serious problem that’s stopping it from working correctly.
It’s like a digital red flag, signaling that something important within the website’s system has gone wrong. This error message is commonly displayed when the website’s underlying code or components experience problems that make it impossible for the site to work as intended.
Let’s find out what causes the “there has been a critical error on this website” issue in your WordPress website:
- Buggy Code: Just like how a spelling mistake can make a sentence confusing, a mistake in the code can make your website super confused. Imagine a robot trying to follow messed-up instructions – it might end up doing a dance instead of making your coffee.
- Updates Gone Wrong: Websites often get updates, just like your phone. But sometimes, these updates can clash with the older stuff and cause a mess. It’s like trying to put a new puzzle piece in a spot where it doesn’t fit.
- Exhausted Server: Websites live on big computers called servers. Sometimes, these servers get exhausted or too busy. When this happens, the website might not be able to find the info it needs, leading to that website critical error message.
- Too Many Traffic: Imagine if too many people tried to squeeze into a small room – it would get crowded and chaotic. Websites can become overwhelmed when too many visitors come at once, causing errors.
- Plugins Conflict: If you are using outdated on incompatible plugins on your site, these could lead you to the website critical error message.
Now you know what a “there has been a critical error on this website” message means and what causes this problem. So, let’s jump into the solutions to solve this problem:
How to Fix “There Has Been a Critical Error on This Website” Issue- Quick Fixes
Now you know what does there has been a critical error on this website mean and why this critical error occurs in a WordPress site.
So, it’s time to find ways to tackle this issue. Here, we have listed 7 proven actions that will help you to solve this problem. At first, take a quick look at the list:
- Check If There is Any Faulty Plugin
- Switch Back to Your Default Theme
- Update to the Latest PHP Version
- Increase PHP Memory Limit
- Turn on WordPress Debug Mode
- Reinstall WordPress Core File
- Revert to a Previous Version of Your Site
Now we are going to discuss each of the above mentioned points in detail. So, let’s get started with the first solution!
Just a Heads up: Before applying these tips to solve your site’s critical issues, make sure you have taken a full backup of your site. This will help you recover your site with ease if anything unexpected happens to your site.
Step 01: Check If There is Any Faulty Plugin
If there is any faulty plugin installed on your WordPress site, it could cause the WordPress critical errors for you. To check whether the plugin is the main culprit or not, you have to deactivate all the installed plugins and then activate them one by one.
You can do it by navigating to your WordPress dashboard -> Plugins -> Installed Plugins. There you’ll find all your installed plugins.
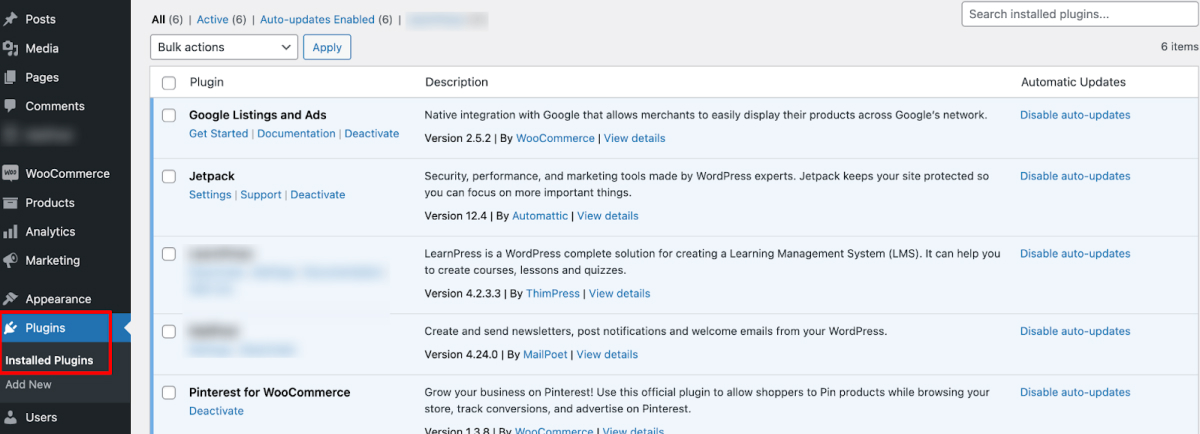
Now you have to deactivate them all and install them one by one. After installing each plugin, you should reload your browser to check if the problem is still there or disappeared.
If you find any faulty plugins, don’t forget to delete that plugin.
There is a shortcut to complete this process in a shorter time. Just go to your control panel and navigate to the File Manager -> public_html -> wp-content. There you’ll find the “Plugins” folder.
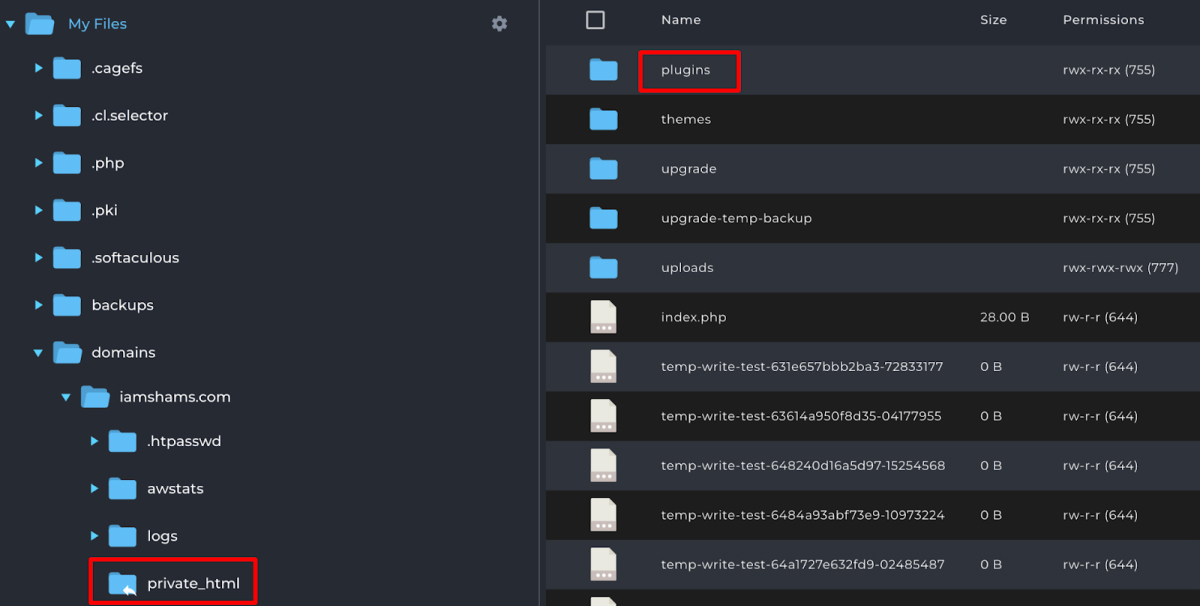
Rename the folder as you wish, e.g., “Plugins_deactivate”. This will deactivate all your installed plugins. Now, open up your web browser and refresh your website. If you still notice the issue, it shows that your plugins are not causing the problem. You can then change the plugin folder’s name back to what it was before and move on to the next solution.
However, if you observe that your website loads correctly and the critical error message is gone, it means one of your plugins was causing trouble. To find out which specific plugin is causing this trouble, you need to examine each plugin individually.
To do that, revert the name of your plugin folder back to its original name, which is usually “plugins.” Then, enter the folder and rename each plugin folder one by one. While doing this, keep checking your website in the browser to see if it runs without the critical error message.
After renaming each plugin folder one at a time, if you still see the same “there has been a critical error on this website” message, it indicates that this particular plugin folder is not to blame. You can change the folder’s name back to its original and proceed to the next plugin folder for further checking.
Following this method, if you identify the plugin folder causing the issue, you can safely delete that folder to fix the problem.
Step 02: Switch Back to Your Default Theme
If you are already using a WordPress default theme, you don’t need to follow this step. You can proceed to the next step. But if you are using any third-party theme, you should check if there is any problem with your theme.
To do that,
- Navigate to your WordPress dashboard -> Appearance -> Themes.
- There you’ll find the theme that you’re currently using.
- Activate the WordPress default theme which is Twenty Twenty Three while we are writing this article.
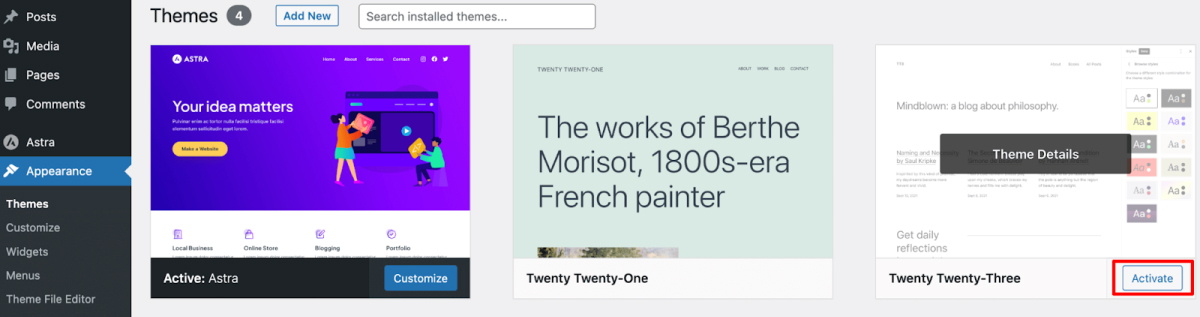
Now reload the browser to check whether the WordPress critical error message is gone or not. If your site loads without showing any issues, it means your theme is the culprit. So, delete the theme and install another one in case you don’t want to continue with the WordPress default theme.
Or, if the problem is still there, let’s jump to the next solution.
Step 03: Update to the Latest PHP Version
Using an outdated PHP version can cause you the “there has been a critical error on this website” issue.
To check which PHP version you’re currently using, go to your WordPress dashboard -> Tools -> Site Health, and click on the Info tab. Now scroll down a bit and you’ll find an option named “Server”. Click on that to check the PHP version of your site.

If it’s a backdated version (just Google it to know the latest version), follow the below steps to update your PHP to the latest version:
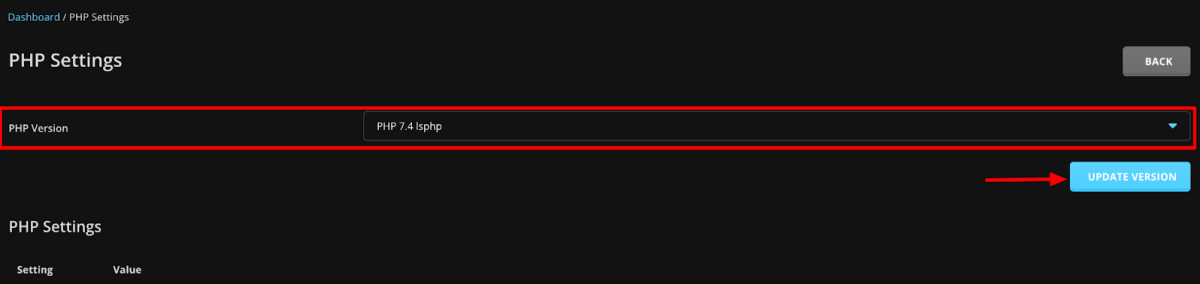
- Log in to your control panel
- Find the PHP settings
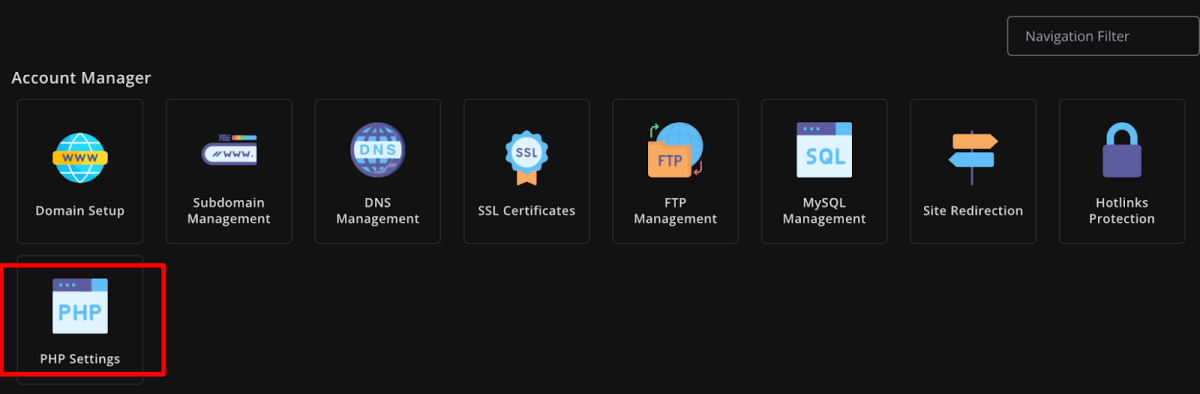
- Click on the PHP settings and choose the latest PHP version from the drop-down list
- Finally, press the Update Version to save the change.
Again you need to check if the problem has been solved or not by reloading your browser.
Step 04: Increase PHP Memory Limit
Usually, WordPress starts with a memory limit of 128 MB. If you raise this memory limit, it should fix the critical WordPress error when it happens because of not having enough memory.
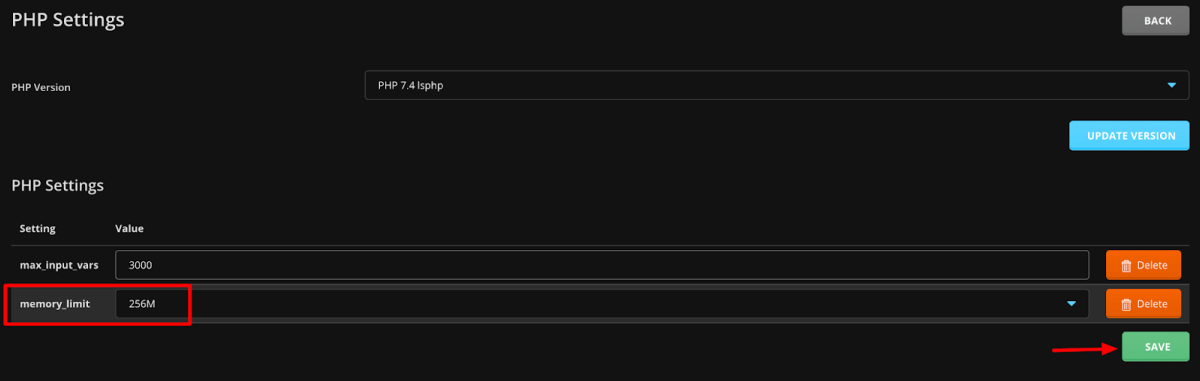
To increase your PHP memory limit, log in to your control panel and find the PHP settings. Click on that and you’ll find the “memory_limit” option.
Now increase the memory limit from the drop-down options and finally hit the Save button to store the change.
You can also increase your PHP memory limit by accessing the wp-config.php file.
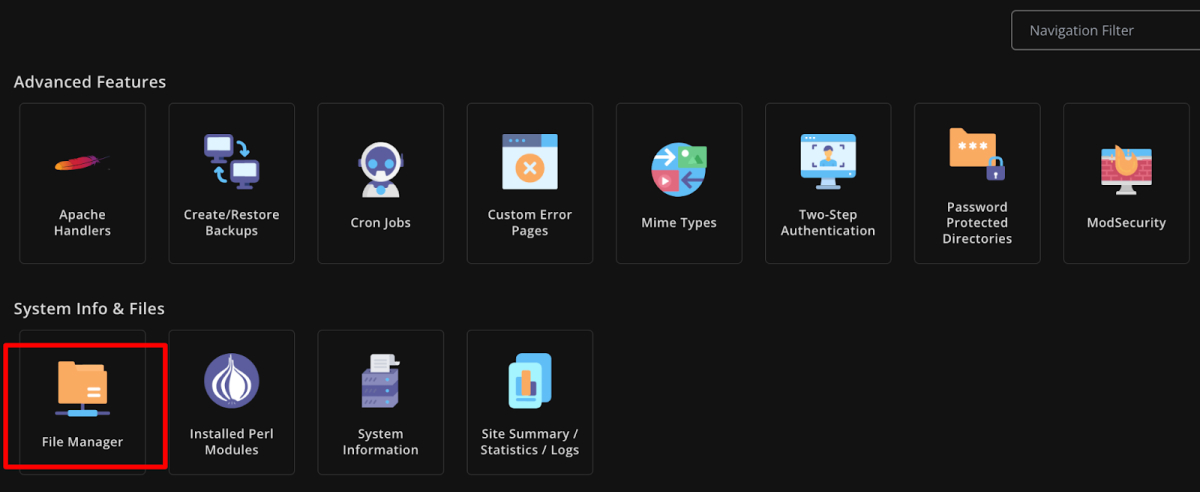
Log in to your control panel and find the “File Manager” option. Click on the File Manager option and you’ll be redirected to a new interface.
Now navigate to the public_html -> wpconfig.php file.
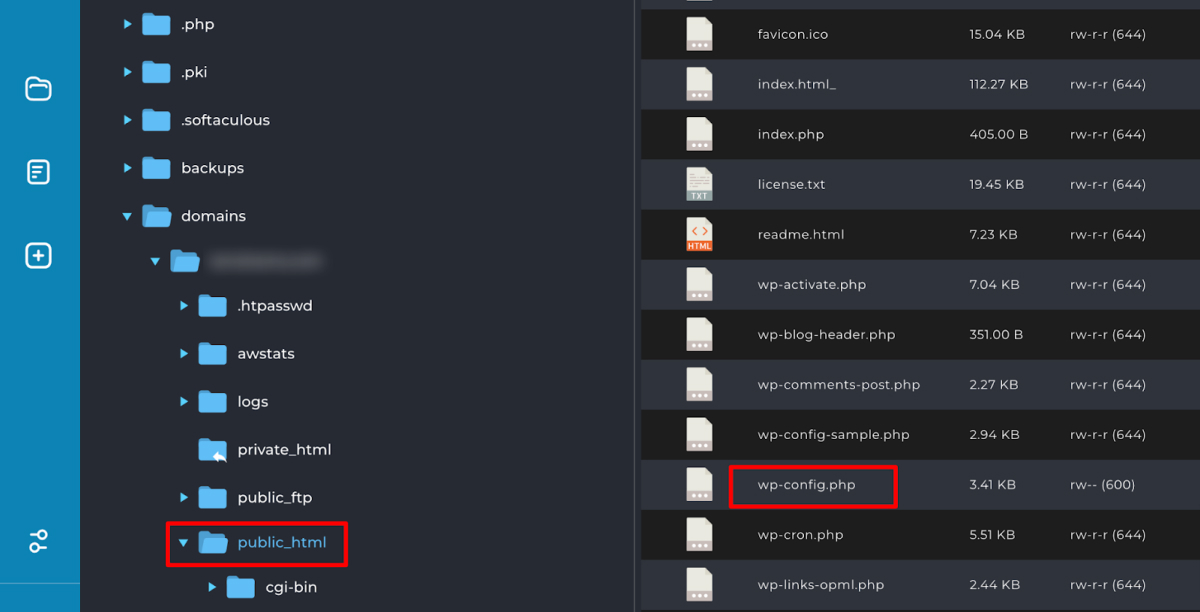
Click on the wp-config.php file to edit the file. Copy the below code and paste it into the file. Then save the file.
define( 'WP_MEMORY_LIMIT', '512M' );
Refresh your site to check if the problem still exists or not.
Step 05: Turn on WordPress Debug Mode
Debugging could be another WordPress website critical error solution. WordPress comes with a default debugging system that lets you check code errors in the core software, themes, and plugins.
To turn on the WordPress debug mode, access the wp-config.php file by navigating File Manager -> public_html from your control panel.
Open the wp-config.php file and find the code:
define( 'WP_DEBUG', false );
define( 'WP_DEBUG_DISPLAY', false );
define( 'WP_DEBUG_LOG', false );
define( 'SCRIPT_DEBUG', false );
The “false” values mean that WordPress debug mode is deactivated. Replace “false” with “true” on all lines to activate it.
If you don’t find these lines, just copy the code and paste it to your wp-config.php file.
define( 'WP_DEBUG', true );
define( 'WP_DEBUG_DISPLAY', true );
define( 'WP_DEBUG_LOG', true );
define( 'SCRIPT_DEBUG', true );
Then save the file and refresh your site.
If there is any error on your site, you’ll be able to check the error after reloading your site. This helps you to find out what is causing the problem so that you can fix it.
Step 06: Reinstall WordPress Core File
If your core WordPress file is corrupted, you may experience the “there has been a critical error on this website” issue. You can fix this problem by reinstalling the core WordPress file.
To replace your existing WordPress file, you have to download a fresh copy from WordPress official website. Just visit the site and there you’ll find the file to download for free.
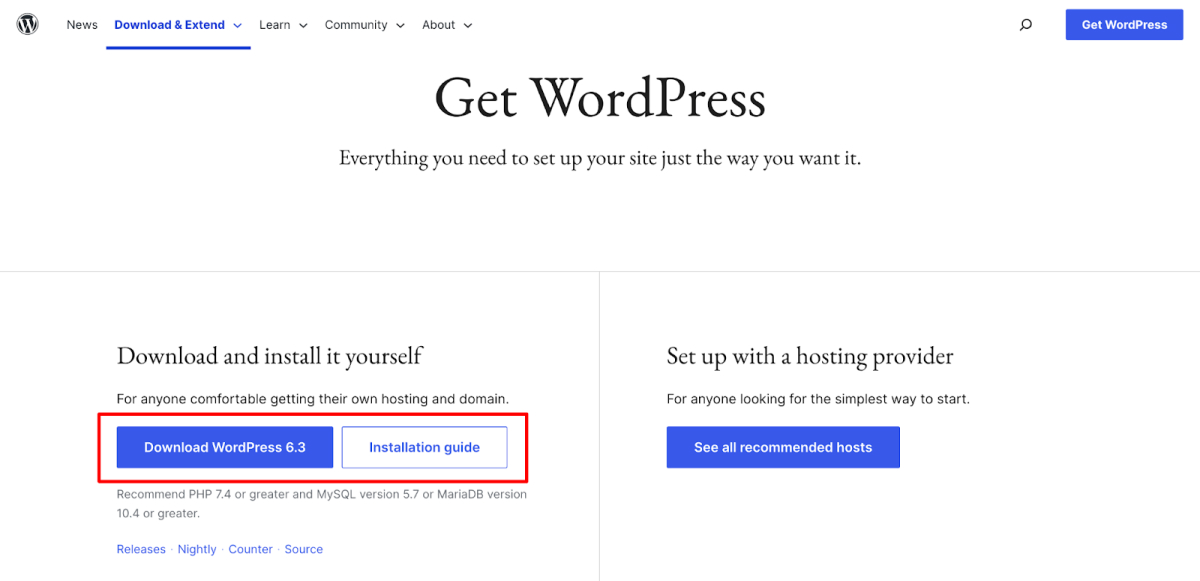
Once you’ve got the file, unzip the folder on your own computer. Next, remove the wp-config.php file and the wp-content folder.
You might be asking why we’re getting rid of these files. Well, by doing this, we avoid directly overwriting your existing stuff. That means your themes, plugins, and media files all stay put, including the important wp-config.php file that holds all your website settings.
Now, sign in to your control panel and use the File Manager option to upload the new WordPress file. This part needs more attention from you – a slip-up could mess up your site’s look and even make you lose data.
But, don’t worry too much. Remember, you’ve already taken a full backup of your site, so there’s a safety net. If something goes wrong, you’ve got a backup ready to get your site back on track.
Once the file is uploaded, go to your browser and refresh it to check if the problem has disappeared or not.
Step 07: Revert to a Previous Version of Your Site
This is the final solution we’ll discuss, but it’s certainly not the least effective. Do you currently use a WordPress backup plugin to regularly back up your website? If you don’t, there’s no need to be worried about it.
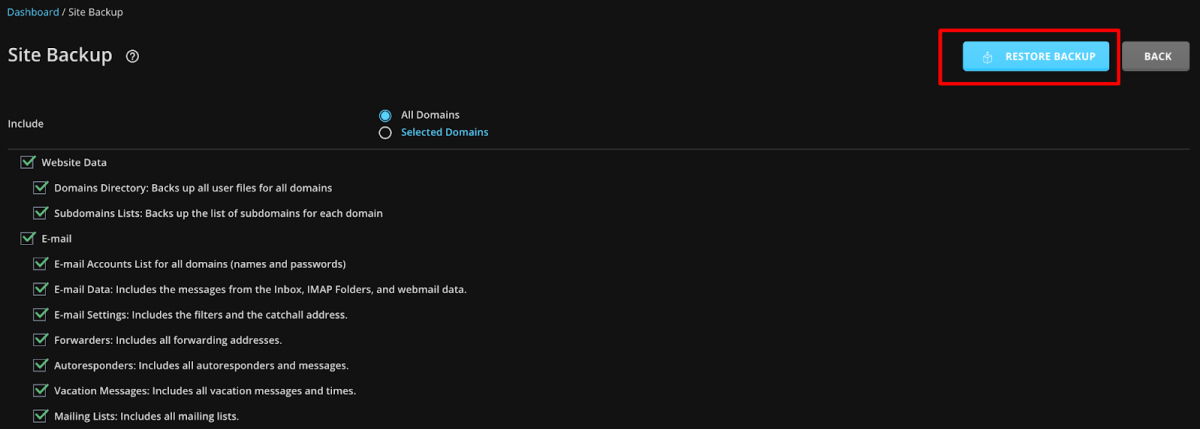
The majority of hosting providers include an automatic backup feature. Therefore, if you have a plugin, it will offer you access to prior versions of your website. However, if you haven’t installed a backup plugin, you can find the backups in your control panel.
Log in to your control panel and find the backup option. Then click on the “Restore Backup” option to revert to a previous version of your website.
Now go to your browser and reload your site. Hopefully, you won’t find the problem anymore.
How to Fix Critical Errors in WordPress- A Quick Recap for You
You are here which means you have read this article. Since you have come this far, so you know all the ways to fix critical errors in WordPress site. So, what are you waiting for?
If you are facing the “there has been a critical error on this website” issue, just roll up your sleeves and start solving this issue. Follow the 7 actionable tips that we have shared in this article, hopefully, you will solve this problem in no time.
That being said, if you have any further confusion regarding this topic, feel free to share it with us using the comment box below. We always appreciate feedback from our readers. Thank you!

Leave a comment