As a Divi user, you know it doesn’t have a table module. And while some Divi plugins add table functionality, they often lack things like table management (like create, edit, delete, reuse or view all tables from a single dashboard).
So what to do? Should you settle with the limitations?
Absolutely not!
You can try a dedicated table plugin like RioVizual, which offers advanced table elements, table management, extensive styling and responsiveness controls.
Not a fan of using plugins? No problem. You can also create custom tables using HTML and CSS right inside Divi.
In this guide, we’ll walk you through how to create tables in Divi with and without a plugin.
Let’s dive in!
Our Created Table Preview

Required Setup
- Latest version of WordPress is installed.
- Latest version of Divi installed and activated.
- RioVizual is installed and activated.
Approach 1: How to Create Table in Divi using RioVizual Plugin
RioVizual plugin will give you two different options to create and insert table in Divi site, including:
- Using template
- Or creating table from scratch
We are going to show you both methods with step by step instructions:
Method 1: How to Make a Table in Divi with Pre-made Template (Easy Way)
RioVizual has 67 free and premium templates in total. And today we are going to use one of them to show you the process:
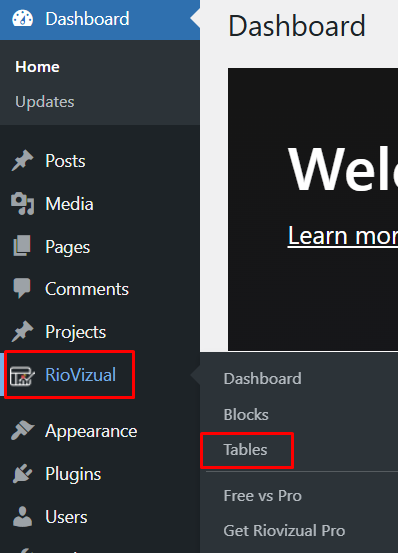
Step 1: Open RioVizual’s Dashboard
Click on RioVizual from WordPress dashboard’s left-side control panel. Then click on “Tables.”
Step 2: Navigate to the Table Creation Interface
Now click on “Create New Table,” give your table a name and click on “Create” (Keep “Synced” on to apply changes wherever the table will be added.)


Step 3: Choose a Pre-made Template
To access to template library, here are the steps to follow:
- Click on the page “+” icon

- Select “Table Builder” which will redirect you to the template library.

- Now scroll from top to bottom to browse all available templates.

- When you hover over any template you will see “import” and “Preview” options. Click Import of your chosen template to load the template into your table editor.

Step 4: Customize & Publish Your Table
After inserting the table template, customize the content and design using the block settings panel. Once you are happy with the design, click on “Publish”.

Step 5: Add Your Table to Divi Page or Post
Now that your table is ready, it’s time to use the table on your Divi page/post. To do so, you can follow two different ways:
- RioVizual’s Divi module
- Shortcode
Here is how to add the table using each method:
1. Using RioVizual’s Divi Module
- Open your page/post with Divi Builder
- Use your existing or add Section > Row > Module and search for “RioVizual” and add it

- Now click on the “Available Table” dropdown menu and select a table

When you select the table, it will instantly load in the preview area for you to review.
2. Using Shortcode
- Go to WordPress dashboard > RioVizual > Tables and copy the shortcode of the table you want to use.

- Next go to the page/post where you want to use the table and enable visual builder.
- Insert “Code” module and paste the code.


The shortcode will render your table on the front-end of your website. Now save and publish your page/post.

Method 2: How to Create a Table In Divi from Scratch
While using templates is easy, you can also create a table completely from scratch. In this method, we will build the same table shown in Method 1 by starting from the ground up.
Here are the steps you can also follow to do so:
Step 1: Create Your Table Structure
Start with defining your table column and row and here is how to do it:
- Go to WordPress dashboard > RioVizual > Tables
- Click on “Create New Table”
- Give your table a name and keep the “Synced” on. Then click on “Create”
- Click on “+” icon and select “Table Builder”
- Select “Builder From Scratch”

- Toggle on “Header section” and take 5 columns and 6 rows. Then click “Create Table”

Step 2: Add Content to the Table
After creating the structure, it’s time to add data to the table. Our demo table design has 5 columns (image, product name, feature list, price and view).
We will show how to add all these in the following steps:
2.1: Add Header Information
Simply Click on each heard cell and input data accordingly.

2.2: Add Image
- Click the “+” icon in a cell under the Image column and select “Image”

- Then click on “Upload or Media Library” add your image to the cell

By repeating the same steps, add images to all cells under the Image column.
2.3: Add Product Name
Click on each cell under the Product column and enter all the product names one by one.

2.4: Add Feature List
- To add a feature list, click the “+” icon inside a cell under the “Features” column, then select “List”.

- Add the first list item and then press enter to add more features

By following the same steps, add all the feature lists for each product in their respective cells.
2.5: Add Product Price
Click on each cell in the Price column and enter the corresponding price for each product.

2.5: Add Button
- To add a button, click the “+” icon in a cell under the “View” column, then select “Button”.

- Then click on the button to add your text

By following the same steps, add a button to each product row in the View column.
Step 3: Style and Customize Your Table
Our demo design has tons of style customization settings for the overall table and all its elements. We will show you how to adjust these settings:
3.1: Style Header
- To style the header, click the row selector to select the entire row. (Hover over the first row’s left edge and click the selector)

- Then go to Style > Cell > Custom from the settings penal and then make the following changes:
- Background > Background Color: FFD56C
- Border > Border Color: FFD56C
- Spacing > Padding: 12 (top, right, bottom and left)

3.2: Customize Image
Click an image, then go to Style > Image > Global > Sizing > Width and set it to 100px.

Note: When you select the Global option from the settings, it will apply the width change to all images in the table uniformly.
3.3: Customize Text
Click any cell in the “Product” column to customize the text. Then go to Style > Text > Global and then make the following changes:
- Typography > Font Weight: 800
- Alignment: Middle

Note: These changes apply to all table text, including the Price column.
3.4: Customize List Items
To customize the text items, click on any list time and then go to Style > List > Global and make the following changes:
- Gap: 3
- Color: 141414
- Typography: Font Size 15
The feature list column also has a different color from the whole table columns. And here is how to apply the different color:
- Click shift and then select all the cells in the feature column
- Then go to Style > Cells > Custom and make these changes:
- Background > Background Color: FFFCF5
- Sizing > Width: 300

3.5: Style Button
To style and customize all the button in the table, click on any button in the table, then go to Style > Button > Global, then make the following changes:
- Color: 000000
- Background > Background Color: FFFCF500
- Typography > Font Size: 15
- Border:
- Border Radius: 4 (top, right, bottom and left)
- Border Width: 1
- Border Color: FFD56C
- Spacing: 12 (top and bottom), 20 (right and left)

3.6: Customize Cell Settings
You have to make the following changes to the cell setting. For that, navigate to Style > Cell > Global and then:
- Background > Background Color: FFFFFF
- Border > Border Color: F7F7F7
- Spacing > Padding: 20 (top, right, bottom and left)

All the button has a hover effect and here is how to add it:
- Click on “desktop” icon from the setting panel and select “Hover”

- Click on Style > Button > Global and then make the following changes:
- Color: 000000
- Background > Background Color: FFD56C
- Typography > Font Size: 6
- Border > Border Color: 000000

Step 4: Save or Publish the Table
Once you have followed all the steps, your table should closely match our demo design. Now just save or publish the page/post.
You can now embed the table using either the RioVizual block or its shortcode. For a reminder on how to use these two methods, refer back to Method 1, Step 5.
Note: For a responsive table Divi setup, adjust column width, padding, and font size using the responsive settings in the Style panel.
Approach 2: How to Add Table in Divi Without Plugin (Not Beginner-friendly)
To build a table similar to our demo design without using a plugin, you will need to write custom HTML and CSS. Then, insert the code into a Divi Code module on your page or post.
Here is how to do it:
Step 1: Create the HTML and CSS Code (Use the demo code below. IIt matches our demo table design.)
<table border="1" cellpadding="12" cellspacing="0" style="border-collapse: collapse; width: 100%; font-family: Inter, sans-serif;">
  <thead style="background-color: #ffd56c; text-align: center;">
    <tr>
      <th style="padding: 12px;">Image</th>
      <th style="padding: 12px; width: 100px;">Product</th>
      <th style="padding: 12px; width: 200px;">Features</th>
      <th style="padding: 12px;">Price</th>
      <th style="padding: 12px;">View</th>
    </tr>
  </thead>
  <tbody>
    <tr style="background-color: #ffffff;">
      <td style="text-align: center; padding: 20px;">
        <img src="https://riovizual.com/wp-content/uploads/2024/08/apple-iphone-14.jpg" alt="iPhone 14" width="100" />
      </td>
      <td style="padding: 20px; width: 100px; font-weight: 600; text-align: center;">
        <strong>iPhone 14</strong>
      </td>
      <td style="background-color: #fffcf5; padding: 20px; width: 200px;">
        <ul style="font-size: 15px; color: #141414; margin: 0; padding-left: 20px;">
          <li>6.1-inch Super Retina XDR</li>
          <li>A15 Bionic chip</li>
          <li>Dual 12MP cameras</li>
        </ul>
      </td>
      <td style="padding: 20px; font-weight: 600; text-align: center;">$799</td>
      <td style="padding: 20px; text-align: center;">
        <a href="#" style="font-size: 15px; color: #000; background-color: transparent; border: 1px solid #ffd56c; border-radius: 4px; padding: 12px 20px; text-decoration: none; display: inline-block;">View on Amazon</a>
      </td>
    </tr>
    <tr style="background-color: #ffffff;">
      <td style="text-align: center; padding: 20px;">
        <img src="https://riovizual.com/wp-content/uploads/2024/08/samsung-galaxy-s23-5g.jpg" alt="Samsung Galaxy S23" width="100" />
      </td>
      <td style="padding: 20px; width: 100px; font-weight: 600; text-align: center;">Samsung Galaxy S23</td>
      <td style="background-color: #fffcf5; padding: 20px; width: 200px;">
        <ul style="font-size: 15px; color: #141414; margin: 0; padding-left: 20px;">
          <li>6.1-inch Dynamic AMOLED 2X</li>
          <li>Snapdragon 8 Gen 2</li>
          <li>50MP main camera</li>
        </ul>
      </td>
      <td style="padding: 20px; font-weight: 600; text-align: center;">$799</td>
      <td style="padding: 20px; text-align: center;">
        <a href="#" style="font-size: 15px; color: #000; background-color: transparent; border: 1px solid #ffd56c; border-radius: 4px; padding: 12px 20px; text-decoration: none; display: inline-block;">View on Amazon</a>
      </td>
    </tr>
    <tr style="background-color: #ffffff;">
      <td style="text-align: center; padding: 20px;">
        <img src="https://riovizual.com/wp-content/uploads/2024/08/google-pixel7-new.jpg" alt="Google Pixel 7" width="100" />
      </td>
      <td style="padding: 20px; width: 100px; font-weight: 600; text-align: center;">Google Pixel 7</td>
      <td style="background-color: #fffcf5; padding: 20px; width: 200px;">
        <ul style="font-size: 15px; color: #141414; margin: 0; padding-left: 20px;">
          <li>6.3-inch OLED</li>
          <li>Google Tensor G2</li>
          <li>50MP wide + 12MP ultra-wide cameras</li>
        </ul>
      </td>
      <td style="padding: 20px; font-weight: 600; text-align: center;">$599</td>
      <td style="padding: 20px; text-align: center;">
        <a href="#" style="font-size: 15px; color: #000; background-color: transparent; border: 1px solid #ffd56c; border-radius: 4px; padding: 12px 20px; text-decoration: none; display: inline-block;">View on Amazon</a>
      </td>
    </tr>
    <tr style="background-color: #ffffff;">
      <td style="text-align: center; padding: 20px;">
        <img src="https://riovizual.com/wp-content/uploads/2024/08/oneplus-11.jpg" alt="OnePlus 11" width="100" />
      </td>
      <td style="padding: 20px; width: 100px; font-weight: 600; text-align: center;">OnePlus 11</td>
      <td style="background-color: #fffcf5; padding: 20px; width: 200px;">
        <ul style="font-size: 15px; color: #141414; margin: 0; padding-left: 20px;">
          <li>6.7-inch AMOLED</li>
          <li>Snapdragon 8 Gen 2</li>
          <li>50MP main camera</li>
        </ul>
      </td>
      <td style="padding: 20px; font-weight: 600; text-align: center;">$699</td>
      <td style="padding: 20px; text-align: center;">
        <a href="#" style="font-size: 15px; color: #000; background-color: transparent; border: 1px solid #ffd56c; border-radius: 4px; padding: 12px 20px; text-decoration: none; display: inline-block;">View on Amazon</a>
      </td>
    </tr>
    <tr style="background-color: #ffffff;">
      <td style="text-align: center; padding: 20px;">
        <img src="https://riovizual.com/wp-content/uploads/2024/08/xiaomi-redmi-13-.jpg" alt="Xiaomi 13" width="100" />
      </td>
      <td style="padding: 20px; width: 100px; font-weight: 600; text-align: center;">Xiaomi 13</td>
      <td style="background-color: #fffcf5; padding: 20px; width: 200px;">
        <ul style="font-size: 15px; color: #141414; margin: 0; padding-left: 20px;">
          <li>6.36-inch AMOLED</li>
          <li>Snapdragon 8 Gen 2</li>
          <li>50MP Leica main camera</li>
        </ul>
      </td>
      <td style="padding: 20px; font-weight: 600; text-align: center;">$749</td>
      <td style="padding: 20px; text-align: center;">
        <a href="#" style="font-size: 15px; color: #000; background-color: transparent; border: 1px solid #ffd56c; border-radius: 4px; padding: 12px 20px; text-decoration: none; display: inline-block;">View on Amazon</a>
      </td>
    </tr>
  </tbody>
</table>
Step 2: Open the Divi Builder
Edit the page or post where you want to place the table using Divi Builder.
Step 3: Add a Code Module
Inside any section or row, insert a Code module.

Step 4: Paste Your Code
Paste your HTML and CSS code inside the Code module.

Step 5: Customize the Content
- Replace demo images, product names, features, prices, and buttons with your actual data.
- Adjust styling (colors, fonts, spacing, etc.) if needed.
Step 6: Save and Preview
Click Save, then preview your page to see how the table looks.
Note: Divi table without plugin is flexible, but best suited for users comfortable with coding.
Preview of Our Created Table
Have a look at the preview of table that we created in Divi with and without a plugin:

Closing Thoughts
In this how to create table in Divi guide, we tried to show every possible way to create table with Divi. From with and without a plugin, we included every method that anyone can follow. To simplify the process, we added clear screenshots for every step.
Now it’s up to you that you choose the method that best fits your needs.
If you still need expert recommendations, we suggest using a plugin like RioVizual. Its advanced and versatile feature set allows you to build different types of tables like pricing as well as pros and cons tables.

Leave a comment