
Have you ever encountered the dreaded WordPress HTTP error when trying to upload images? A variety of factors, such as insufficient memory, incorrect file permissions, or a conflict with a plugin or theme can cause it.
We know this HTTP error when uploading images can be a real mood spoiler, but we’ve got your back. In this step-by-step tutorial, we’ll hold your hand and walk you through the most common solutions to fix this error.
So, get ready with your website and start following the fixes that we are going to show you. Keep reading!
What Causes the HTTP Error in WordPress?
The “HTTP Error” in WordPress can be a frustrating roadblock when uploading images, but understanding its underlying causes is the first step toward solving the issue.
Here are the most common factors that can trigger this error:
- File Size and Format: If your image file is too large or in an unsupported format, WordPress may fail to process it, and as a result shows this error message.
- Server Limitations: Some web hosts impose restrictions on file uploads, including maximum file sizes and execution times. If your image surpasses these limits, an HTTP error can occur.
- PHP Memory Limit: WordPress relies on PHP to manage server-side operations. If your server’s PHP memory limit is exceeded during the image upload process, you might encounter an HTTP error.
- Folder and File Permissions: Incorrect folder and file permissions can lead to upload problems. Ensure that the directory where you’re uploading images has the right permissions to allow WordPress to create and store files.
- Plugin or Theme Conflict: Sometimes, plugins or themes can clash with the image upload process and show you the HTTP error.
- Corrupted .htaccess File: A corrupted .htaccess file can interfere with the upload process. Renaming or regenerating your .htaccess file can be a quick fix if it’s the culprit.
These are the main reasons behind seeing this HTTP error when uploading images to your WordPress website. Now let us show you the proven ways to tackle this issue!
7 Ways To Fix WordPress HTTP Error When Uploading Images
Seeing the HTTP error when uploading images to your WordPress website is really frustrating. However, you can easily solve this problem by following some DIY tasks.
In this segment, we are going to discuss the 7 proven ways to fix WordPress HTTP error when uploading images. First, take a quick look at the list:
- Refresh Your Browser
- Rename the Image File
- Resize the Image and Re-upload
- Increase PHP Memory Limit
- Make GD Library Your Default Image Editor
- Edit the .htaccess File
- Update the PHP Version
Now let’s dive into the deep!
Note: Don’t forget to take a full backup of your WordPress site before making any changes to your site. In this tutorial, we are going to edit a few crucial files of your site like the .htaccess file and PHP file. So, you must ensure a backup of your site first, then follow this tutorial. It will help you to fully recover your site if anything bad happens mistakenly.
Solution 01: Refresh Your Browser
Refreshing your browser is the first solution because it is the simplest and easiest thing to try. Sometimes, an HTTP error can be caused by a temporary glitch with your browser. Refreshing the page can clear the glitch and fix the problem.
Refreshing a browser is very easy. If you are a Windows user, simply click the F5 button and it will get refreshed.
And if you are a macOS user, you should click the “Command+R” to refresh your browser. After refreshing your browser, check if the HTTP error has disappeared or not. If the problem doesn’t disappear, jump to the next solution!
Solution 02: Rename the Image File
Renaming the image file is another simple solution that you can try to fix an HTTP error when uploading images to WordPress. Sometimes, the error can be caused by a conflict with another file on your server. Renaming the image file can help to prevent this conflict and fix the problem.
To rename the image file, simply right-click on the file and select Rename. Then, enter a new name for the file and click Enter.
When renaming the image file, be sure to avoid using any special characters, such as spaces, commas, or apostrophes. You should also use a descriptive name for the file, so that you can easily identify it later.
Once you have renamed the image file, try uploading it to WordPress again. If the error persists, you should proceed to the next solution.
Solution 03: Resize the Image and Re-upload
Resizing the image and re-uploading it is another solution that you can try to fix an HTTP error when uploading images to WordPress. Sometimes, the error can be caused by the image file being too large. Resizing the image can make it smaller and easier for WordPress to upload.
The most convenient way to resize an image is to use the online free image optimizer – TinyPNG.
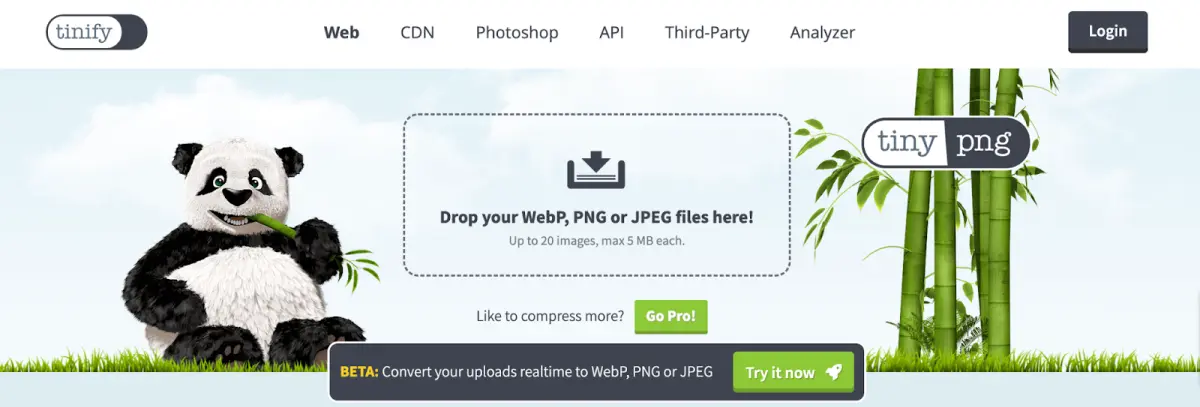
Just upload the image and it will automatically optimize your image. Then download the image and re-upload it to avoid the WordPress HTTP error.
Solution 04: Increase PHP Memory Limit
Another cause for the WordPress HTTP error is that your server lacks the available memory for the background upload process to complete successfully. This is a very common problem with shared WordPress hosting.
To increase the PHP memory limit, you need to edit your wp-config.php file. This file is located in the root directory of your WordPress installation.
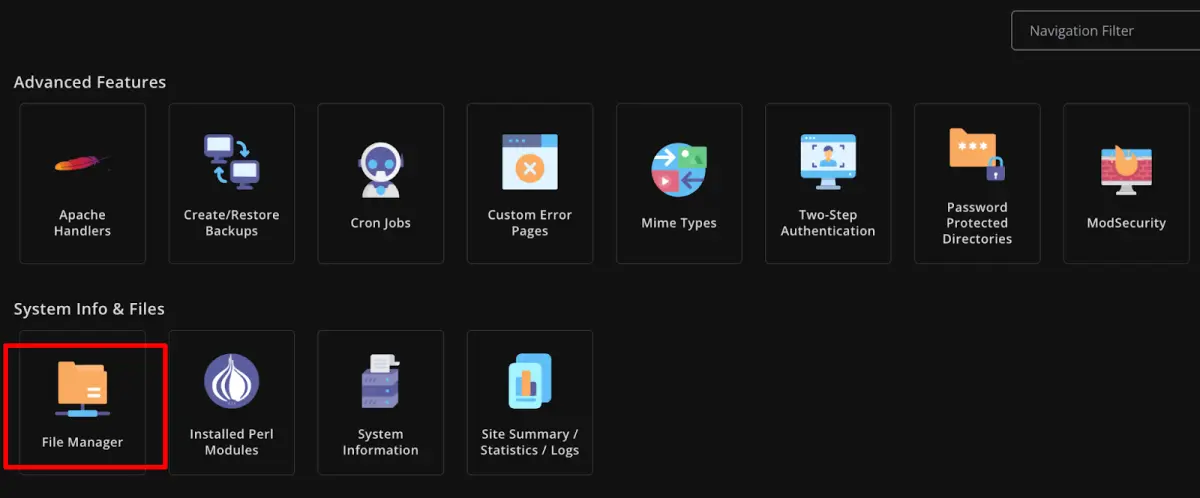
Log in to your control panel and find the “File Manager” option. Click on the File Manager option and you’ll be redirected to a new interface.
Now navigate to the public_html -> wpconfig.php file.
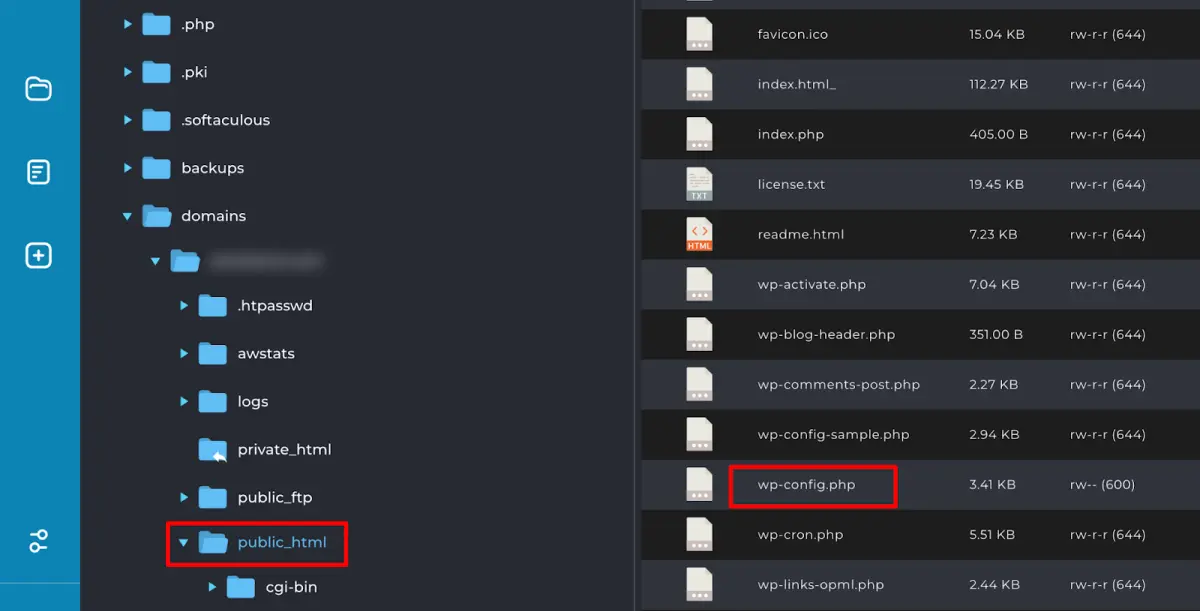
Click on the wp-config.php file to edit the file. Copy the below code and paste it into the file. Then save the file.
define( ‘WP_MEMORY_LIMIT’, ‘512M’ );
To increase the memory limit, simply change the value of the WP_MEMORY_LIMIT constant to a higher value, such as 512M or 1024M.
That’s it!
There is another way to increase the PHP memory limit.
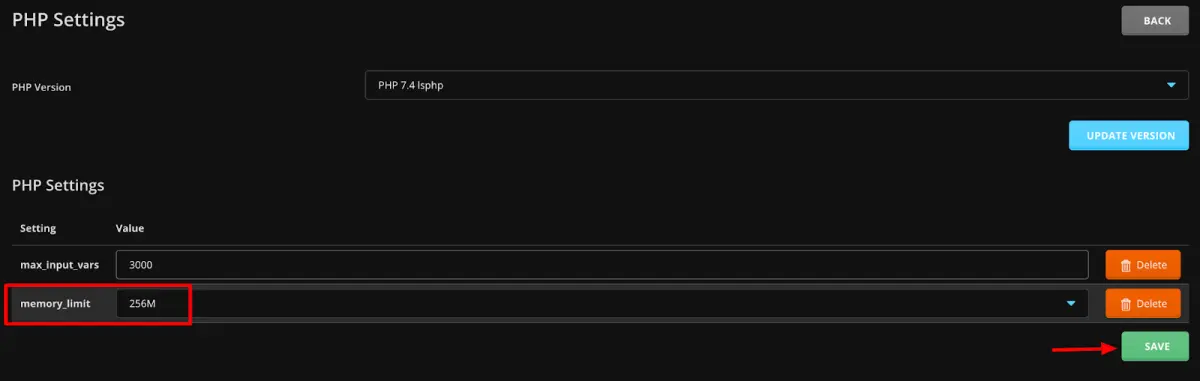
To do this, log in to your web hosting control panel and find the PHP settings. Click on that and you’ll find the memory_limit option.
Now, increase the memory limit from the drop-down options. A good starting point is to increase it to 256 MB. If you’re still seeing errors, you can try increasing it further.
Once you’ve increased the memory limit, click the Save button to store the change.
That’s all!
Now try to upload the image and hopefully, you won’t face the HTTP error anymore. That being said, if the problem is still there, try the next solution.
Solution 05: Make GD Library Your Default Image Editor
The GD Library is a critical part of WordPress, and it is essential for the proper functioning of many WordPress features, such as the media library, the image editor, and the theme customizer.
A GD library in WordPress takes care of several things:
- When you upload an image to your WordPress media library, the GD Library is used to resize the image and create thumbnails.
- When you use the WordPress image editor to crop or resize an image, the GD Library is used to make the changes to the image.
- When you use a WordPress theme that includes a custom image header or background, the GD Library is used to display the image at the correct size and resolution.
If the GD Library is not enabled on your server, you may experience the HTTP error when uploading images.
To solve this issue, you need to edit your functions.php file. This file is located in the themes directory of your WordPress installation.
Log in to your control panel and navigate to File Manager -> public_html -> wp-content -> themes -> your activated theme name and find the functions.php file.
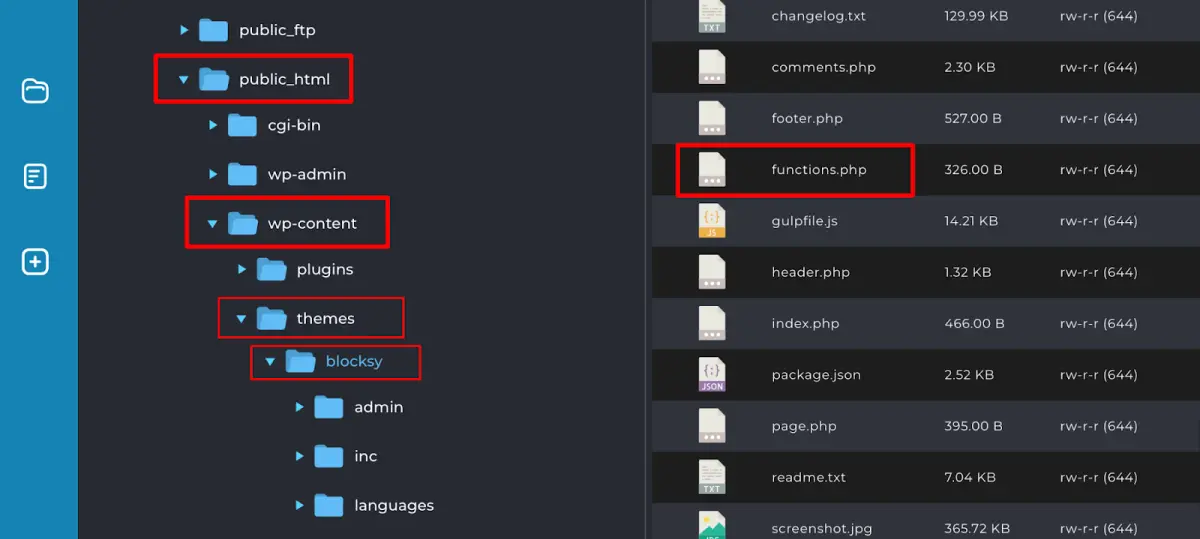
Once you have opened the functions.php file, add the following code at the end of the file:
function hs_image_editor_default_to_gd( $editors ) {
$gd_editor = ‘WP_Image_Editor_GD’;
$editors = array_diff( $editors, array( $gd_editor ) );
array_unshift( $editors, $gd_editor );
return $editors;
}
add_filter( ‘wp_image_editors’, ‘hs_image_editor_default_to_gd’ );
This code will force WordPress to use the GD Library as the default image editor.
Once you have added the code, save the functions.php file and try to upload the image again. If the HTTP error persists, revert the code change and try the next solution.
Solution 06: Edit the .htaccess File
Editing the .htaccess file is a more technical solution to the WordPress HTTP error when uploading images. However, it can be effective if the other solutions have not worked.
The .htaccess file is a configuration file that is used by Apache web servers. It can be used to control a variety of settings, such as redirects, caching, and security.
To edit the .htaccess file, log in to your control panel and navigate to File Manager -> public_html to find the .htaccess file.
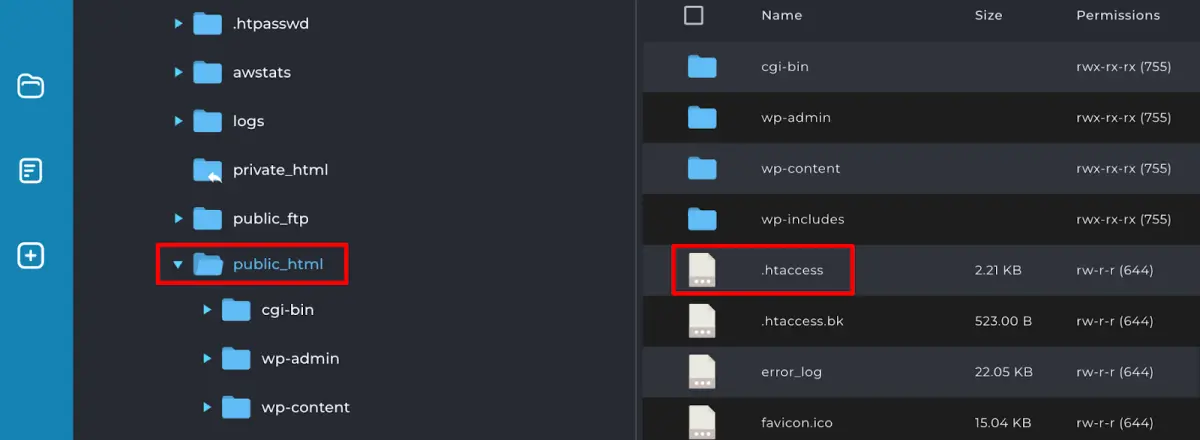
Now open the .htaccess and add the following code:
SetEnv MAGICK_THREAD_LIMIT 1
Once done, attempt to add your file again to see if the issue was fixed. If it did not work, there are a few more code snippets that you can test:
<IfModule mod_security.c>
SecFilterEngine Off
SecFilterScanPOST Off
</IfModule>
or
# Exclude the file upload and WP CRON scripts from authentication
<FilesMatch “(async-upload\.php|wp-cron\.php|xmlrpc\.php)$”>
Satisfy Any
Order allow,deny
Allow from all
Deny from none
</FilesMatch>
Try implementing them individually, save the changes and upload your media file once again. If the problem hasn’t already disappeared, jump to the next solution.
Solution 07: Update the PHP Version
Using an outdated PHP version can cause you the WordPress HTTP error issue.
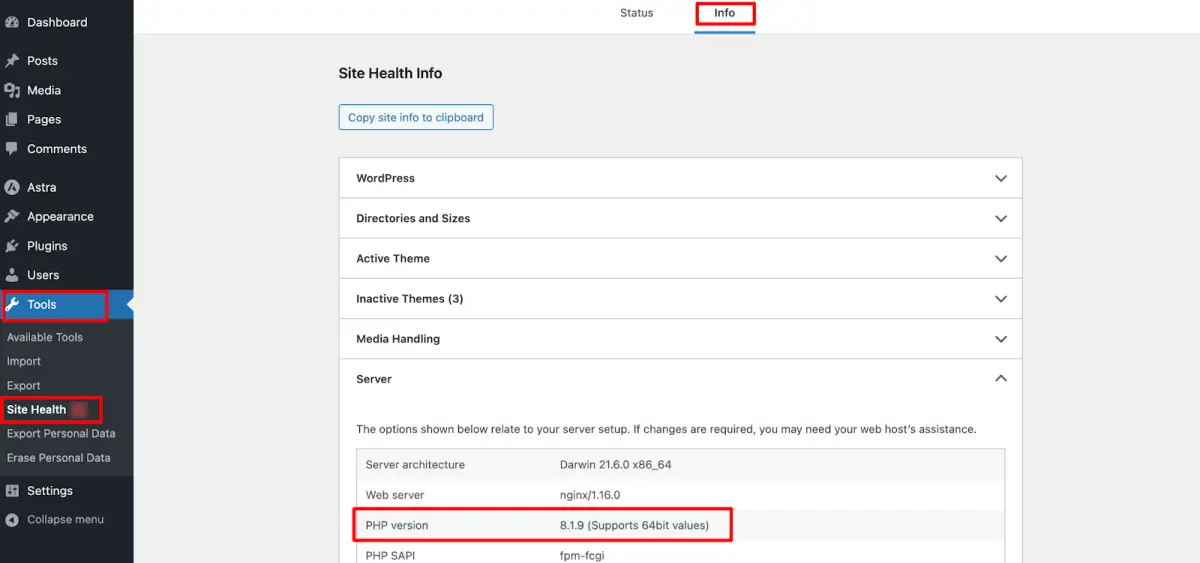
To check which PHP version you’re currently using, go to your WordPress dashboard -> Tools -> Site Health, and click on the Info tab. Now scroll down a bit and you’ll find an option named “Server”. Click on that to check the PHP version of your site.
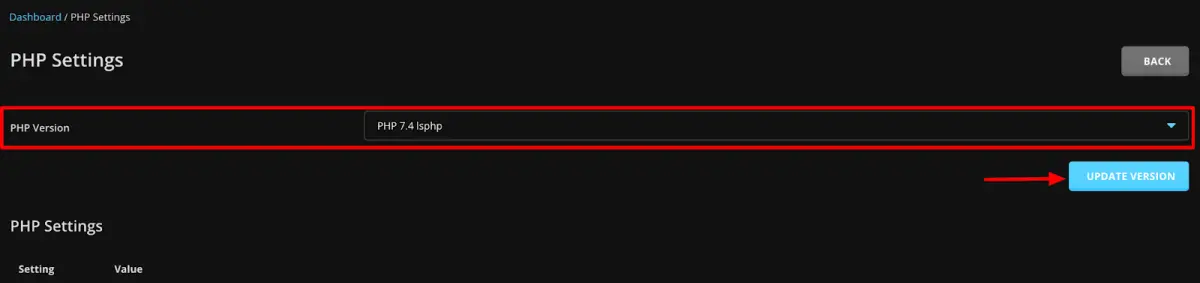
If it’s a backdated version (just Google it to know the latest version), follow the below steps to update your PHP to the latest version:
- Log in to your control panel
- Find the PHP settings
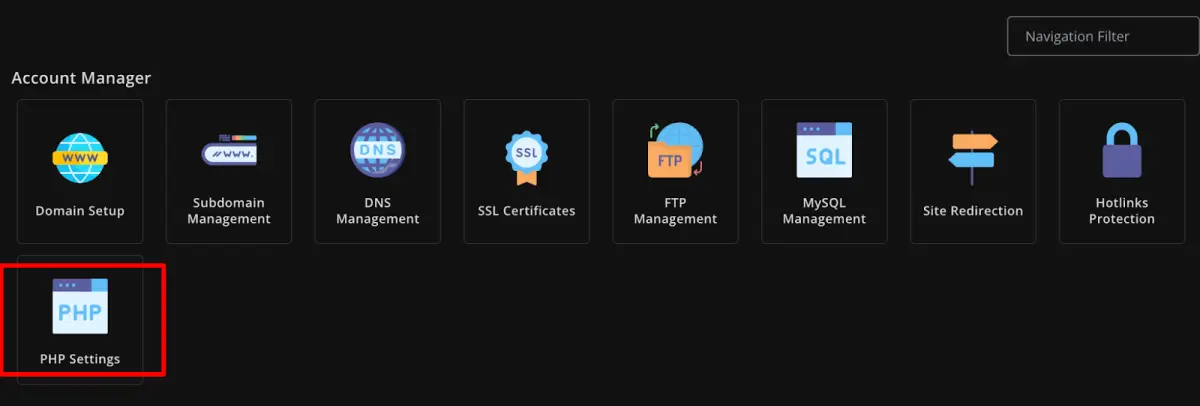
- Click on the PHP settings and choose the latest PHP version from the drop-down list
- Finally, press the Update Version to save the change.
Now try to upload the image again and hopefully, you won’t see the WordPress HTTP error anymore.
Best Practices to Avoid the WordPress HTTP Error When Uploading Images
Follow these 5 tips to avoid the WordPress HTTP error in the future:
- Optimize Image Size: Uploading large images can strain server resources and slow down your website. Before uploading, make sure you have optimized the image size using an image-optimizing tool.
- Choose the Right File Format: Stick to commonly supported image formats like JPEG, PNG, and GIF. These formats are more likely to upload without issues. Avoid uncommon or proprietary formats.
- Avoid Special Characters: When naming your image files, use only lowercase letters, numbers, hyphens, and underscores. Avoid spaces and special characters in file names, as these can cause problems during the upload process.
- Update Your Plugins and Themes: Keep your WordPress core, plugins, and themes up to date. Many HTTP errors are caused by outdated software that is incompatible with the latest WordPress version.
- Ensure an Increased PHP Memory Limit: Ensure that your WordPress hosting provider has enough PHP memory allocated to your account. The PHP memory limit can be increased by adding a line of code to your wp-config.php file. We have already shown you how to do that in this article.
Now It’s Your Turn
We have shown you what is the WordPress HTTP error when uploading images and the reasons behind it. We have also shown you 7 ways to solve this problem all by yourself without hiring any expert.
Was that tough? Nope, right?
So, whenever you are facing the WordPress image not uploading error, just follow this tutorial to get rid of the situation.
That’s all from our side. Now it’s your turn. Do let us know your feedback regarding this tutorial. You can share anything using the comment box below. We always appreciate our readers’ feedback. Take care!

Leave a comment