With over 43.6% of all websites, Gutenberg has transformed WordPress with easy drag-and-drop functions for any screen size without coding.
Unlike the Classic Editor, with a single text box, Gutenberg offers advanced block-based editing features with live previews and even custom styling options.
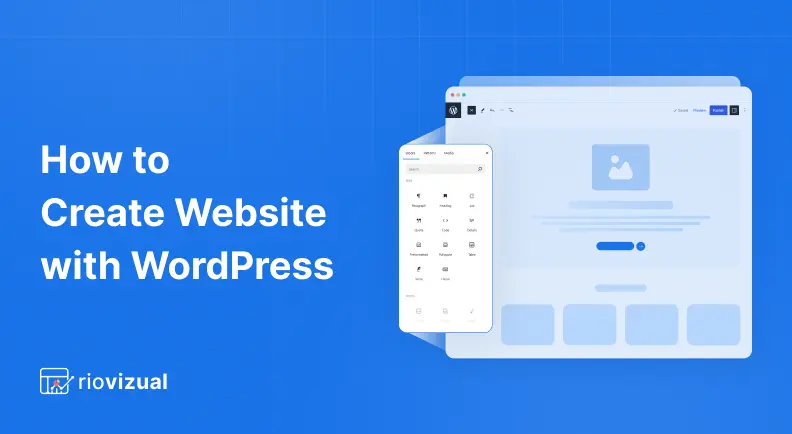
In this guide, we’ll walk you through the complete process of how to create a website with Gutenberg.
Here, you’ll learn everything from wordpress installation to add website blocks for optimizing your website design to make a polished, professional-looking website effortlessly.
Prerequisites
Before you start creating a website with Gutenberg, you need:
- A domain: When choosing a domain name for your website, the most preferred option is usually a .com extension. It’s the most widely recognized and trusted by users across the globe for any general-purpose website.
However, other domain extensions also depend on the nature of your website.
For example, .org is commonly used for non-profits or open-source projects, niche-specific extensions like .shop for eCommerce, or country-code domains like .uk, .ca can signal local relevance.
- Web hosting: For web hosting, always ensure your hosting provider includes an SSL certificate for security, regular backups, DDoS protection.
Here are the two best platforms that provide both domain registration and web hosting services:
- NameCheap: Starts at $2.88/month (Best Deal for all business)
- GoDaddy: Starts at $6.99/month (Beginners, small businesses)
Once you have the perfect domain and hosting plan, let’s jump into the steps.
Step 1: Install WordPress
The first step of creating a WordPress website is to install WordPress on your hosting server. Many hosting providers, including Namecheap and GoDaddy, offer one-click WordPress installation with the C panel.
So, you can easily install WordPress with just a few clicks without any technical knowledge. Here’s how you can do it:
- Log in to your hosting account.
- Go to cPanel > WordPress Installer (or use auto-install from the hosting dashboard).
- Click Install WordPress and select your domain.
- Fill in site details (site name, admin username, password, and email).
- Click Submit and wait for the process to complete.
- Once installed, log in to your WordPress dashboard via yourdomain.com/wp-admin.
Note:
If your hosting provider doesn’t support one-click installation or you prefer manual setup, simply download the latest version from WordPress.org. Upload and extract it in the public_html directory. Then, run the installation script at yourdomain.com/wp-admin/install.php, and log in.
Now you’re ready to set up your WordPress site.
Step 2: Select WordPress Theme
Every year, WordPress introduces a new default theme to highlight the platform’s latest features and with each release, the editing experience gets smoother and more powerful.
For 2025, the default theme is Twenty Twenty-Five. It’s flexible, and fully designed to take advantage of WordPress’s block editor. Even, this theme will be pre-installed and activated in your wordpress.
Of course, there are many other themes built for specific website needs, but in this guide, we’ll stick with the default theme to customize our site from the ground up.
To, check the Twenty Twenty-Five theme, simp[ly log in to your WordPress dashboard and go to Appearance > Themes.
As WordPress has already installed and activated the twenty-twenty five theme on your site, you’ll see it listed among your themes. And, you’ll find the customize button on the theme to start customizing it with the Site Editor.
But, before customizing the theme, let’s set up the website technical settings from your wordpress dashboard.
Step 3: Set up Website Technical Settings
Alright, before we get too deep into making things pretty, let’s quickly handle some important behind-the-scenes technical settings. Getting these right early on helps your site run smoothly and makes things easier.
To configure the website’s settings,
- Go to WordPress dashboard >> settings
- In the settings, then adjust each section to match your needs.
- Set up each tab and click Save Changes.
We’ll just focus on the key things you might need to change.
1. General Settings
This is where you give your site its basic identity. You’ll definitely want to set your Site Title. This is the main name of your website that appears in browser tabs and search results.
Next is the Tagline. It should quickly explain what your site is about in a catchy way. It’s especially useful for blogs, portfolios, or small business sites. If you don’t need it, you can leave it blank.
Now, for the Administration Email Address by default, WordPress sets it up like [email protected]. Try to follow that by default mail structure. However, you can use a personal one, just make sure it’s valid and regularly monitored.
Then, set your Site Language. This controls the language used in the WordPress dashboard and in some built-in text like “Leave a comment.” If you’re targeting a specific region or country, try to set the language to match your audience, like Spanish for a site focused on Spain or France for French readers.
But if you’re planning to reach a global audience or multiple countries, it’s best to stick with the default language, English, since it’s widely understood.
Then, set your Timezone to match the city or region you’re actually in ro make sure any scheduled posts, events, or updates happen at the correct local time. For example, if you’re in New York, choose “New York”, not just a random UTC offset.
However, WordPress gives you a list of major cities to make it easy.
2. Writing Settings
Honestly, most settings here are usually fine as default, especially now with the powerful block editor handling formatting. Here, the only thing you can consider is to chnage the Default Post Category. By default, WordPress puts new posts into a category called “Uncategorized.”
If you’ve already set up a primary category (like “Blog” or “News”) and you know most of your posts will belong there, then, then select the category from the dropdown later.
However, leaving it as “Uncategorized” is perfectly fine too, as you can easily assign categories while writing each post.
3. Reading Settings
The reading section controls what visitors see when they land on your site, and it even affects how search engines like Google find you.
Under “Your homepage displays”, you’ve got two main choices:
- Your latest posts: Choose this option, if your site is for blogs, news sites, or anything where fresh content is key. If you want your homepage to always show your most recent blog posts, this is the way to go.
- A static page: It’s perfect for business websites, portfolios, or any site where you want a set welcome page. You’ll choose a welcome or services page to use as your Homepage and your blog feed to use as your Posts page.
The Posts page is usually a blank page with just the title like “Blog.” The page itself doesn’t need any content as WordPress will automatically fill it with your blog feed.
Also, don’t miss the Search Engine Visibility setting. If you’re still building your site and don’t want it showing up on Google yet, you can check the box “Discourage search engines from indexing this site.”
So, for now, we’re keeping this option checked. And, once you’re ready to go live, make sure to Uncheck that box to make your site appear in search results.
Lastly, there’s a small setting called “Blog pages show at most”. This controls how many posts show up per page on your blog. You can adjust this number if you want to show more or fewer posts at a time.
4. Discussion Settings
This area controls how comments work on your site like notifications and moderation. The main thing to consider here is if you actually want comments enabled on your posts or pages.
If your site isn’t really a blog or you prefer not to have public discussions, you can uncheck the box for “Allow people to submit comments on new posts” under “Default post settings”.
You could also consider unchecking the first two options (“Attempt to notify any blogs…” and “Allow link notifications…”) if you find you’re getting a lot of spammy trackbacks or pingbacks.
5. Media Settings
For most users starting out, the default settings for Media are usually perfectly fine, so keep it as default. WordPress automatically sets standard sizes for thumbnails, medium, and large images when you upload them to work well with their own optimized sizes.
6. Permalink Settings
This one is super important for your site’s URLs and SEO (Search Engine Optimization). The permalink structure is selected as Post name by default which is the most user-friendly or search-engine-friendly. So, leave this section as it is.
7. Privacy Settings
For privacy, you have to set up your privacy policy page here. You can create a new one from here. But, wordpress automatically creates a privacy policy page once you install it.
So, just under the Change your privacy policy page, select the privacy policy and hit on Use this page. Later on simply customize the pre-built page. Again, check the policy guide before starting creating one.
After configuring these settings, save your changes to ensure your site runs efficiently.
So, let’s come to the main part of customizing your WordPress site with the Gutenberg Editor. This will make it reflect your brand and help you reach your target audience.
Step 4: Customize Your Site With Gutenberg Site Editor
Alright, now that you’ve got your WordPress site up and running with the default Twenty Twenty-Five theme, it’s time to make it yours by customizing Gutenberg full site editor.
Gutenberg is now the default editor in WordPress, and if you’ve used the old Classic Editor before, you’ll notice a big difference.
Instead of just typing text and adding images, Gutenberg lets you build your site using blocks like little building pieces for text, images, buttons, videos, and more. You just drag & drop or click and arrange things the way you want.
What’s really great is that you’re not limited to editing just posts or pages anymore. With Full Site Editing (FSE), you can change your entire site with fonts, color, headers, footers, blog layouts, even customizing templates.
And since you’re using the Twenty Twenty-Five theme, you’re already set up for all of this. It’s a block-based theme built specifically for FSE, and it’s super clean and minimal, which makes it a perfect canvas for any kind of site.
So, let’s start customizing your site.
To start customizing your theme:
- Go to your WordPress dashboard.
- Click on Appearance > Editor.
This will take you into the Site Editor, which is kind of like your design command center. From here, you can control the look and layout of your entire site.
4.1. Styles
Global styles control your entire site’s visual settings like typography, color palette, spacing, and element styling. Instead of styling blocks one by one, you define a consistent base here.
Here’s the process:
- First, click on the Style and, you’ll find all the options for customizing various style parameters like typography, font sizes, colors to reflect your brand style.
- You’ll see several style panels:
- Typography: In the typography section, you can set the typesets, font style, font size, etc. By default, there will be Fira Code and Manrope fonts.
To change the font style, simply go to the Fonts section and click on the Manage fonts option and go to install fonts section. Here, you can search for your preferred font style (for example, Inter) and then, select the variants of the font (like Inter 300 normal).
And, then, just hit on Install and you can see your font in the fonts list.
Then, you can also use the same font for other elements like heading, links, captions, buttons. Again, for the font sizes, the preset settings are good enough, but you can still add custom size from the Font size section.
- Colors
Now, in the color panel, you can set the color palette for your site. You can also set colors for text, buttons, links, and headings, etc individually.
Note:
The background and shadow settings are set to “null” by default, and that works well for most websites. So, we’ll leave them as they are and move on to the Layout section.
- Layout:
In the Layout panel, adjust structural settings like padding, margin, block spacing, and content width to fine-tune how your content is spaced and arranged across the site.
A good content width is usually between 940px and 1000px. Some designers go wider, but they still keep the main content within 1000px. This makes your website look good on most devices, including larger screens.
- After doing every change, hit on review and select Save to apply all the changes you made.
Well, you’re done here in the style section.
4.2 Pages
Now, let’s move on to managing your Pages.
By default, WordPress creates two sample pages for you: a Privacy Policy page and a Sample Page. However, these two pages aren’t enough for a complete website, again you still have to customize or remove these pages for your site.
So, keep just the privacy policy page and delete the sample page as it’s just for blog demonstration.
Now, what main pages do you have to create initially for your site?
Well, your website must have essential pages for a complete user experience.
- Home Page
- About Us Page
- Service/product
- Contact Page
Again, you can also create a 404 error page and landing pages with the Gutenberg page builder. However, using Gutenberg’s custom fields and blocks is the best way to create unique and highly customized landing pages that stand out.
When you click on Pages, you’ll see what pages are there in the list. To create a new page, simply hot on the Add Page button at the top. Then, simply name the page (e.g; home page) and click on Create Draft. Well, your page will be instantly generated.
Note:
You can always create and manage your pages from here. However, I will recommend you to go with a more straight option to create pages is with the dedicated Pages option from your wordpress dashboard.
And, we’ll discuss the entire page creation and customization using block editor below.
4.3. Templates
Alright, so while you can totally build every single page on your site manually, Gutenberg hooks you up with an awesome shortcut via Page Templates.
This feature provides a collection of pre-built, purpose-driven templates that make it easy to create essential pages across your website.
From landing pages and single post layouts to even error pages like the 404 page, you’ll find ready-made templates that serve as strong foundations. These templates are fully customizable and let’s the content, structure, and style to match your brand and messaging.
All you have to do is select a template, tweak the details, and you’re done. It’s a fast, flexible way to build professional-looking pages without starting from scratch.
You can also create your own custom templates to keep consistency of the design and style of your pages.
4.4. Patterns
Now, lastly, go to the patterns section. Patterns are pre-designed block layouts you can insert anywhere. They’re ideal for building consistent and professional-looking sections quickly.
With the patterns, you can customize the different template parts of your pages like how you want to show the header, footer, and sidebar of your site. And, you’ll also get different patterns for hero sections, testimonials, or call-to-actions and many more.
Note:
If you’re just getting started, I highly recommend using the built-in templates and patterns to create key pages like your Blog and Single Post pages. They save time and help keep your design consistent.
Well done, you’re finished with the overall design of your site. Now, let’s move on to creating and customizing your pages and posts to connect your website with your business and goals.
Step 5: Build Pages & Posts with Gutenberg Blocks
Creating website pages with Gutenberg is simple and efficient. Whether you’re setting up an Home page, About Us, or blog posts, the Gutenberg website builder provides an intuitive interface and different blocks for easy yet professional design.
To create a page/post with Gutenberg Blocks:
- Navigate to Pages/post >> Add New in your WordPress dashboard. This will open a blank page where you can add content using Gutenberg blocks.
- Then, look in the top-left corner for the main “Block Inserter” (a big blue +). Simply click it to find the block you want.
- Now, to add the block to your page, you can either click to add it where your cursor is, or drag-and-drop it exactly where you want it between other blocks.
Note:
If so many blocks overwhelm you, just type (/) and enter the name of the block you want (e.g., /image or /heading). As you type, options pop up. Then, simply just click on it to add the block.
- Here, Gutenberg organizes blocks into categories to keep things tidy. Here’re the categories you’ll find:
- Text: These blocks let you add things like paragraphs, headings, lists, and quotes, basically all the written content for your site.
- Media: Use media blocks when you want to drop in images, videos, or audio to make your pages more engaging.
- Design: Design blocks help you control the layout with elements like columns, buttons, spacers, and groups to organize your content neatly.
- Widgets: These are handy for adding extra features like a list of your latest posts, a search bar, or even a calendar.
- Theme: Theme blocks let you add parts of your site like the logo, title, menu, or even query loop for dynamic content, which show up across your pages and templates.
- Embeds: If you want to pull in content from places like YouTube, Twitter, or Spotify, embed blocks make it super easy.
Note:
Can’t find the block you’re looking for?
No problem. Just click the + button and use the search bar. It checks the Gutenberg Block Directory, where you can find and add new blocks right from the editor. For example, type “book review,” and from the available blocks , simply install it, and it’s ready to use.
- Here, you can also shift to the block patterns easily to speed up the design process. Open the Block Inserter (+) icon, go to the Patterns tab, and select from pre-designed sections like headers, footers, or call-to-actions without advanced design skills.
- After configuring the page settings and design, hit Publish to live your page.
Step 6. Customize Your Blocks
Once you’ve added blocks to your page, it’s time to make them stand out by customizing their appearance and behavior. Gutenberg gives you two main ways to do this: the block toolbar and the settings sidebar.
6. 1. The Block Toolbar
When you click on any block, a small toolbar appears just above it. The options in this toolbar change depending on the type of block you’re using.
For example, if you’re working with a Paragraph block, you’ll see controls for text alignment (left, center, right), formatting options like bold or italic, adding links, inserting footnotes, highlighting text, or even placing inline images.
Again, if it’s an Image block, the toolbar gives you options to align the image, apply duotone filters for stylish color effects, crop or replace the image, and add captions.
6. 2. The Settings Sidebar (Gear Icon)
For more advanced settings, click the gear icon (⚙️) in the top-right corner of the editor. This opens the block settings panel on the right side of your screen.
The options here are specific to the block you’ve selected. For example, with an image block, you can fine-tune details like aspect ratio, image dimensions (width and height), and resolution.
And, even if you want to add more style settings to Your Blocks, simply go to the style tab in the sidebar.
6. 3. Advanced Customization
If you’re comfortable with code or want more control, you can scroll to the Advanced section in the sidebar. Here, you can add custom HTML anchors (for in-page links) or CSS classes, allowing you to style blocks exactly the way you want using your own CSS.
And, block customization is done. It’s time to publish your site.
Step 7: Live your website
Now that you’ve built your website with Gutenberg, it’s time to go live. But before publish your website, follow these steps:
- First, check for broken links, responsive design, and overall functionality on different devices.
- Then, preview Before Publishing: Use WordPress’s preview feature to see how your pages look before making them public.
- Once everything looks perfect, finally publish to make your site live.
To publish your website, go to Settings >> Reading. In the reading section, go to search engine visibility. Then, simply uncheck the box of Discourage search engines from indexing this site.
And, from now on, the search engine will crawl your site, and all your posts and pages will be started indexing and visible to your audiences.
WordPress SEO optimization with Gutenberg
Gutenberg not only makes it easy to create and manage content, but optimizing your site also for SEO ensures better visibility and performance.
Here are some of the top optimization tips for your Gutenberg build website:
- Build Mobile-Responsive Layouts:
With Gutenberg, you don’t need to dive into complex CSS to make your site mobile-friendly. The Columns block is perfect for creating layouts that automatically adjust to different screen sizes.
For example, you can have two equal columns on the desktop that stack neatly on mobile. You can also use the Group block to organize content and apply consistent spacing or styles, which helps your layout stay clean and readable. You can even use the Cover block with its overlay options to create visually appealing and mobile-friendly hero sections with text that remains legible on smaller screens.
- Optimize Page Speed:
While Gutenberg doesn’t compress images or videos by default, its block-based design makes it easier to organize content in a way that keeps your pages lightweight.
For example, instead of adding ten separate images, use a Gallery block to organize them better. When embedding videos,you can use the Embed or Video block with YouTube or Vimeo links rather than uploading large files directly to your site. This way, your pages stay lighter and load faster.
- Structure Content:
Search engines like content that’s well-structured—and so do readers! Gutenberg makes it easy with its dedicated Heading blocks (H1 to H6). So, you can use the appropriate heading level to indicate the hierarchy of information.
For example, the main title of your post should always be an H1 using the Heading 1 block. Subsections should then use Heading 2 blocks, and further sub-points can utilize Heading 3 blocks, and so on.
Similarly, the List block (both bulleted and numbered) ensures that your lists are created with proper <ul> and <ol> HTML tags, which search engines understand as semantically grouped information and importance of different sections.
- Schema Markup:
If you want your content to show up in search results with rich features like FAQs, star ratings, or recipe cards, adding schema markup is key.
Gutenberg makes this easier by giving you full control over your content structure. While it doesn’t include built-in schema blocks by default, you can still use the Custom HTML block to paste schema markup (like JSON-LD) directly into your pages.
For example, if you’re sharing a recipe, you can add structured data with fields like ingredients, cooking time, and ratings, all inside a simple HTML block.
What are the best plugins for extending Gutenberg’s functionality?
WordPress Gutenberg provides everything you need to build a functional and interactive website. However, if you want more advanced design, better customization, and unique features, the right plugins can extend its capability and make your website smoother, more dynamic, and highly optimized.
Here are five best Gutenberg-compatible plugins to boost your WordPress experience:
1. Spectra (For Advanced layout control and design; 4.9/5)
Gutenberg offers basic content blocks, but if you need to create advanced design layouts with animations and dynamic elements, it’s not enough.
That’s where Spectra is the perfect plugin. It enhances your site with stylish buttons, flexible columns, and feature-rich sections and makes page building effortless.
Key Features:
- Pre-designed block templates to create professional layouts in no time.
- Advanced animations & effects to make your pages more engaging.
- Flexible layout controls for a seamless design.
Pricing: Starts at $49/year.
2. Stackable (For Premium Blocks & UI Kits; 4.8/5)
When you want more creative control over blocks and other design layouts, Stackable adds a full set of layout and design options to the Gutenberg editor. It offers premium design blocks, UI kits, and customization options with modern aesthetics and intuitive layouts.
- Access 40+ feature-rich blocks for advanced page design.
- UI kits & block designs to speed up your workflow.
- Performance optimized for fast-loading pages
Pricing: Starts at $49/year.
3. Otter Blocks (For Lightweight Performance; 4.7/5)
While Gutenberg has all the essential blocks, otter Blocks takes it further with lightweight yet powerful elements for building fast, responsive websites. It’s perfect for creating beautiful pages without affecting site speed.
- Adds powerful features while keeping your site optimized.
- Easily design complex layouts with section-based blocks.
- Show or hide blocks based on user roles, device type, or conditions.
Pricing: Starts at $139/year.
4. Kadence Blocks (For Advanced Form & Grid Layouts; 4.9/5)
Gutenberg’s basic grid options work fine, but with Kadence Blocks, you’ll have full design flexibility with custom layouts, row control, and advanced forms. It’s an excellent tool for building structured, high-converting pages.
- Create highly customizable page structures.
- Build complex forms with conditional logic and integrations.
- Fine-tune text styling, margins, and padding.
Pricing: Starts at $69/year.
5. CoBlocks (For Unique Gallery & Typography Control; 4.7/5)
Gutenberg provides basic content styling blocks; here CoBlocks expands your design capabilities with advanced elements like interactive galleries along with pricing tables, hero sections. It also includes enhanced typography settings, giving you more control over fonts, sizes, and spacing to create visually appealing content effortlessly.
- Custom typography controls for unique designs.
- Access blocks like pricing tables, hero banners, and animated galleries.
- Adds advanced features without compromising website performance.
Pricing: Free.
Conclusion
Gutenberg makes website design easy with its features and simple content blocks. It keeps things simple, offers a clean, code-free experience, and doesn’t require extra plugins, unlike other page builders like Elementor.
Even Gutenberg keyboard shortcuts also make editing quicker and more efficient. For those who want an easy and fast way to build a professional-looking website, Gutenberg is a great choice without the extra complexity.
FAQs about WordPress Website Building
- How do I change my WordPress site to Gutenberg?
To se Gutenberg on your WordPress site, update WordPress to version 5.0 or later. It’s the default editor, so once you update your WordPress, you can automatically start using the block-based editor right away.
- Will Gutenberg be a problem for my current website?
If your theme isn’t fully compatible with Gutenberg, it can cause some problems. Themes built for the old Classic Editor or ones that haven’t been updated in a while might not work perfectly with the block editor. You could run into layout disruptions, styling conflicts, or even missing blocks.
- How does Gutenberg compare to other page builders?
Gutenberg is a free, lightweight block editor built into WordPress, ideal for structured content. However, page builders like Elementor or Divi offer advanced design flexibility, templates, and customization without coding and are better for complex website layouts.

Leave a comment