
Every WordPress update comes with essential bug fixes, improvements, and enhanced security features to safeguard your website from potential vulnerabilities. That’s why we highly recommend keeping the auto-update option enabled for every WordPress user.
However, sometimes, you can see the “An auto WordPress update has failed to complete” message on your dashboard. This means your site is struggling to implement the update.
But there is nothing to be worried about about this issue. Because it’s a common issue and it can be handled with ease.
In this tutorial, we will show you what is this issue about, why this happens, and how to solve this issue forever. So, without any further ado, let’s get this show on the road!
What Does “An Automated WordPress Update Has Failed to Complete” Mean?
WordPress needs to be updated from time to time. These updates help your website run smoothly and securely. Usually, you can let WordPress update itself automatically, which is pretty convenient.
But sometimes, things don’t go as planned. When you see this message – “An automated WordPress update has failed to complete”, it means the automatic update didn’t finish properly. Something interrupted it, like a problem with your internet connection or your website’s setup.
When this happens, it’s important to fix it because an incomplete update can leave your website vulnerable or cause it to act strangely. You’ll need to figure out what went wrong and then follow some steps to get your website back to normal.
Stick with us. We are going to discuss why this happens and how to solve it.
What Causes An Automated WordPress Update Has Failed to Complete Issue?
There could be several reasons behind this issue. Here are some of the common reasons that may be causing you the problem:
- Internet Connection Problems: If your internet connection was unstable or got interrupted during the update, it could cause the update to fail.
- Insufficient file and folder permissions: WordPress needs to have write permissions for the files and folders that it updates. If these permissions are not set correctly, the update will fail.
- Outdated PHP version: WordPress requires a minimum PHP version to run correctly. If your PHP version is outdated, it may cause the update process to fail.
- Low memory limits: WordPress also requires a certain amount of memory to update. If your memory limits are set too low, the update will fail.
- Plugin or theme conflicts: If you have any plugins or themes that are not compatible with the latest version of WordPress, they may cause the update to fail.
- Server-side issues: Server-side issues such as connectivity problems, temporary server downtime, or a misconfigured firewall can also interfere with the update process.
How to Fix “An Automated WordPress Update Has Failed to Complete” Problem – 4 Proven Ways for You
Facing any WordPress issue is frustrating, we know that. Especially, when you are making any changes on your site to make it more user-friendly and eye-catchy, but if the changes do not show up.
To help you in this situation, in this segment, we are going to discuss exactly 4 proven ways to handle this problem like a pro. So, without any further delay, let us first show you the ways:
- Delete the .maintenance File
- Edit the wp-activate.php File
- Update Your PHP Version
- Increase Your PHP Memory Limit
Now let’s discuss each of the above-mentioned points in detail:
Note: We would like to recommend you to take a full backup of your website before making these changes to your website. Because in this tutorial we are going to edit crucial files like wp-activate.php or .maintenance file. If anything bad happens while editing this file, you can recover your site from the backup with ease.
Method 01: Delete the .maintenance File
This is a super simple way that anyone can use, no matter if you are a beginner or a veteran WordPress user. To do it, just get an FTP client or use cPanel’s file manager to remove a file called “.maintenance” from your WordPress’s main directory.
Here, we are showing you how to delete the .maintenance file using cPanel:
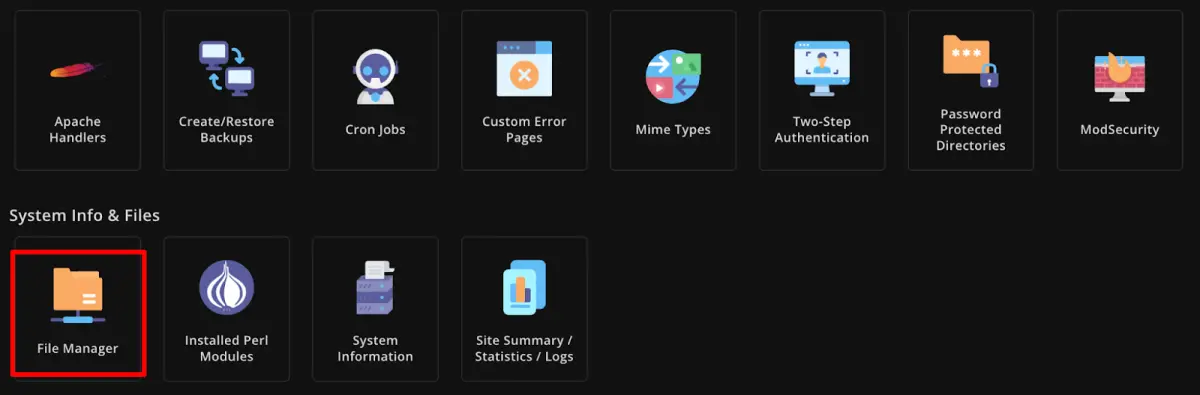
First, log in to your cPanel. Then find the “File Manager” option and click on it to open the file.
Once you are inside the “File Manager”, you need to double-click on the “public_html” folder to open it.
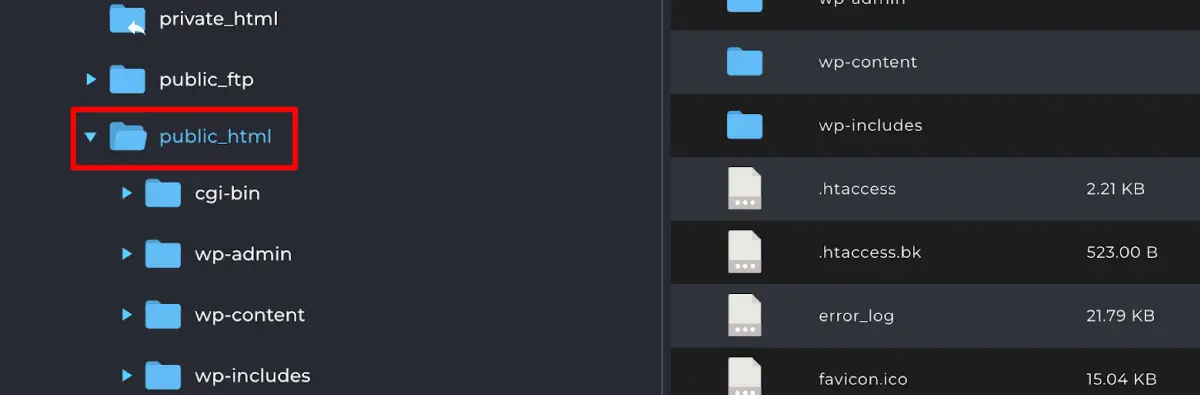
Now find the .maintenance file inside the public_html file and delete that file. That’s all!
This folder might have a slightly different name depending on your host. If you don’t see a folder named public_html, just explore and look for the folder that contains other folders like wp-admin and wp-content.
Also, if you can’t find the file- “.maintenance”, then it might be hidden because of a setting in File Manager. On your File Manager, go to Settings and select Show Hidden Files to display the file.
After deleting the .maintenance file, the error message “An automated WordPress update has failed to complete” should disappear from your backend dashboard.
Delete the .maintenance File Using a WordPress Plugin
Using cPanel is the most preferred method to delete the .maintenance file. But if you find it challenging to access or if it appears complex, you can consider utilizing WordPress file manager plugins as an alternative.
To delete the “.maintenance” file using this method, first, you need to install a file manager plugin like WP File Manager, Advanced File Manager, etc, on your website. We are using the Advanced File Manager free plugin in this tutorial to delete the .maintenance file.
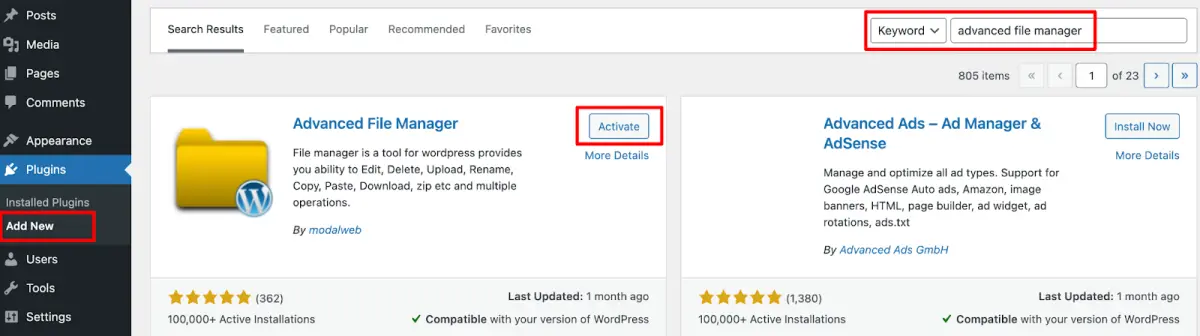
To install this plugin, navigate to your WordPress dashboard -> Plugins -> Add New. Then search the plugin name “Advanced File Manager” in the search box and install the plugin from the search result. After installing the plugin, don’t forget to activate the plugin.
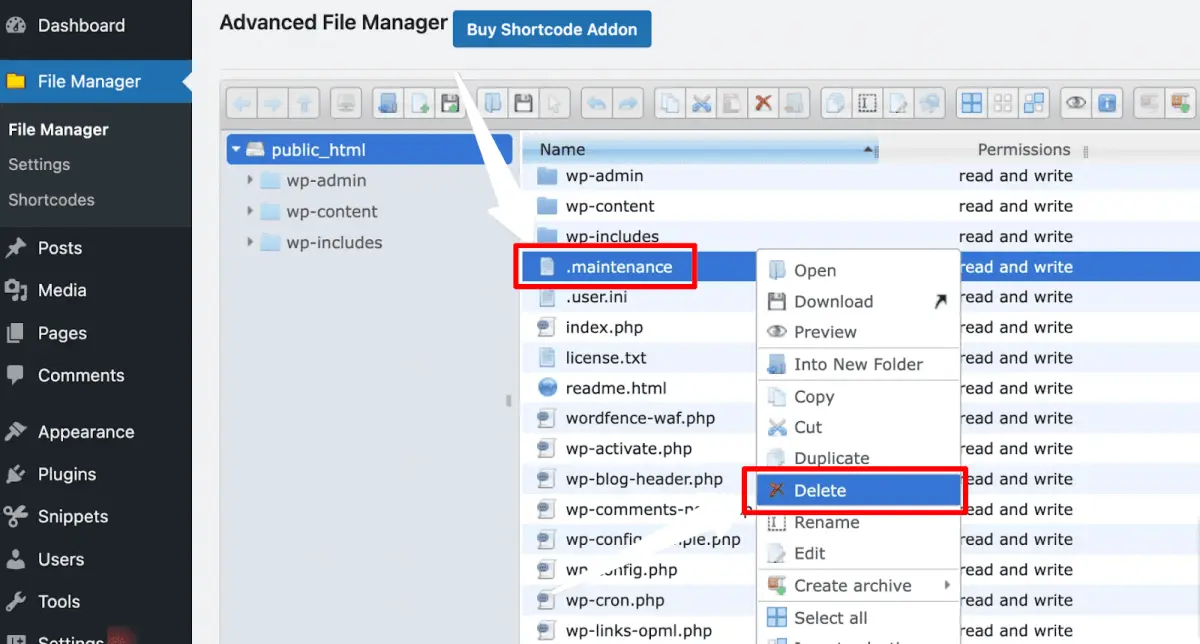
Once the plugin is installed and activated, go to “File Manager” under the left-hand menu.
Here, you’ll see a file named “.maintenance”. Click on it and then right-click to find the “Delete” option. Once the file is deleted, refresh your site again, and your website will be fixed.
That’s all!
Method 02: Edit the wp-activate.php File
After deleting the .maintenance file, if the error message hasn’t disappeared, it’s time to apply the second method which is editing the wp-activate.php file. By making a minor edit to this file, you might resolve the update issue.
Here’s how to do it:
First, log in to your cPanel and find the File Manager option. Then find the wp-activate.php file inside the public_html folder.
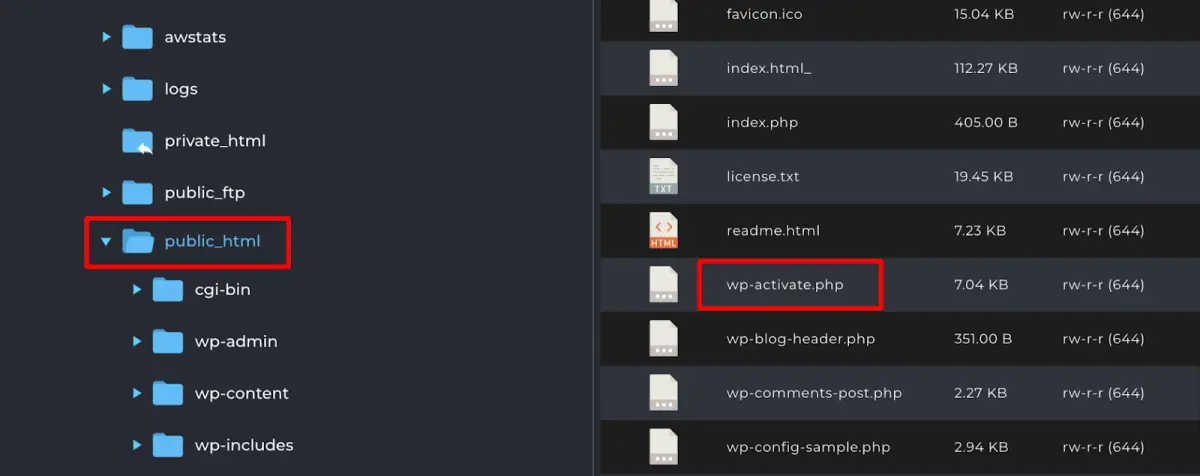
Once you are inside the wp-activate.php file, follow the below instructions to make a minor change to get your job done.
You need to change a line of code that says: “define( ‘WP_INSTALLING’, true );” from “true” to “false“.
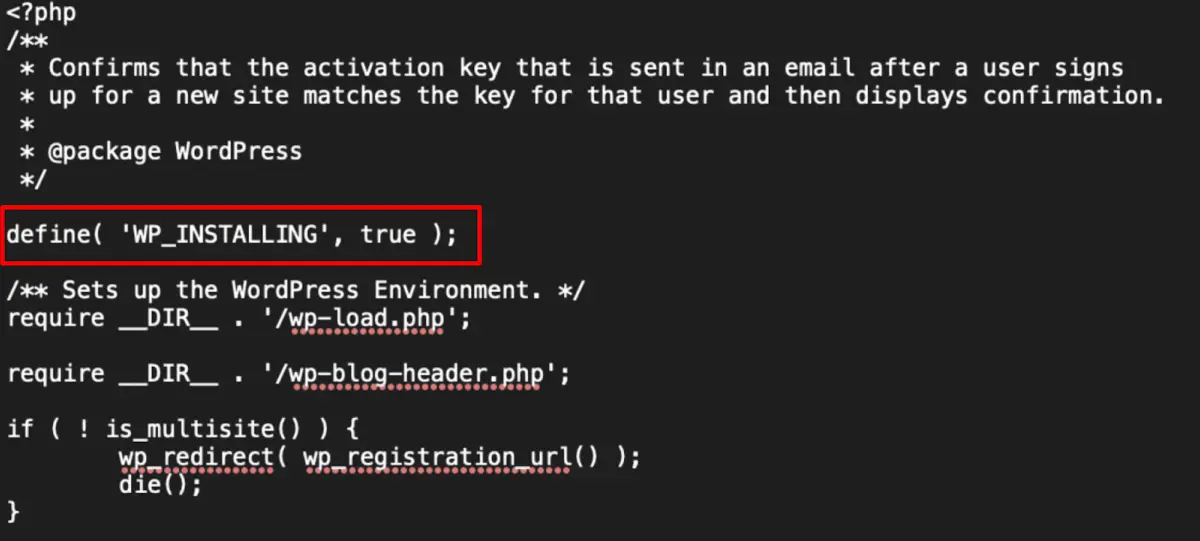
After making this change, click on the “Save Changes” button and log in to your WordPress dashboard to check if the error message “An automated WordPress update has failed to complete” has gone or not.
Method 03: Update Your PHP Version
Sometimes an outdated PHP version can cause you the automated update failed error. You can check and update to the latest version of PHP for your website in two ways. You can do it by using a plugin or manually. Let’s check both ways:
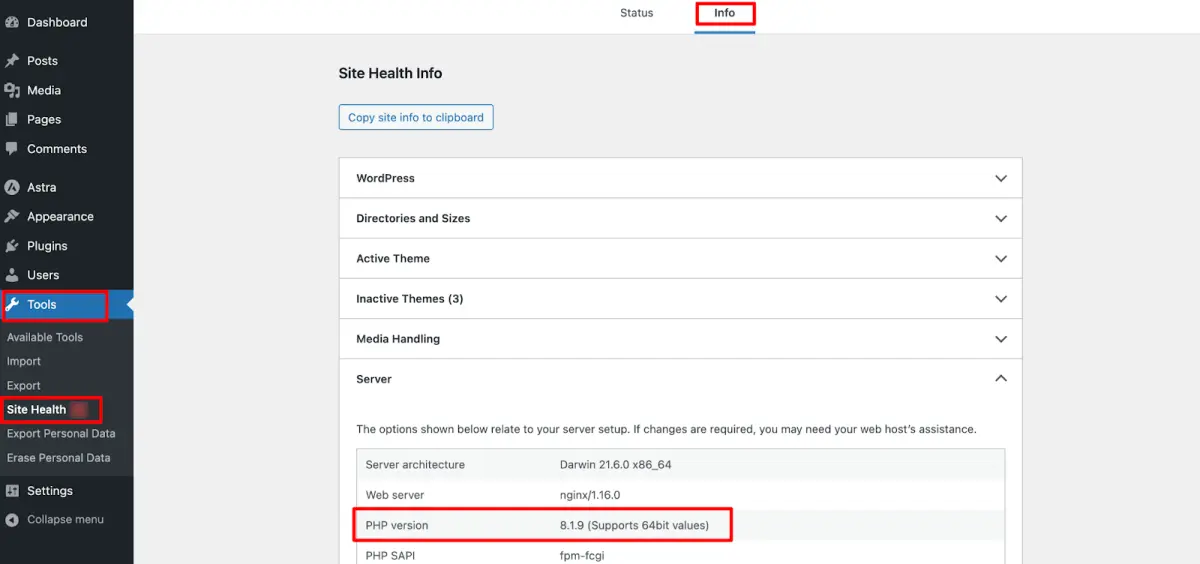
For manually checking, go to your WordPress dashboard -> Tools -> Site Health, and click on the Info tab. Now scroll down a bit and you’ll find an option named “Server”. Click on that to check the PHP version of your site.
If you want to use a plugin to check the PHP version, there are several plugins to choose from. Just choose a plugin, for example, Display PHP Version, and install it by navigating to your WordPress dashboard -> Plugins -> Add New.
After installing and activating the plugin, go to your WordPress dashboard and scroll down a bit to check the latest version of PHP on your site from the At a Glance section.

If your PHP version is not up to date (just search on Google to know the current version of PHP), follow the below steps to update your PHP version.
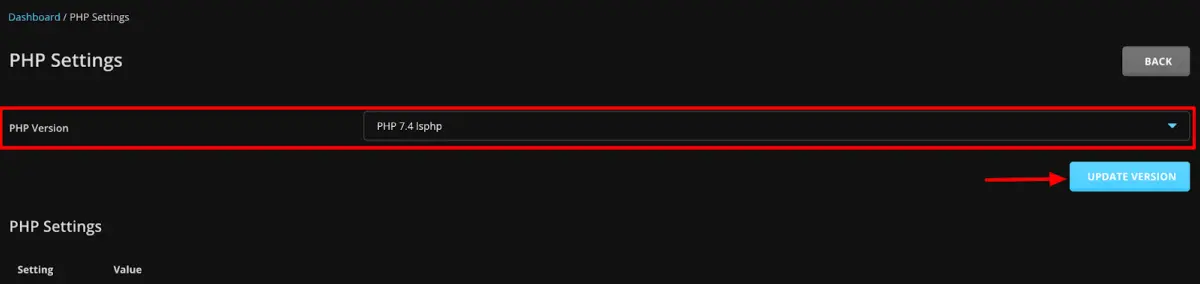
- Log in to your control panel
- Find the PHP settings
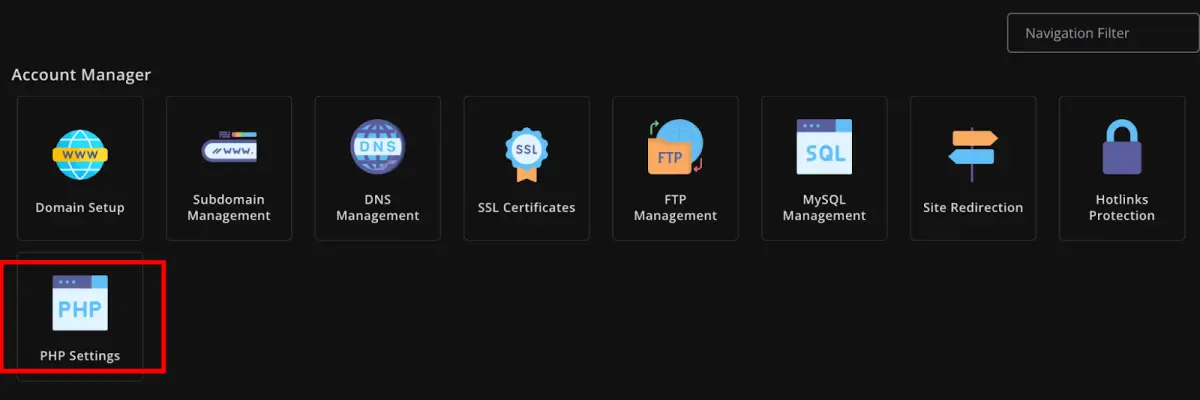
- Click on the PHP settings and choose the latest PHP version from the drop-down list
- Finally, press the Update Version to save the change.
That’s all!
Now go to your WordPress dashboard and reload the site to check if the problem has been solved or not.
Method 04: Increase Your PHP Memory Limit
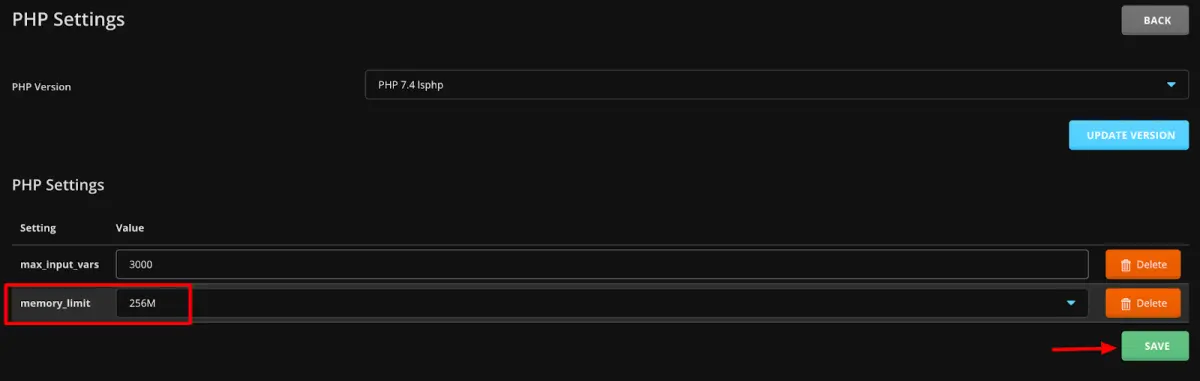
WordPress by default starts with a memory limit of 128 MB. Sometimes, this lower memory limit can cause you the “An automated WordPress update has failed to complete” error.
To increase your PHP memory limit, log in to your control panel and find the PHP settings. Click on that and you’ll find the “memory_limit” option.
Now increase the memory limit from the drop-down options and finally hit the Save button to store the change.
You can also increase your PHP memory limit by accessing the wp-config.php file.
To do that, go to your cPanel -> File Manager -> public_html -> wpconfig.php file.
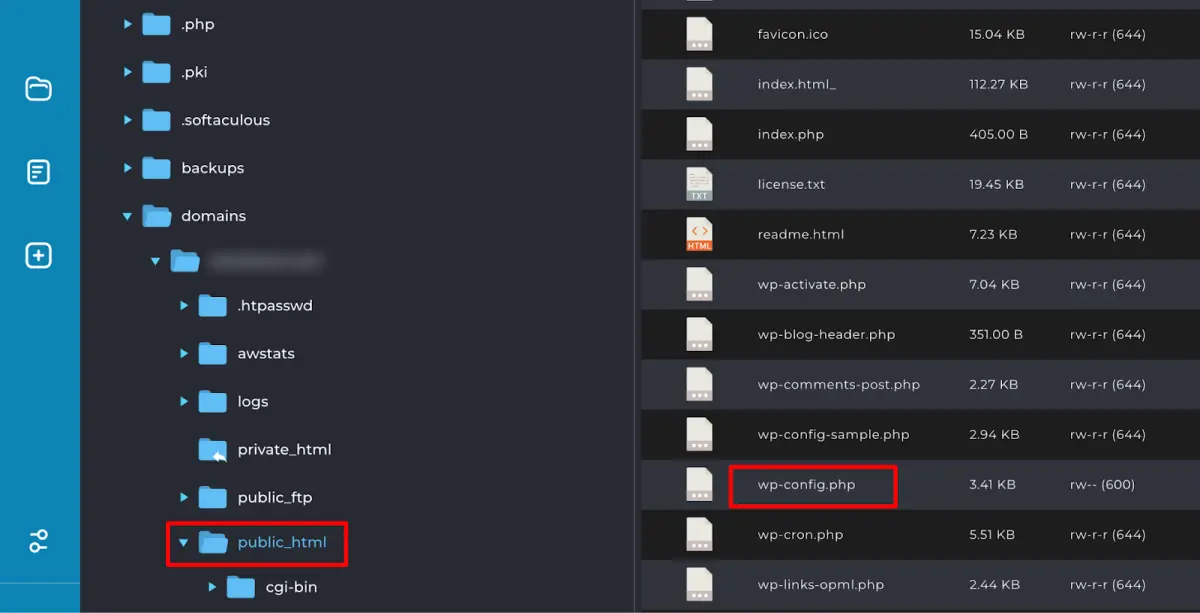
Click on the wp-config.php file to edit the file. Copy the below code and paste it into the file. Then save the file.
define( ‘WP_MEMORY_LIMIT’, ‘512M’ );
Now go to your WordPress dashboard and hopefully, the error message has disappeared.
Bonus: Best Practices to Avoid the “An Automated WordPress Update Has Failed to Complete” Error in the Future
After solving this problem, you should always follow a few practices to avoid this issue in the future. Here are the top easy practices that we would like to recommend you to follow:
- Keep your WordPress core, themes, and plugins up to date: WordPress releases security updates and bug fixes on a regular basis. It is important to keep your WordPress core, themes, and plugins up to date to reduce the risk of security vulnerabilities and compatibility issues.
- Use a staging site to test updates before deploying them to your live site: A staging site is a replica of your live site where you can test updates and changes before making them public. This can help you to identify and fix any potential problems before they affect your live site.
- Make a backup of your site before running any updates: This will give you a safety net to fall back on in case something goes wrong during the update process.
- Use a reliable WordPress hosting provider: A good hosting provider will have the infrastructure and expertise to support WordPress updates.
Over to You
Dealing with the “An automated WordPress update has failed to complete” issue can be a frustrating experience, but now you know how to tackle this problem.
WordPress updates are essential for keeping your website secure, bug-free, and up-to-date with the latest features. So, don’t let the fear of a failed update hold you back from updating the latest WordPress version regularly.
As we’ve explained in this tutorial, understanding the common causes of update failures, troubleshooting the issue step by step, and implementing best practices for future updates can solve this problem for good.
That being said, if you have any queries related to this topic, feel free to let us know through the comment box below. We always appreciate your feedback.

Leave a comment