When you run a physical store, profits often shrink due to rent, utilities, and staff costs. But online? It’s a whole different story. In 2025, retail e-commerce sales are expected to surpass $4.3 trillion worldwide. With lower costs and a wider reach, it’s no surprise that many businesses make more profit when they move online.
The best part?
You don’t need to be a web developer or learn complicated coding to build your online store. WordPress, combined with Ecommerce platforms, provides all the tools necessary to create a professional online store. Whether you’re selling physical products, digital downloads, or services, you’re in full control.
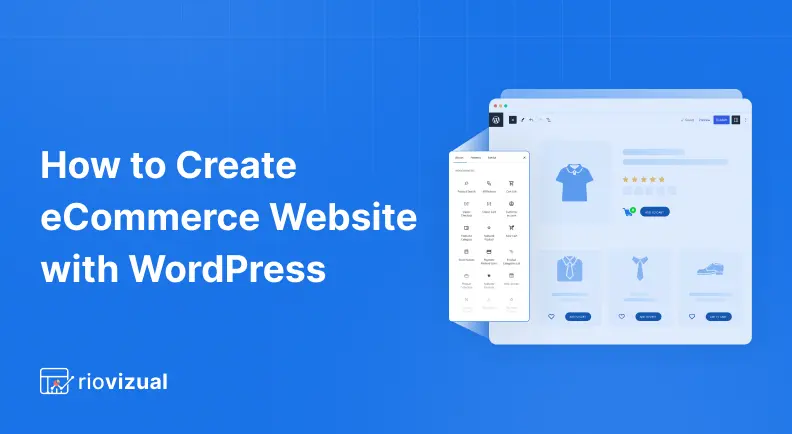
In this guide, I’ll walk you through every step of how to create an ecommerce website with wordpress from selecting the best wordpress ecommerce platform to launching your store. It’s beginner-friendly, affordable, and by the end, you’ll have a complete, ready-to-sell eCommerce website of your own.
So, let’s get started.
Prerequisites
- Buy a domain and hosting
Before creating your eCommerce website, you’ve to secure a domain name and a reliable hosting service.
When picking a domain name, try to pick .com if possible as it’s the most trusted and easy to remember. If .com isn’t available, you can also consider .store, .shop, or a country-specific extension like .co.uk. Again, try to keep the domain name short, easy to remember, and relevant to your brand.
For hosting, choose a provider that fully supports WordPress and WooCommerce. Again, make sure they offer important features like free SSL certificates, one-click WordPress installs, and dynamic resource allocation like (CPU, RAM, storage) as your store grows. However, if you’re looking for a simple, all-in-one option, I personally recommend Namecheap.
- Install wordpress
After you’ve secured your domain and hosting, the next step is to install WordPress. Most hosting providers make this super easy by offering a one-click WordPress installation right from your hosting dashboard.
So,just find the WordPress installer, follow the prompts, and within a few minutes, your site will be up and running.
Once installed, you’ll be able to log into your WordPress dashboard, where you can start setting up your eCommerce store and customizing your website the way you want.
Note:
Before you start building your eCommerce website with WordPress, it’s a good idea to temporarily hide your site from search engines. This way, you can work on it without worrying about unfinished pages showing up in Google.
To do this, go to your WordPress dashboard, head over to Settings >> Reading, and check the box that says “Discourage search engines from indexing this site.” Once your site is fully built and ready to go live, you can come back and uncheck the box to make your store visible to everyone.
So, now, let’s jump on the steps of creating an ecommerce website.
Step 1: Select Ecommerce Platform
The first step of creating an eCommerce website is installing and setting up an eCommerce platform on WordPress.
By default, WordPress is a powerful content management system, but it doesn’t include built-in functionality for selling products or processing orders. While you can easily build blogs, portfolios, and even business websites directly with WordPress, it doesn’t support eCommerce features to sell online.
So, you can’t just install WordPress and start your business. You won’t be able to add products, manage inventory, handle shipping, or accept online payments unless you extend its functionality.
To transform your WordPress site into a fully functional online store, you’ll need to install a dedicated eCommerce plugin on WordPress.
Fortunately, there are several robust and best popular platforms for wordpress ecommerce website building. Let’s take a look at how the top three options compare:
| Platform | Key Features | Cons |
| WooCommerce | Built specifically for WordPress, Huge extensions library | The vast number of plugin options may overwhelm new users. |
| WP Easy Cart | Simple setup with Built-in Google Analytics integration. | Not ideal for a large store requiring complex features |
| Easy Digital Downloads (EDD) | Designed specifically for selling digital goods, great file access control | Not suitable for physical products |
Among these platforms, WooCommerce is highly preferred as the most flexible, scalable, and widely supported solution especially for WordPress users. In fact, there are currently more than 4 million stores built using Woocommerce.
Again, it’s easy to customize, works seamlessly with WordPress, and lets you scale your store the way you want. Plus, with thousands of plugins and themes available, you can build a store that truly fits your brand and business needs.
So, let’s start building your WordPress eCommerce website with the power of WooCommerce.
Step 2: Install and Setup Ecommerce Plugin
Now, to install woocommerce on your WordPress site:
- Log in to your WordPress dashboard.
- Then, go to Plugins >> Add New.
- In the search bar, type “WooCommerce”.
- Once it appears, click Install Now and activate it.
After activation, WooCommerce launches a step-by-step setup wizard to guide you through essential configurations.
WooCommerce setup Wizard
- First, hit on “set up my store” and choose the stage of your business. I’m choosing the “I’m just starting my business” option and then, click “continue”.
- Then, provide the details of your store.
- Business Name
- Business Type
- Store location
- Business email
- Now, woocommerces shows you a list of it’s default free features like payments, shipping, integration with other social platforms and many more. By default, all the features will be selected, just hit “continue”.
- And, you’re all done to start your online store with Woocommerce.
Now, your online store is basically ready for products. And don’t worry about manually creating the core pages for your store, WooCommerce takes care of that automatically as soon as you complete the setup.
It instantly generates all the essential pages your eCommerce site needs to function smoothly:
- Cart
- Checkout
- My Account
- Privacy Policy
- Refund & Returns Policy
- Shop
Simply go to Pages >> All Pages and you’ll find these described pages there.
These pages are pre-configured to work seamlessly with your store, and you can easily customize their layout and content using the WordPress Site Editor.
Step 3: Customize your Store
Now, before adding products, let’s customize the store appearance that matches your business niche and type.
You don’t need to mess around with any complicated page builders. With WordPress’s default editor (Gutenberg) and the Twenty Twenty-Five theme, you’ve got everything you need right at your fingertips.
So, let’s start. To customize the appearance of your ecommerce website;
- First, go to Appearance >> Editor on your site. The latest theme (twenty-twenty five) will be auto installed to your site.
- Now, you’ll be in the theme editor section. On the left side, you’ll find all the customization menus.
Style
First, click on the style. There, you have to mainly customize the font and colors of your website according to your brand.
You can choose any but I recommend to use sans-serif fonts (like Inter, Open Sans, or Roboto). These fonts work great for online stores because they feel modern and are super readable even on small screens.
For colors, you really don’t need more than 2 or 3 main colors to make your store look clean and professional.
- One primary color (for buttons and links)
- One background color (usually white or very light)
- One accent color (for highlights, or sales or promotional offers)
Now, it’s the main part, customize the pre-build pages and create some essential ones for your woocommerce store.
Pages
Under the page, you’ll see all the default pages created by woocommerce. But, you’ll also need to create some essential pages for your ecommerce site. Let’s create the pages one by one:
- Home page:
To create a home page, first, go to Pages and click on Add Page. Then, in the pop-up set the name as home page and hit create draft.
Note: You can generally create pages from Pages >> Add new page on your wordpress dashboard.
The default wordpress theme offers different patterns to build your site. You can choose any patterns to create your homepage as well.
However, Here, I’ll create the page manually, yet using blocks. And, once inside, you can start dropping in blocks.
The very first thing people should see is a bold, eye-catching banner that shows off your best offer or highlights your new collection. You can easily create this by adding a Cover block at the top of your homepage.
Then, customize the image with a bold headline (“New Arrivals Just Dropped” or “Shop the Winter Sale”), and add a Button block that says something like “Shop Now” to lead visitors straight to your products.
Now, you can add a Product Grid block to show off a few of your bestsellers, featured products, or new arrivals. Simply, hit on the (+) icon, and search for your preferred ones.
After showing some products, it’s a good practice to tell a little bit about your brand. So, you can drop in a Heading block (“Our Story” or “Why Shop With Us”) followed by a Paragraph block. Here, you can share a few lines about your mission, your style, or what makes your products special.
And, lastly, if you have customer reviews, a Testimonial block is perfect here. Adding just two or three glowing reviews can significantly boost trust. Then, simply publish the page.
And, finally, you home page will look like as follows:
- About Us Page:
In the same way, create another page and name it “About us”. In this page, include the mission of your business and also add some engaging images of your store.
Use headings and paragraphs blocks and even add a Quote block if you have a tagline to share.
And, Here’s a about us page i’ve created:
Once everything looks good, simply publish the page.
- Contact Us Page:
To create a contact page, add a new page named “Contact Us”. Here, you need to share your email and maybe a phone number if you offer phone support.
Again, try to ad the location of your physical store address and social media links of your ecommerce website.
It’ll look like as follows:
Bonus:
Even, you can go for free contact plugins like WpForms to create and easily manage your “contact us” page.
- Default pages (Shop,cart, checkout, My account)
Well, now what about customizing the pre-built (shop, cart, checkout, my account) pages for your online store?
In WooCommerce, core pages like the Shop, Cart, Checkout, and My Account pages are powered by dynamic templates. WooCommerce automatically pulls in and displays the relevant data on these pages.
For example, when your customer adds products to their cart, the cart page updates automatically, and the same products flow into the checkout process. And, these pages are designed perfectly and I recommend you to keep these pages as it is.
However, if you still want to customize the layout, design, or branding of these pages, you’ll need to edit their templates.
So, let’s go to the templates section.
Templates
To customize a WooCommerce page template, go to Templates. Here, you’ll see a list of templates assigned to various pages. There, you’ll find the template you want to edit.
For example, search for the “Cart” and open it. You can then start personalizing the page by adding or removing blocks, organizing content into sections, and applying your preferred styling options.
So, you might showcase featured categories at the top, display products in a custom grid layout, or add a sidebar with product filters. And, in the same way, you can customize the other pages.
Note:
Apart from the main store pages, WooCommerce also provides templates for other important areas of your site, such as the Single Product page, Product Category page, and the 404 Page, order confirmation and many more. Again, you can add or even make custom templates for your posts or pages.
Bonus:
To take your WooCommerce store’s appearance and layouts even further, you can also make use of WooCommerce shortcodes. Although WooCommerce now provides a wide range of blocks that make it easy to build pages visually, there are still times when using shortcodes can be very useful.
Patterns
While you can always manually build your pages like the homepage, about page, or other important sections block by block, Patterns offer a much faster and easier way to design them. And, I recommend you to use patterns for building your additional pages for a quick yet professional designed look.
In fact, WordPress and WooCommerce now include a wide range of ready-to-use patterns including dedicated designs for the Homepage, About page, Contact page, and many more sections.
You can also make custom widgets for header, footer, even mini cart sections of your pages. These patterns are specially designed to match modern design standards and user experience best practices, so you don’t have to start from scratch or worry about layout issues.
Inside your page, simply hit on the (+) icon, go to patterns and you’ll find all the patterns to create different pages or sections.
Once you insert a pattern, you can easily customize it by editing the text, replacing images, changing colors, and adjusting the structure to better fit your brand.
Step 4: Add products
Now that your WordPress site is set up and WooCommerce is running, it’s time to start adding your products to sell.
Here’s how to do it:
- To add your woocommerce products, go to, Products >> Add New Product from your WordPress dashboard.
- In the product editor, enter your product name and a short description. This is what your customers will see first, so make it clear and appealing.
Bonus Tip:
Try to include related keywords in your product title and description to make it optimized for search engines. For example, if your product is “winter jacket”, try to include “windproof, cozy, insulated” in the descriptions that are related words and people often want in their jacket.
- Next, scroll down to the Product Data section. Here, you can choose the product type.
- Simple product
- Grouped product
- External/Affiliate product
- Variable product
Since we’re starting with physical products, we primarily need simple products, variable or grouped products. Again, you can also set external/affiliate products if you want to promote products of other brands.
Simple product:
In a simple product, you’ve to include items that don’t have any variations—like size, color, or style.
- So, first, select such types of products from your store and inside the product details, select “Simple product” from the drop-down.
- Now, set your regular price, and if you want to run a promo or discount, you can also add a sale price.
- Next, add the image of your product from the set product image option on the right side menu. Even, you can add multiple images to a product gallery if you want to show different angles.
Bonus tip:
Always use images with proper size and resolution for your store products. WooCommerce recommends using JPEG or PNG with at least 800 x 800 pixels, especially for single product pages and product galleries where customers want to zoom in and see detail.
Again, there, you’ll find options to:
- Set a product category (like “Winter Jackets”)
- Add product tags (like “warm”)
Once you’ve filled everything in, you’re almost done. Just click the Preview button to see how your product page looks. If everything looks good, go ahead and hit Publish.
Your product is now live and, the single product page looks like as follows:
Grouped Products
If you’re selling items that make more sense as a collection like (a dining set or a bundle of related books), you can use WooCommerce’s Grouped Product option.
- To create one, first, switch the product type from “Simple product” to Grouped product in the Product Data section.
- You’ll notice that price fields disappear. That’s totally normal since the grouped product pulls info from its linked items.
- Next, click the Linked Products tab, search for and select the individual products you want to group, and add them. You can also set upsell items of the product here.
- Once everything’s set, hit Publish.
You can always go back, edit the group, and add or remove products as needed. And, the products will show up like,
External/Affiliate product
If you’re promoting products from another website (like Amazon or any affiliate program), you don’t need to handle stock or shipping. Instead, you can simply add them as External/Affiliate Products.
- So, this time, select the External/Affiliate product from the dropdown menu.
- You’ll now see fields for the Product URL (link to the external product page) and the Button text (like “Buy Now” or “View on Amazon”).
- Fill in the regular product details like price, category, tags, and then hit Publish.
When customers click the product button, they’ll be redirected to the external site to complete the purchase and you’ll get the commission.
After setting the affiliate products, this will turn out,
Variable products
Now, what if you have multiple versions of the same product—like a jacket in different sizes or colors? No worries! That’s where WooCommerce’s Variable Product feature comes in.
This lets you manage everything under one product page, so customers can pick their preferred variation (instead of you creating the same product five times).
So, let’s break it down.
- First, for adding variable products, you’ve to create attributes of the product like size or color. To do this,
- From your WordPress dashboard, go to Products >> Attributes.
- In the Name field, type in the attribute you want to use. I’ve set it color.
- You can skip the Slug field unless you want to customize the URL (not necessary for most stores).
- Once that’s done, click the Add Attribute button.
You’ll now see your new attribute added to the table on the right.
- Now, let’s add the attribute values (Terms) like red, blue, etc. To add the values,
- Click on Configure terms next to the attribute you just created (color).
- You’ll see a simple form on the left where you can start adding values. I’ll set two values, blue, red.
- After typing each one, click Add new Color to save it.
- Repeat this process for all the options you want to offer like size, brand, etc.
Note:
If you’re adding another attribute like Size, follow the same steps, just name it “Size” and then add options like S, M, L, XL.
- Once done, you’ve to add the attribute to your product. To do this,
- Scroll down to the Product data section and change the product type to variable product using the dropdown.
- Next, click on the Attributes tab inside the Product data box.
- From the dropdown menu, select the attribute you created earlier, like “Color” and hit Add.
- Now choose the specific values you want to include (like blue, red). You can also just click Select all if you want to include every option.
- Again, make sure to check the boxes for Visible on the product page and Used for variations.
- Click Save attributes.
- Finally, now that your attributes are in place, let’s create the actual product variations.
- Go to the Variations tab. It’s right under the Attributes section.
- From the dropdown menu at the top, select Generate variations.
- WooCommerce will automatically generate all the possible combinations based on the attributes you added (like blue, red).
- Once the variations are created, you can easily customize each one to suit your product variants. For example, you can upload a unique image for each variation with different colors or styles. You can also set individual prices for each variation, which is helpful if some options are more expensive than others.
- Once you’ve set up all your variations, scroll up and click Publish. That’s it. You’ve just added a variable product to your WooCommerce store.
And, in the shop page, this product variations will look like as follows:
Note:
If you already have a product detail for all of your woocommerce products, then, you don’t need to upload them one by one. In this case, you can directly upload the products info in CSV file format on your website. Even, all of the variations of your products will be automatically set.
To bulk import your woocommerce products in wordpress, just go to products >> import.
Then, simply select your file and click Continue. After checking the column mapping, just hit Run the importer and all your products will be uploaded within a while.
And, you’ll find all of your products on Products >> all products section like below:
Step 5: Configure Essential Store Settings
Once your products are in place, it’s time to fine-tune the store settings to make sure everything runs smoothly for your customers from how they shop to how you get paid.
Let’s go through each section inside the WooCommerce settings panel. To configure the store settings, go to Woocommerce >> settings.
- General:
In settings, the first tab you’ll land on is General. Here, you will set the locations of store, customers and also currency.
- Start with setting up your store’s location like city, country, full street address, and ZIP code. Even if you’re selling digital goods, still fill in your store address as it’s required for tax setup.
- Next, you’ll decide where you’re willing to sell and ship your products. If you’re only selling within certain countries, make sure to set that up here so you don’t end up with orders you can’t fulfill.
- You’ll also see a setting called Default Customer Location. This tells WooCommerce what location to assume for customers who haven’t entered one yet. I recommend using geolocation to get a more accurate guess based on where they’re browsing from.
- Before you leave the General settings screen, don’t forget to set your store’s currency. However, the defaults work fine for most shops.
After filling the necessary details, the section will look like this;
- Products
This tab controls how your products behave across your site. For most stores, the default settings work perfectly fine, however, just change the following section;
- Placeholder Image: This option lets you set an image as a placeholder for products that don’t have screenshots or pictures. You’ve to change it according to your store.
- Tax
Now, in the tax settings, the default configuration is set to exclude the pricing without tax. And, for ecommerce stores, it generally shows product prices excluding tax. SO, keep it as it is. However, here, I recommend you to change the following configuration:
- Rounding: For most setups, rounding at the subtotal gives cleaner totals. So, just check the box to enable it.
- Display Tax Totals: Decide if you want to show all tax rates combined as one total or listed separately. I recommend choosing “As a single total” to keep things simple and easy to read at checkout.
Next, you’ll want to set up your actual tax rates. So, bestie the tax options, WooCommerce breaks this down into three sections:
- Standard rates: These are your regular tax rates that most of your products will use.
- Reduced rate rates: Use this for items that qualify for a lower tax rate, like certain foods or children’s clothing, depending on your region.
- Zero rate rates: Perfect for products that are tax-exempt.
You can add as many rates as you need under each category by clicking the tab and filling in the country, state, ZIP, rate percentage, and a few other details.
Bonus Tip:
Setting up taxes for every single product can be a real headache. If you want things to be easier and hassle free, I recommend using a woocommerce tax plugin to automate your tax rates.
- Shipping
If you’re selling physical products, you’ve to hop over here to sort out how your customers will get the products:
- Shipping Zones: You’ll need to create zones, basically, groups of regions you ship to. For each shipping zone, you can set individual shipping methods and prices.
- Shipping Methods: Under shipping zone, add delivery options like Free Shipping, Flat Rate, or Local Pickup. For example, you could offer free shipping in the UK but charge a flat rate for everywhere else.
- Shipping Classes: It’s for if you sell items of different sizes or weights. As heavier items might cost more to ship, so you can adjust shipping costs accordingly.
Note: If you’re only selling digital products (like downloads or courses), you can skip this entire section.
- Payments
Now, let’s configure how you’ll get paid. WooCommerce gives you a few built-in options to start with:
| Payment Method | Best For |
| WooPayments | Great if you want an all-in-one setup for cards, Apple Pay, subscriptions, and more. |
| Offline payments | Perfect for local businesses that take cash on delivery or direct bank transfers. |
| Paypal | Best if you want a quick, trusted way to accept payments, especially from international customers. |
For offline payments just enable the payment options, and for others, you’ll see a “Complete Set up” button next to each one and just click it to get started. And if you want more payment gateways like Stripe, Apple Pay, etc. you can install plugins for those.
- Emails
WooCommerce sends automated emails for things like new orders, refunds, and account creation. All the settings are made by default. You just have to do the following changes:
- Customize the From name and email address.
- Then, add your store logo and adjust the brand colors and even customize the email copy.
- Site Visibility
To make sure your store is visible to everyone,
- Go to site visibility
- Enable the live option and save the changes.
- Multi-Currency
If you’re planning to sell internationally and want customers to easily see prices in their local currency, WooCommerce makes it pretty simple.
In the Multi-currency tab, you’ll see a list of the currencies your store currently supports.
To add more currencies:
- First, click on “Add/Remove Currencies.”
- A drop-down menu will appear with all the major currencies around the world.
- Just check the ones you want to offer, and you’re good to go!
Now, your customers can view product prices in their own currency without any hassle.
Note:
Some payment gateways like PayPal will automatically convert currency, but it’s better to display local pricing to help boost global conversions.
Step 6: Optimize your site
Almost everything for your store is done like your pages are set up, your templates are customized, and your products are live.
Now, before launching your site, it’s crucial to optimize your site to make sure it runs fast, stays smooth, and delivers the best experience for your customers.
- Optimize your WooCommerce database:
Over time, your WooCommerce database can fill up with old orders, post revisions, and expired data, which can slow down your site. You can clean it up manually by using phpMyAdmin, but this requires some technical knowledge.
However, the simplest way is to use a WordPress plugin like WP-Optimize that automatically removes unnecessary data to run your site faster without you needing to handle the database manually.
- Optimize your product details:
No matter how great your products are, if they’re not optimized for search engines, people might never find your store. Make sure your product titles are clear, your descriptions include relevant keywords, and your images are high-quality with proper alt text.
For overall site SEO, tools like Rank Math or Yoast SEO are great options. They help you manage things like meta descriptions, sitemaps, and keyword usage easily. Again, beyond seo plugins, you can also boost your SEO through faster site speed, a mobile-friendly layout, quality backlinks from trusted websites, and regular content updates.
- Avoid too many plugins:
WooCommerce is built to be flexible, still a lot of that flexibility comes from using plugins to add new features. However, every plugin you install adds extra load to your site, and too many can slow things down or even cause conflicts.
So, it’s good to regularly go through your installed plugins and remove anything you’re not actively using.
For example, let’s say you installed a popup plugin to collect emails during a promotion, but you’re no longer using it. But, keeping it active can slow things down, especially on mobile. So, if you’re not running the promo anymore, it’s better to remove the plugin completely rather than let it sit unused in the background.
- Increase WordPress memory limit:
Sometimes, as your WooCommerce store grows with more products, bigger images, and extra plugins, you might run into errors or slowdowns because WordPress simply doesn’t have enough memory to work with. By default, WordPress sets a memory limit of 40MB or 64MB, which is often not enough for a moderate WooCommerce site.
In this case, you need to increase the WordPress memory limit, and the easiest way is by editing your wp-config.php file.
Simply add the following line of code just before the line that says “That’s all, stop editing! Happy blogging.”
define( ‘WP_MEMORY_LIMIT’, ‘256M’ );
And, save the file. That’s it, your site will now have more memory to handle WooCommerce tasks more efficiently.
- Cache woocommerce to speed it up:
Caching basically creates a static version of your pages, so they load much faster for visitors. So, when people visit your site, caching lets them see a saved version of the page right away, instead of making WordPress rebuild it from scratch every time.
And, you can easily set up caching manually through your hosting or server settings. But, you’ve to make sure you exclude pages like the Cart, Checkout, and My Account from caching, because they need to stay dynamic.
Step 7: Test and Launch Your Store
Almost everything is set up, but before you open your online store to customers, it’s really important to properly test your WooCommerce store.
- First, start with browsing different product categories, add a few items to the cart, and proceed to checkout. This will help you spot any issues with navigation, product pages, or the cart and checkout flow. By this time, also consider the loading speed of your site.
- Then, test your payment methods too. WooCommerce offers sandbox modes for gateways like PayPal and Stripe, which lets you simulate purchases without actually spending money. So, simply use it to verify your checkout works smoothly and securely without any last-minute surprises.
- Once everything works properly, it’s time to go live. To launch your ecommerce website, go to WordPress Dashboard >> Settings >> Reading. First, in the “Your homepage displays” section, select the “A static page” option.
Then, set your homepage to homepage and post page to shop page.
Now, simply uncheck the box next to “Discourage search engines” settings you have enabled before setup.
- Then, save your changes.
And congratulations, your WooCommerce store is officially live.
FAQs:
- Can I create an eCommerce website for free?
Yes, you can build a basic eCommerce site for free using WordPress and free ecommerce plugins, but you’ll still need to pay for hosting and a domain.
- How much does it cost to create an eCommerce website?
The cost of creating an ecommerce website depends on the platform and functionality you use. However, it usually costs you between a hundred dollars to thousands dollars for setting up a small to enterprise eCommerce website, depending on your hosting, theme, and plugin choices.
- Which platform is best for creating an eCommerce website?
The best ecommerce platform actually depends on your requirements and budget. Some of the best platforms to create ecommerce websites are Woocommerce, shopify, bigcommerce, etc. Here’s a breakdown:
| Platform | Best For |
| WooCommerce | Full control, flexibility, and budget-friendly setup |
| Shopify | Beginners wanting an all-in-one, easy-to-use solution |
| BigCommerce | Fast-growing large businesses needing robust built-in features |
So, the best platform depends on how hands-on you want to be, what you’re selling, and how much you’re ready to invest upfront.
- What is the cheapest eCommerce website?
The cheapest eCommerce website you can build is with WooCommerce on WordPress.It’s because WooCommerce itself is free, and WordPress is open-source. You only need to pay for a domain and basic hosting, which can cost as little as $30–$60 per year if you choose affordable providers. There are also plenty of free themes and plugins to help you get started without extra costs.
- Can you provide examples of WordPress ecommerce websites?
Some great examples of WordPress eCommerce websites include Blue Star Coffee (sells premium coffee products online), ThemeForest (a massive digital marketplace for WordPress themes) and Airstream (the iconic travel trailer brand). These sites highlight the flexibility of WordPress for both physical and digital product stores.
Conclusion:
Creating a successful eCommerce website with WordPress isn’t just about launching a store, it’s about smartly managing and growing it. Here’s key takeaways to make sure you’re on track:
- Always Focus on Customer Support
- Monitor Your Site to track performance
- Optimize for SEO to increase organic traffic
- Leverage Social Media Marketing to expand your reach
When you combine great products with smart marketing, that’s when real success begins. So, let’s start selling today with wordpress ecommerce.

Leave a comment